Removing the shuttle
(Trained service technician only) Use these instructions to remove the chassis shuttle from the Flex System Carrier-Grade chassis.
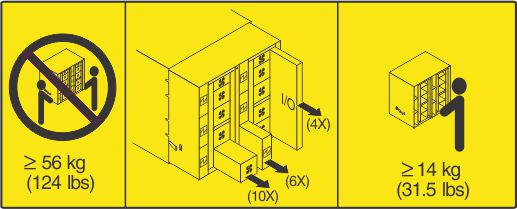
Statement 4

 |  |  |
|---|---|---|
| ≥ 18 kg (39.7 lb) | ≥ 32 kg (70.5 lb) | ≥ 55 kg (121.2 lb) |
CAUTION
Use safe practices when lifting.

Before you remove the shuttle, complete the following steps:
- Read Safety and Installation guidelines
- Shut down the operating systems and turn off any compute nodes in the chassis. See the documentation that comes with the compute node for detailed instructions.
- Disconnect the chassis from power (see Disconnecting the chassis from power).
- Disconnect all cables from the modules in the rear of the chassis.
- Remove any of the following modules that are installed in the rear of the chassis:
- I/O modules (see Removing an I/O module).
- CMM (see Removing a Chassis Management Module).
- Fan modules (see Removing a 40 mm fan module and Removing a 80 mm fan module).
- Power supplies (see Removing a power supply).
To remove the chassis shuttle, complete the following steps.

- Remove the left, right, and bottom support brackets from the rear of the chassis, if they are installed.
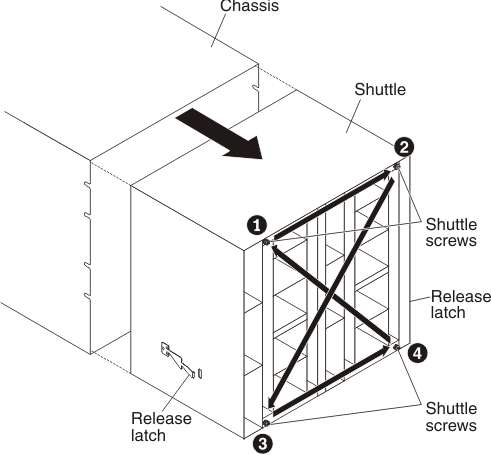
- Loosen the captive screws on the rear of the shuttle with a T-15 Torx driver:
- Turn the upper-left screw 3 times.
- Turn the upper-right screw 3 times.
- Turn the lower-left screw 3 times.
- Turn the lower-right screw 3 times.
- Repeat steps a through d until the screws are loosened (they will not turn anymore).
- Grasp the shuttle by the holes between fan bays 1 and 2 and between fan bays 6 and 7; then, slide the shuttle out of the chassis until it stops.
- Place your hands under the shuttle by the safety latches on both sides of the shuttle, then while you support the shuttle, press and hold the safety latches in and slide the shuttle out of the chassis.
If you are replacing the shuttle with a new shuttle, remove any remaining module fillers for installation in the new shuttle.
Give documentation feedback