Install VRoC key
Follow instructions in this section to install the VRoC key.
About this task
Read Installation Guidelines and Safety inspection checklist to ensure that you work safely.
Power off the server and peripheral devices and disconnect the power cords and all external cables. See Power off the server.
Prevent exposure to static electricity, which might lead to system halt and loss of data, by keeping static-sensitive components in their static-protective packages until installation, and handling these devices with an electrostatic-discharge wrist strap or other grounding systems.
Procedure
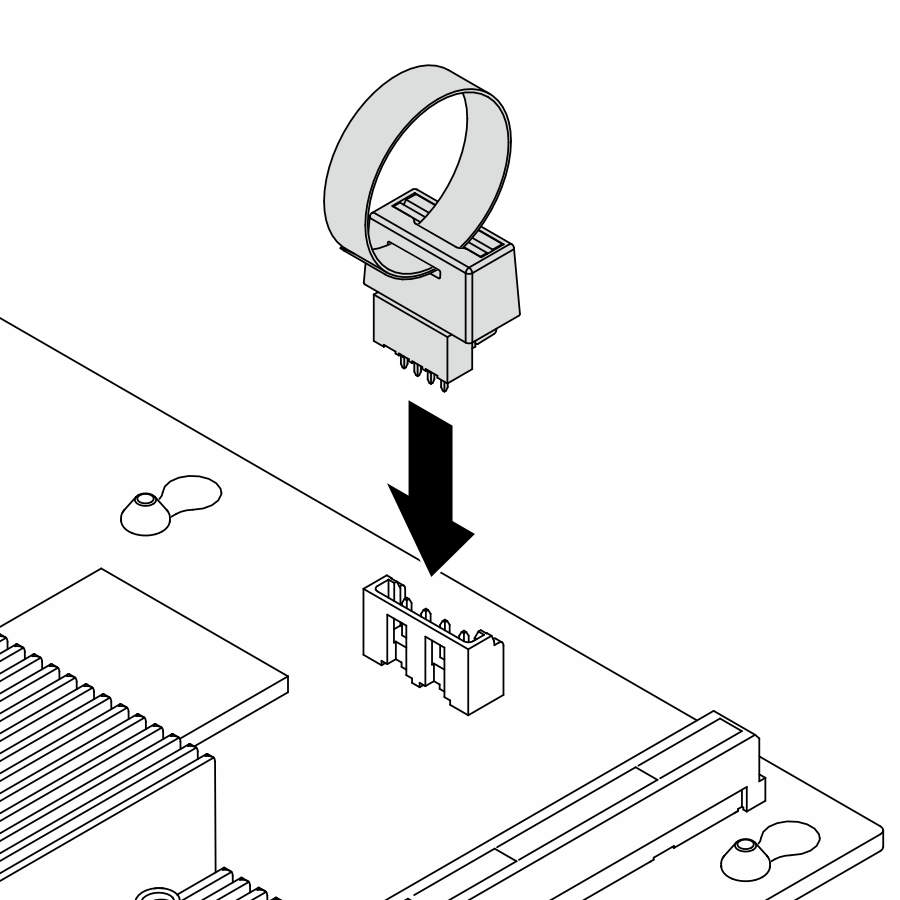
- Install VRoC key. Press the key down to the system board until it is securely seated.Figure 1. VRoC key installation
After you finish
Complete the parts replacement. See Complete the parts replacement.
- Enable Intel® VRoC. Before setting up RAID for NVMe drives, follow the below steps to enable VRoC:
Restart the system. Before the operating system starts up, press the key specified in the on-screen instructions to enter the Setup Utility.
Go to Socket Configuration > IIO Configuration > Intel® VMD technology > Intel VMD for Volume Management Device on Socket 0 > VMD Config for IOU 1 and enable the option VMD port A to D.
Save the changes and reboot the system.
- Intel® offers various VROC configurations with different RAID level and SSD support. See the following for more details.
Intel VROC configurations for PCIe NVMe SSDs Requirements Intel VROC StandardNote Supports RAID levels 0, 1, and 10
Requires an activation key
Intel VROC PremiumNote supports RAID levels 0, 1, 5, and 10
Requires an activation key
NoteIntel VROC Standard and Premium listed above in the table are VRoC capacity offerings. The actual VRoC capacity depends on the model delivered.
Demo video