Install the SMM3
Use this information to install the SMM3.
About this task

Read Installation Guidelines and Safety inspection checklist to ensure that you work safely.
After replacing the SMM3 or resetting the SMM3 to factory default, the PCS redundancy mode will return to the default N+1 mode. If needed, re-configure PCS redundancy mode as the original or as loading required via SMM3.
Make sure the SMM3 firmware version is Q4SM08E or later version.
Go to Drivers and Software download website to see the latest firmware and driver updates for your server.
Go to Update the firmware for more information on firmware updating tools.
- A video of this procedure is available at YouTube.
Procedure
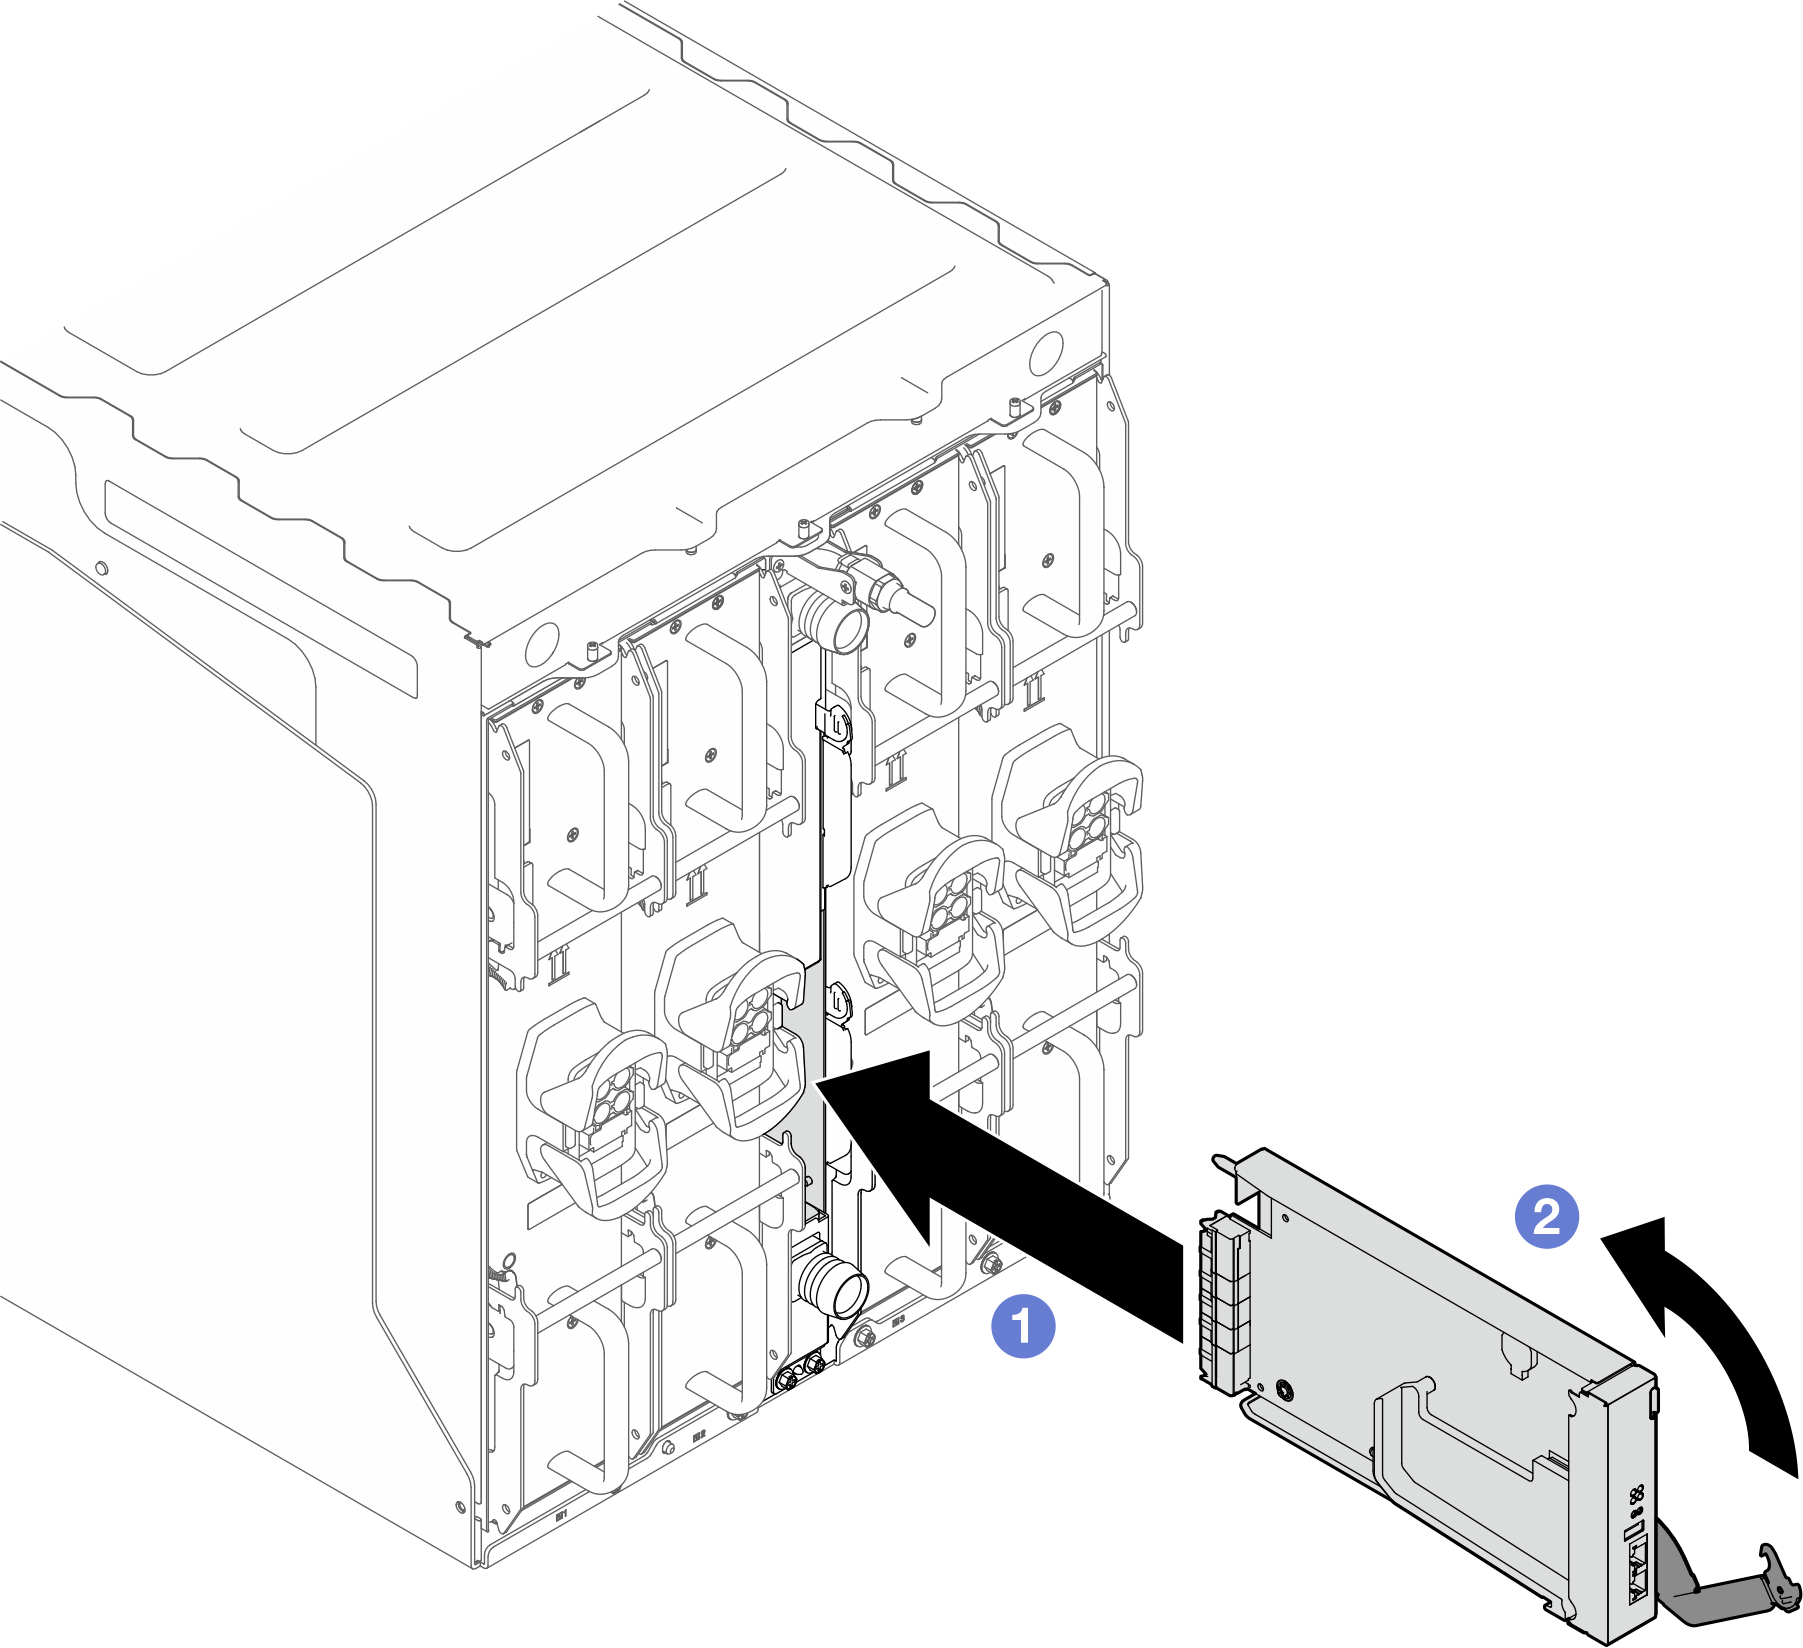
 Align and slide the SMM3 module into the support bracket.
 Rotate the latch inwards to secure the SMM3 module.
After you finish
When status LED flashed at 1 Hz (once every second), it indicate SMM3 is ready. Meanwhile, if the status of LED is off, continuously lit or unstable, it indicates the SMM3 has encountered one or more problems.
Check the power LED on each node to make sure it changes from fast blink to slow blink to indicate all nodes are ready to be powered on.