Remove the PCIe riser assembly
Follow instructions in this section to remove the PCIe riser assembly.
About this task
To avoid potential danger, make sure to read and follow the safety information.
Attention
Read Installation Guidelines and Safety inspection checklist to make sure that you work safely.
Note
Depending on the specific configuration, the hardware might look slightly different from the illustrations in this section.
Procedure
- Make preparations for this task.
- Power off the node (see Power off the node); then, disconnect all external cables from the node.NoteIf necessary, press the release clip with a flat-head screwdriver to remove an external network cable from the rear of a 2U node.

- Power off the node (see Power off the node); then, disconnect all external cables from the node.
- Remove the PCIe riser assembly from the node.
 Loosen the captive screw that secures the PCIe riser assembly to the node.
 Disconnect the PCIe riser power cable from the riser.
 Carefully hold the PCIe riser assembly by its edges and lift it out of the node.
Figure 1. Removal of the PCIe riser assembly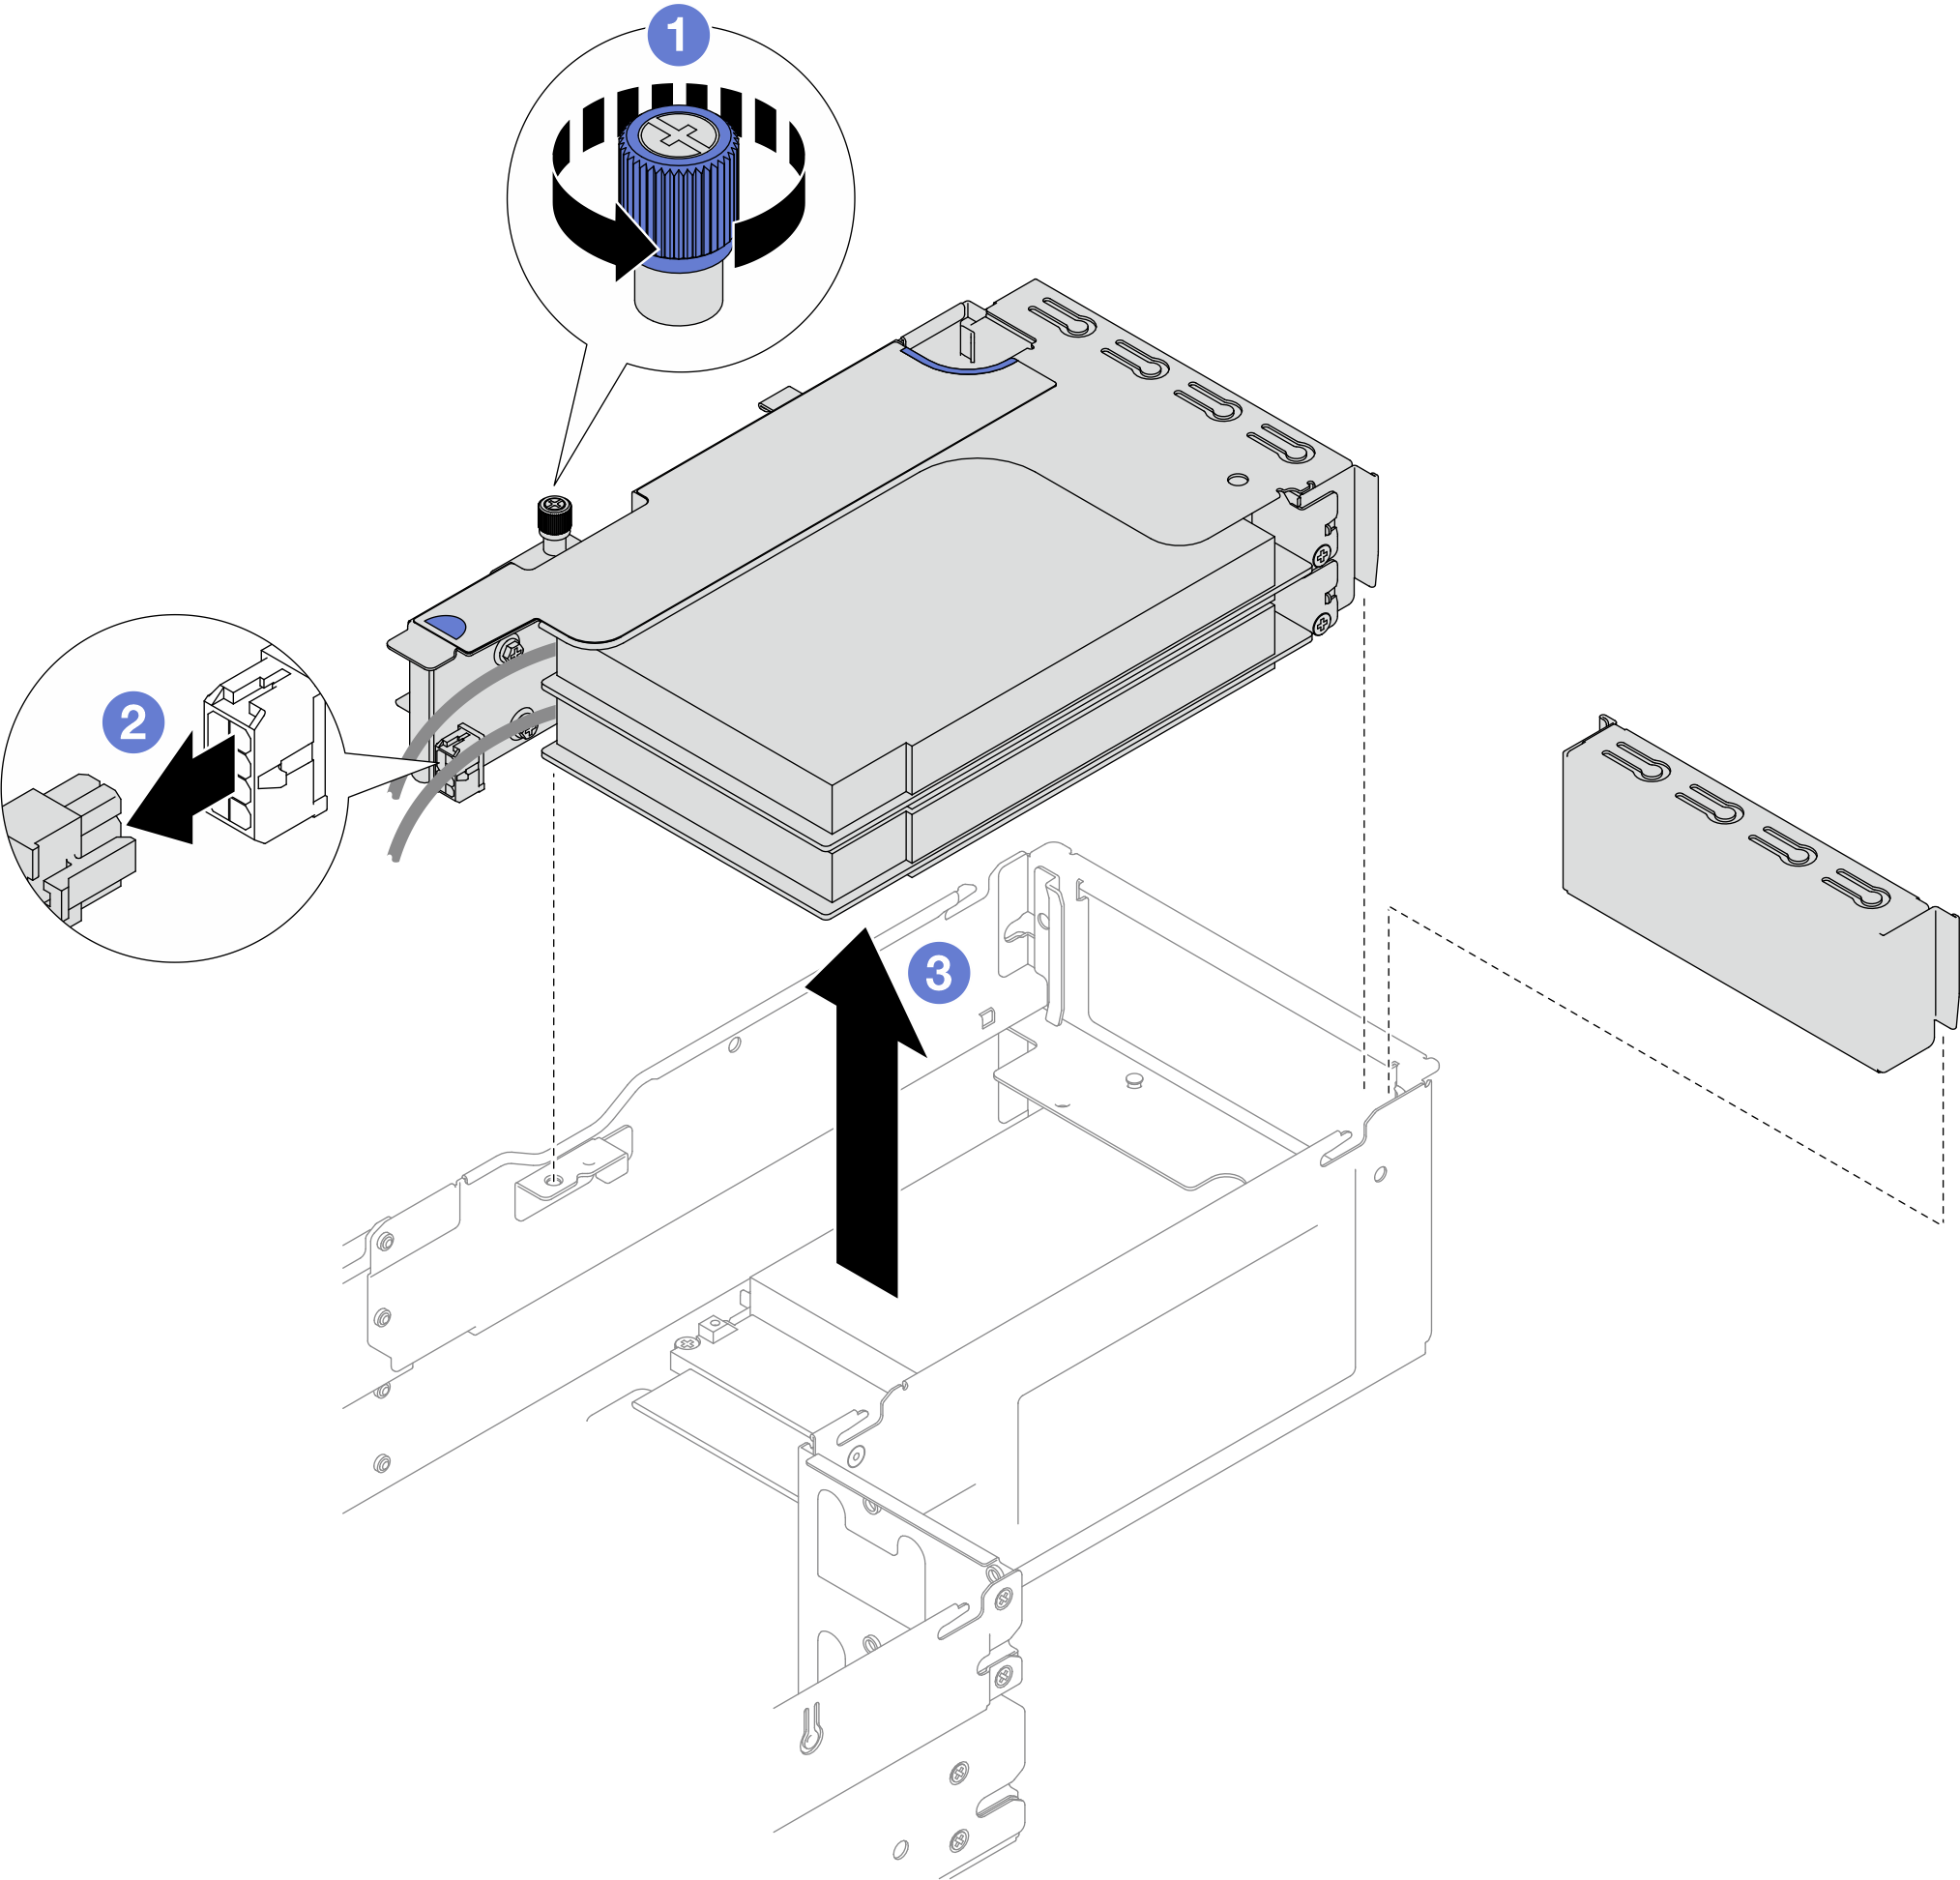
After you finish
- To replace a PCIe adapter, see Remove a PCIe adapter and Install a PCIe adapter.
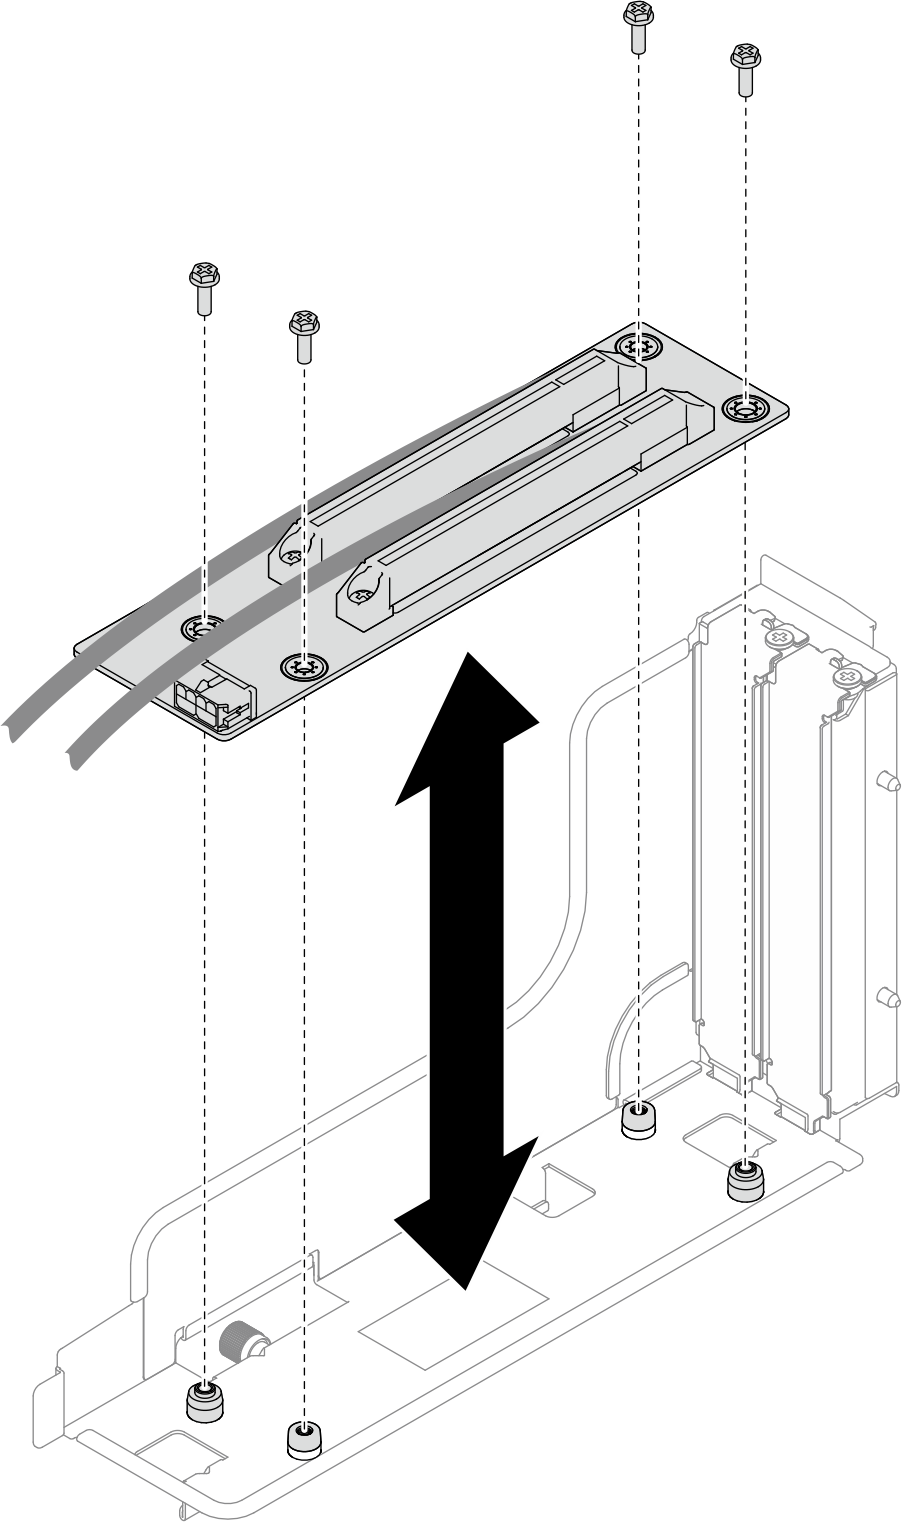
- If necessary, replace or remove the PCIe riser card from the riser cage.Figure 2. Replacement of the PCIe riser card
- Install a replacement unit or filler (see Install a PCIe riser assembly).NoteFor proper cooling and air flow, make sure to install a riser filler when there is no riser cage installed in the node.
- If you are instructed to return the component or optional device, follow all packaging instructions, and use any packaging materials for shipping that are supplied to you.
Demo video
Give documentation feedback