Remove components from the right wing of riser assembly

Follow instructions in this section to remove components from the right wing of riser assembly.

About this task

S002
disconnect all power
CAUTION
The power-control button on the device and the power switch on the power supply do not turn off the electrical current supplied to the device. The device also might have more than one power cord. To remove all electrical current from the device, ensure that all power cords are disconnected from the power source.
Attention

Procedure

  1. Make preparation for this task.
    1. If applicable, remove all the 7mm drives. See Remove a 7mm hot-swap drive.
    2. If necessary, remove all the WLAN antennas. See Remove the WLAN antennas.
    3. Remove the top cover. See Remove the top cover.
    4. Remove the PMB air baffle. See Remove the PMB air baffle.
    5. Remove the riser assembly. (Before disconnecting the cables of riser assembly, remove the processor air baffle.) See Remove the riser assembly from the node and Remove the processor air baffle and air flow sensor board.
  2. Proceed to the section corresponding to the component to be removed:

Remove the M.2 assembly

Procedure
  1. Remove the M.2 adapter from the riser cage.
    1. Loosen the screw on the bottom side of the M.2 adapter.
    2. Loosen the two screws on the top side of the M.2 adapter.
    3. Slide the M.2 adapter outward to remove it.
    Figure 1. Removing the M.2 adapter
    Removing the M.2 adapter
  2. Remove the M.2 riser card from the riser cage.
    1. Loosen the two screws that secure the riser card.
    2. Slide the riser card upward until the guide pins are seated in the large opening of the keyholes; then, remove the riser card from the riser cage.
      Figure 2. Removing the riser card
      Removing the riser card
  3. Remove an M.2 drive from the M.2 adapter.
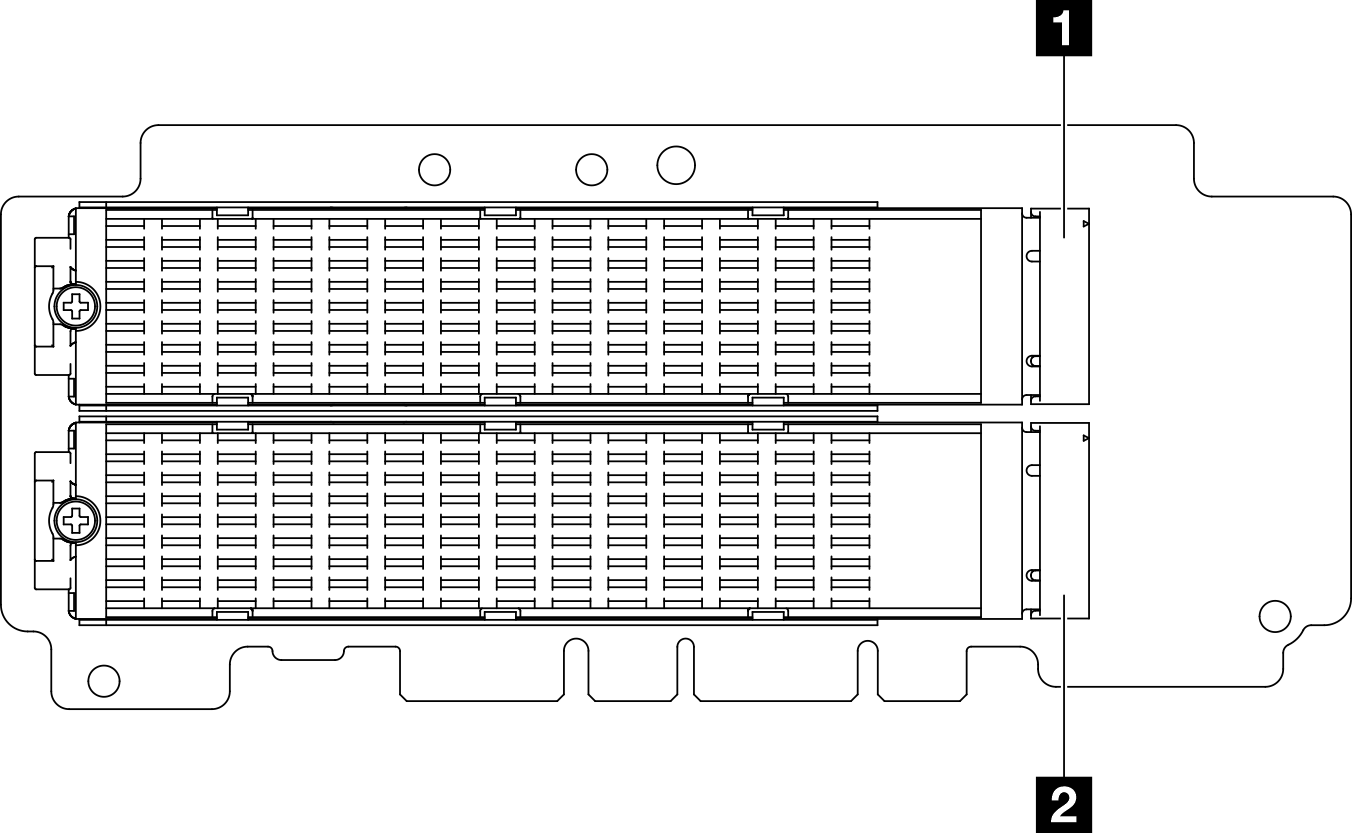
    1. Locate the M.2 drive to be removed.
      Top side of M.2 adapter


      1 Slot 9 / M.2 Bay 8
      2 Slot 7 / M.2 Bay 6
      Bottom side of M.2 adapter


      1 Slot 10 / M.2 Bay 9
      2 Slot 8 / M.2 Bay 7
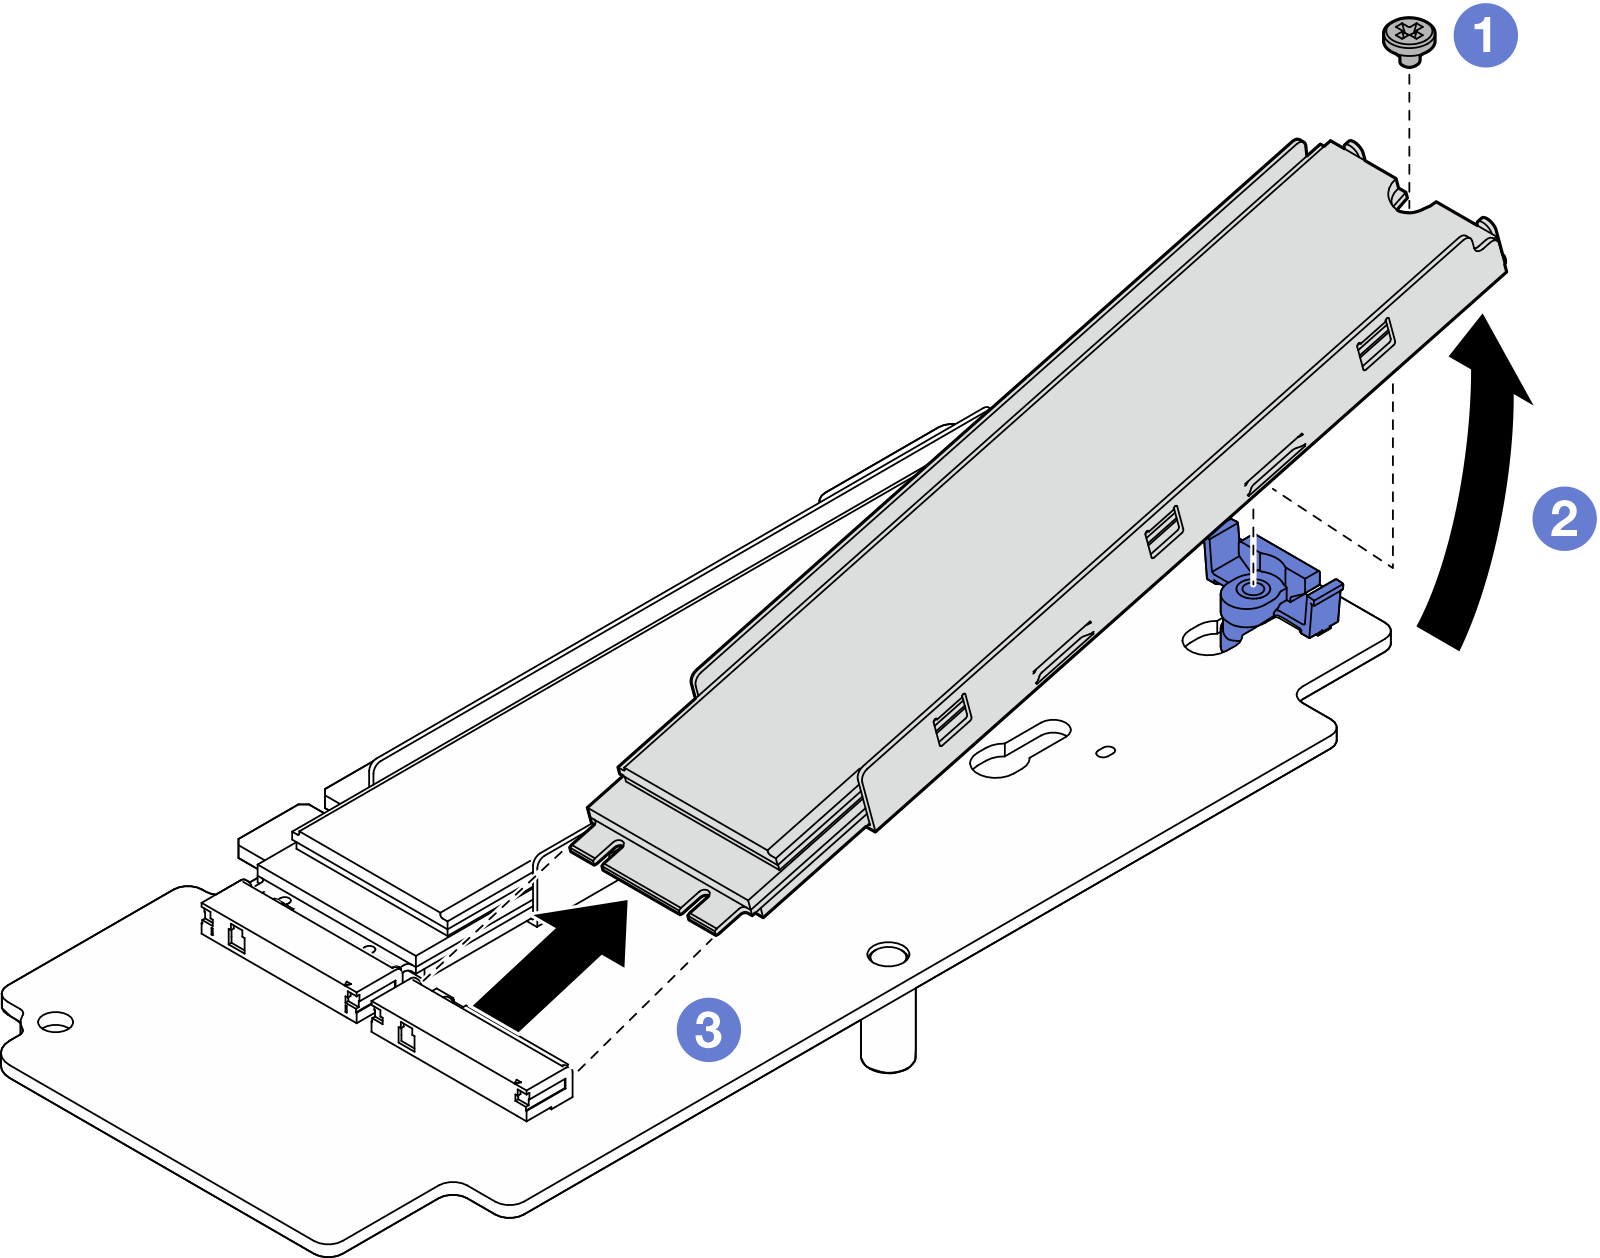
    2. Loosen the screw that secures the M.2 drive.
    3. Pivot the rear side of the M.2 drive away from the M.2 adapter.
    4. Remove the M.2 drive from the slot.
    Figure 3. Removing an M.2 drive
    Removing an M.2 drive
    Note

    If necessary, repeat this procedure to other M.2 drives to be removed.

After this task is completed

Remove the PCIe assembly

Procedure
  1. Remove the PCIe adapter from the riser cage.
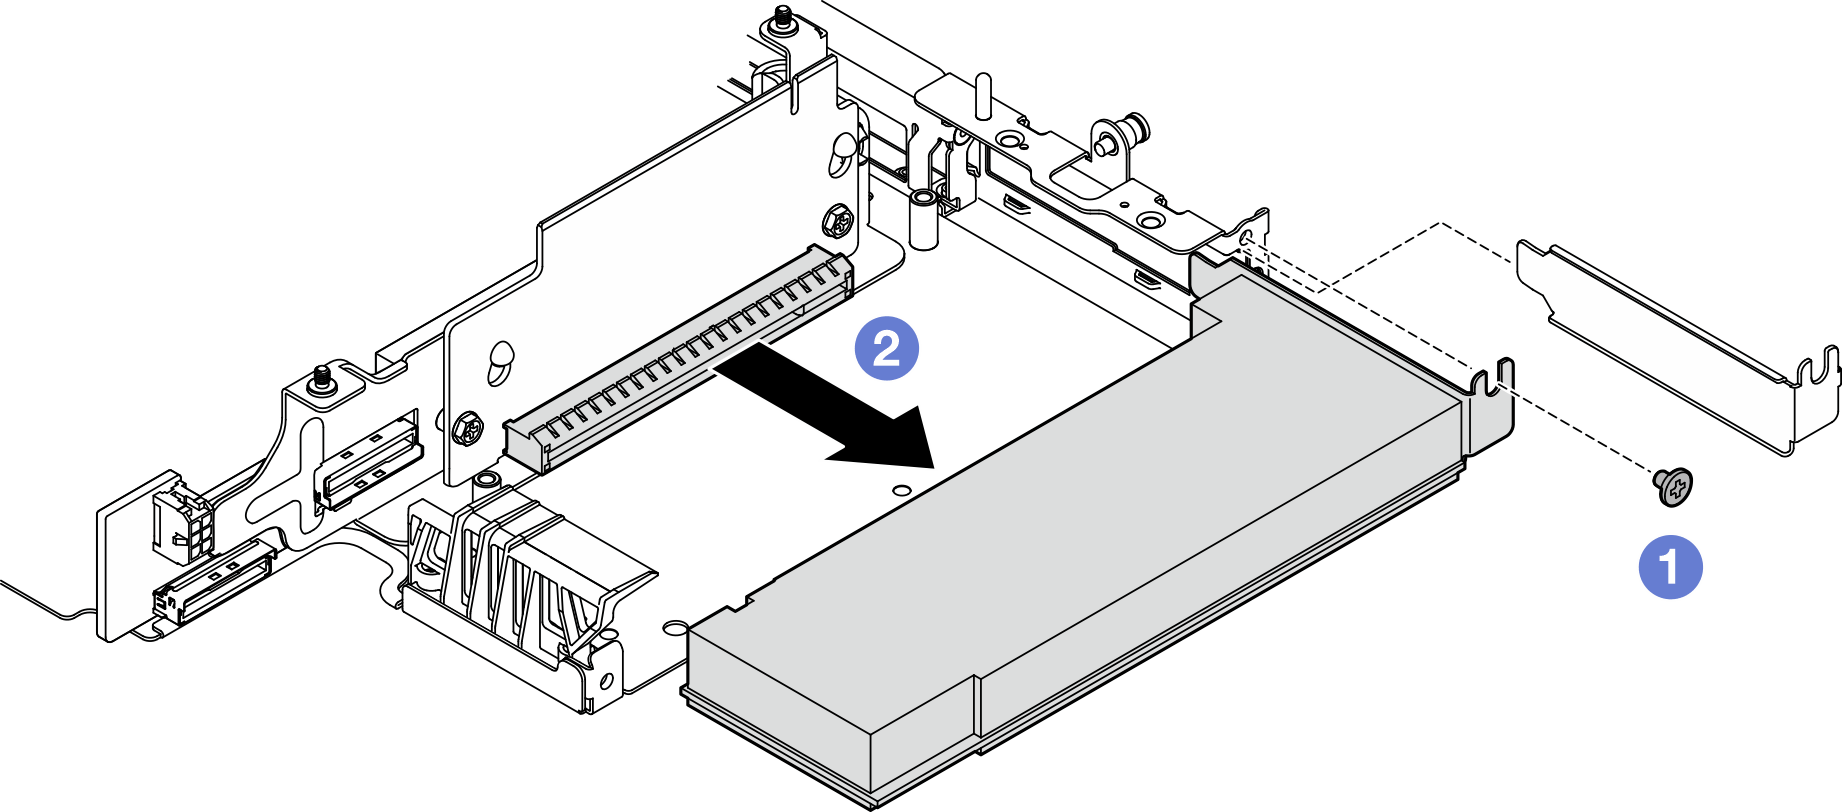
    1. Loosen the screw that secures the PCIe adapter.
    2. Slide the PCIe adapter outward to remove it.
      Note
      If no PCIe adapter is to be installed to this slot, insert the PCIe filler and secure it with one screw.
      Figure 4. Removing the PCIe adapter
      Removing the PCIe adapter
  2. Remove the PCIe riser card from the riser cage.
    1. Loosen the two screws that secure the riser card.
    2. Slide the riser card upward until the guide pins are seated in the large opening of the keyholes; then, remove the riser card from the riser cage.
      Figure 5. Removing the riser card
      Removing the riser card

After this task is completed

Demo Video

Watch the procedure on YouTube