Install the 3.5-inch backplane
Use this information to install the 3.5-inch backplane.
About this task

Read Installation Guidelines and Safety inspection checklist to ensure that you work safely.
Power off the server and peripheral devices and disconnect the power cords and all external cables. See Power off the server.
If the server is installed in a rack, remove the server from the rack.
Go to Drivers and Software download website for ThinkSystem SR250 V3 to see the latest firmware and driver updates for your server.
Go to Update the firmware for more information on firmware updating tools.
Procedure
 Insert the backplane into the chassis at an angle. Make sure the pins are against the backplane on the backside.
 Rotate the backplane up towards the front of the server.
 Close the retaining clips to secure the backplane in place.Figure 1. 3.5-inch backplane installation
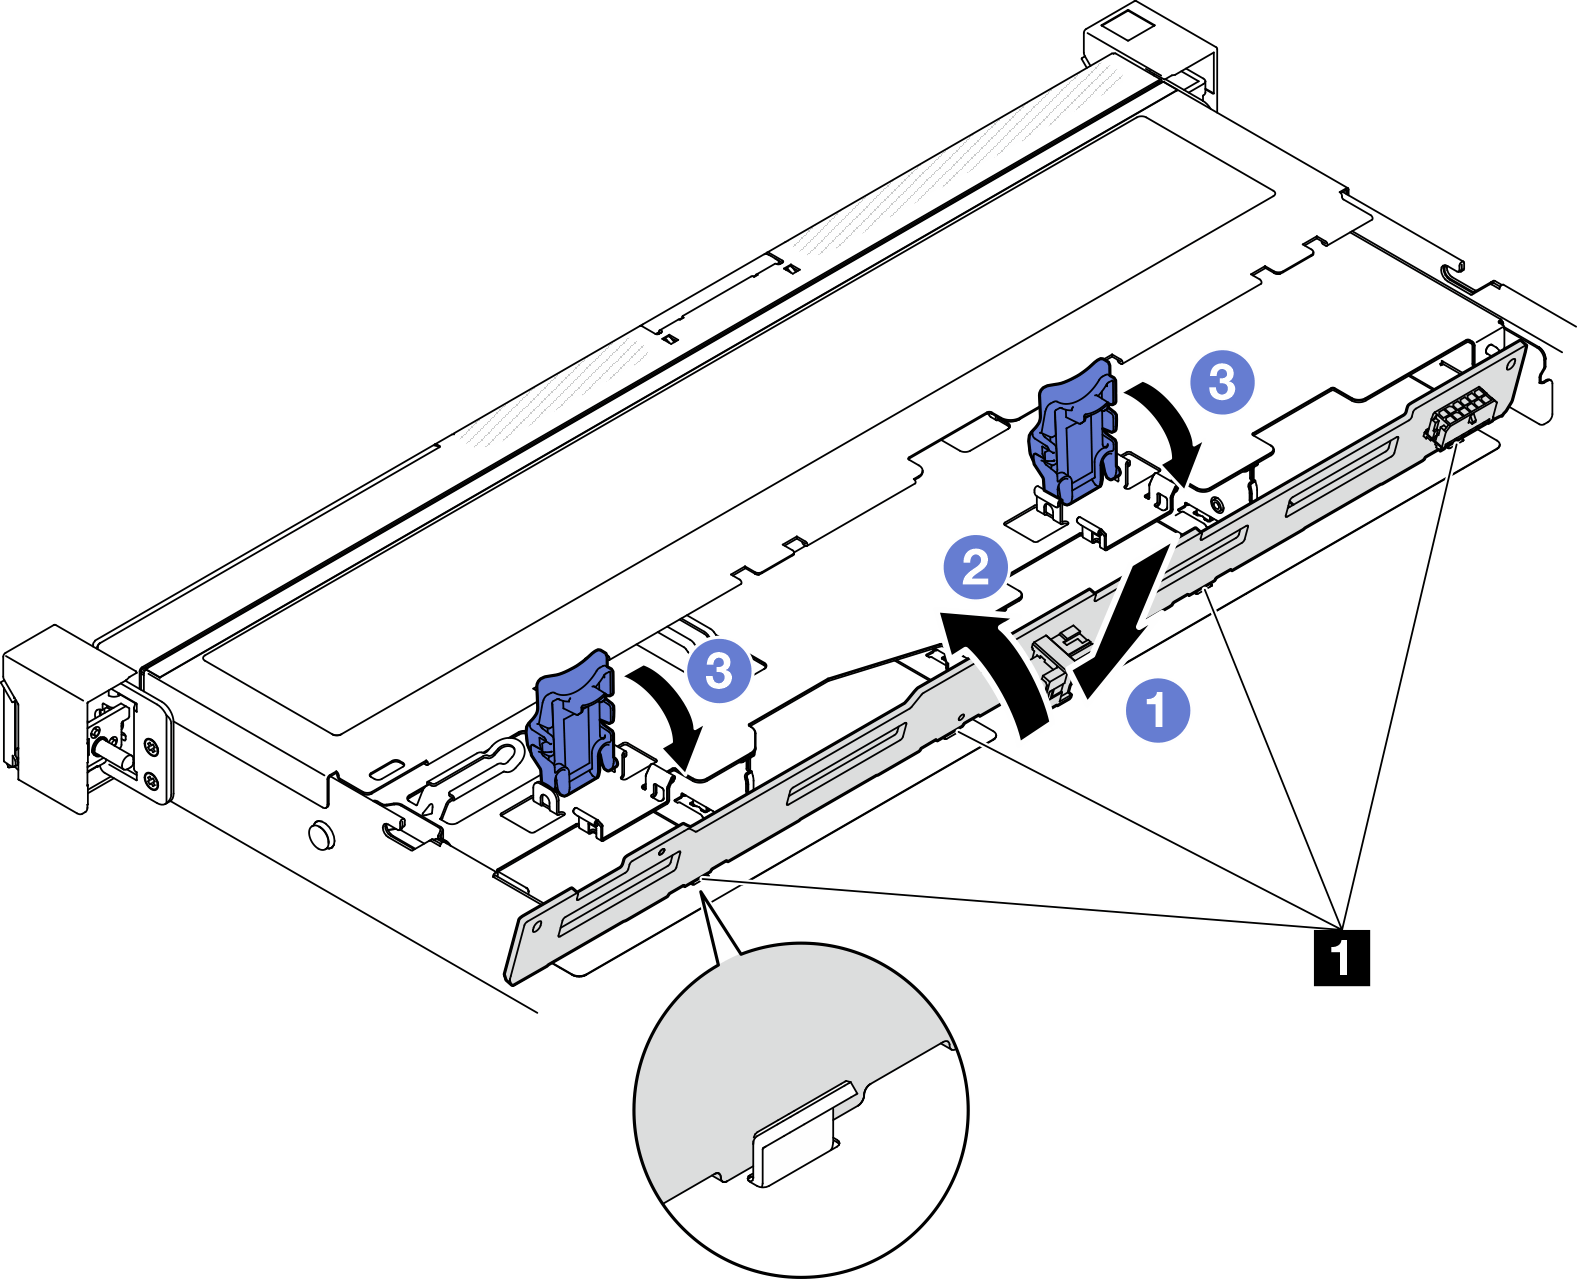
1 Pin
After you finish
Connect the cables to the backplane. See Backplane and backplate cable routing.
Install the top cover. See Install the top cover.
Install drives and drive bay fillers into the drive bays. See Install a hot-swap drive.
Complete the parts replacement. See Complete the parts replacement.
Demo video