Install the heat sink
Use this information to install the heat sink. This procedure must be executed by a trained technician.
About this task

Read Installation Guidelines and Safety inspection checklist to ensure that you work safely.
Power off the server and peripheral devices and disconnect the power cords and all external cables. See Power off the server.
If the server is installed in a rack, remove the server from the rack.
Touch the static-protective package that contains the component to any unpainted metal surface on the server; then, remove it from the package and place it on a static-protective surface.
Prevent exposure to static electricity, which might lead to system halt and loss of data, by keeping static-sensitive components in their static-protective packages until installation, and handling these devices with an electrostatic-discharge wrist strap or other grounding system.
Do not touch the processor socket or processor contacts. Processor-socket contacts are very fragile and easily damaged. Contaminants on the processor contacts, such as oil from your skin, can cause connection failures.
Procedure
- Tighten screw 1 and 2:
- Partially tighten screw 1.
- Fully tighten screw 2.
- Fully tighten screw 1.
Figure 1. Heat sink installation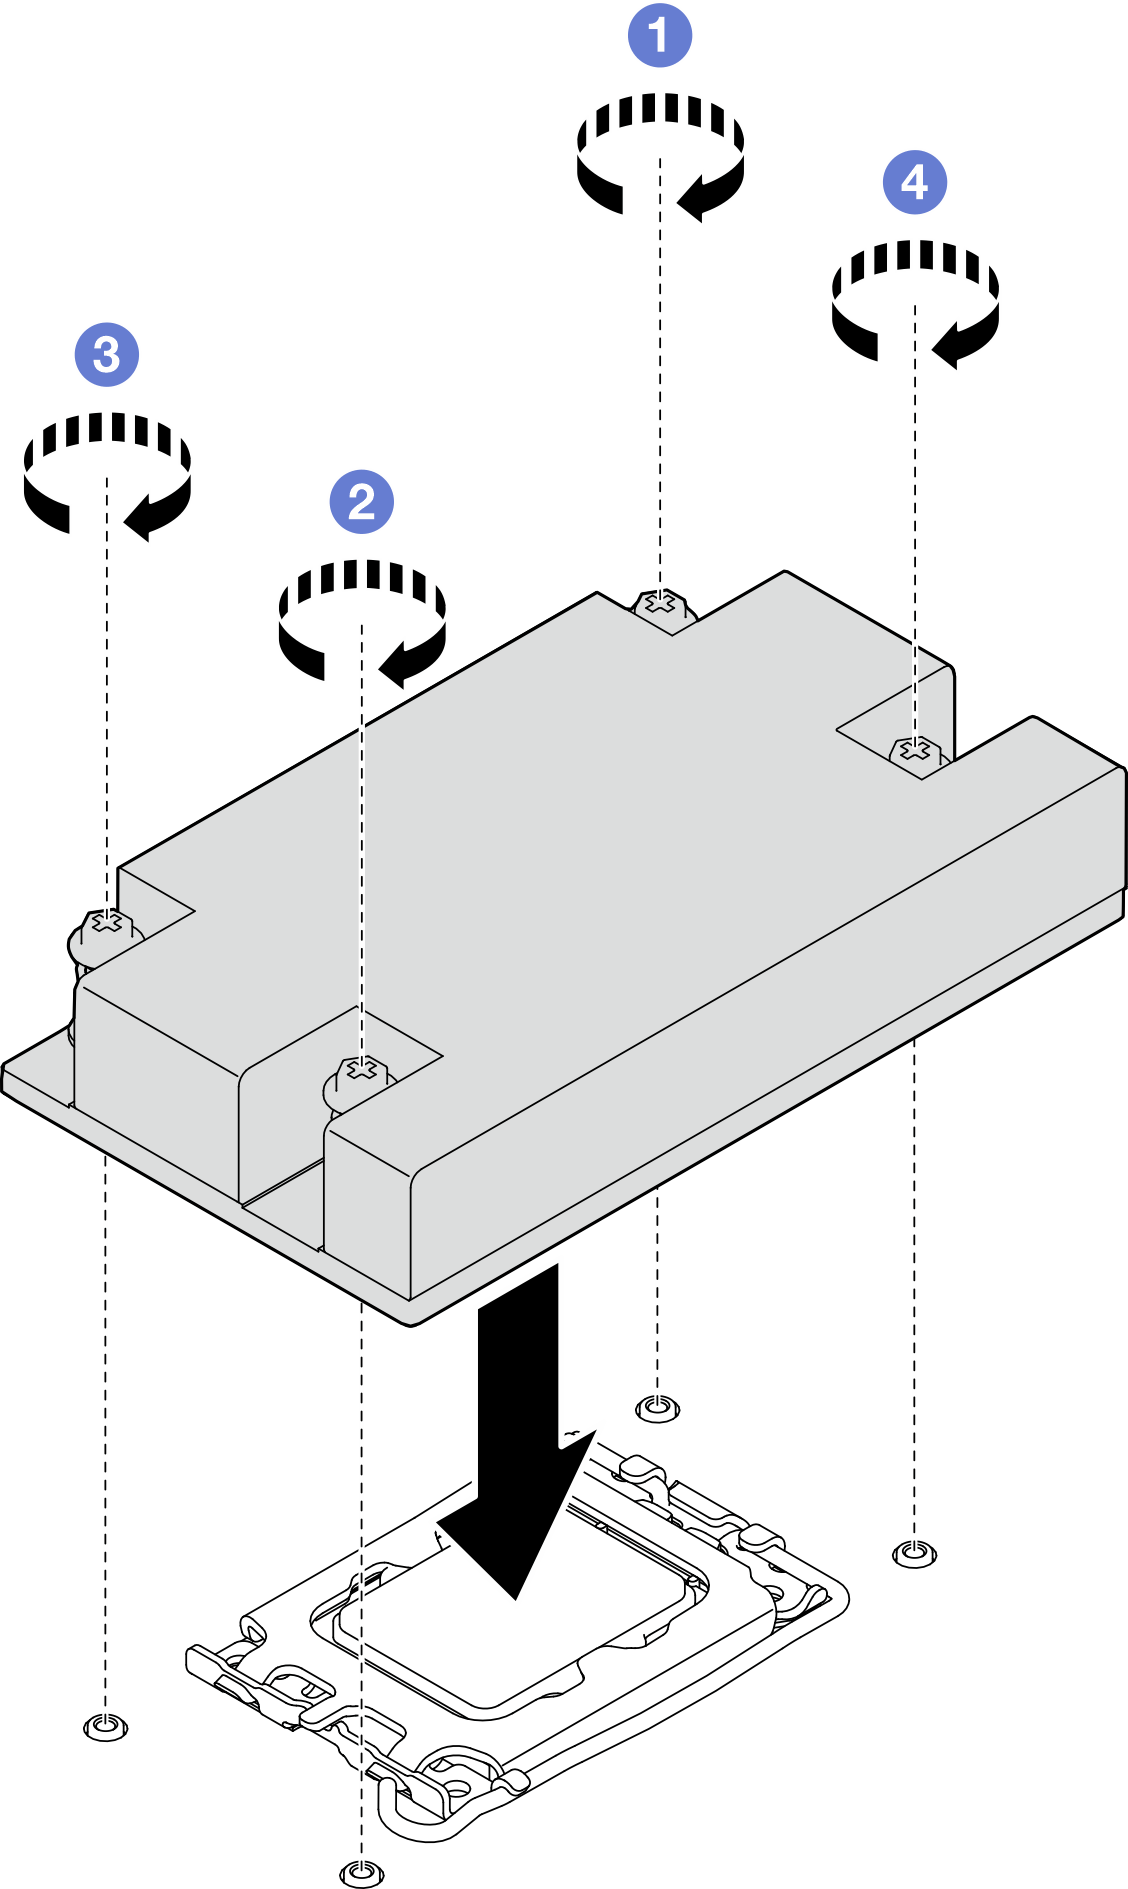
After you finish
Install the top cover. See Install the top cover.
Complete the parts replacement. See Complete the parts replacement.
Demo video