Install the PCIe expansion cage
Use this information to install the PCIe expansion cage.


To install the PCIe expansion cage, complete the following steps:
- Install the PCIe expansion cage cover and cable management tray, if necessary.
- Push the USB and VGA cables into the cage to create sufficient slack in the cables; then, position the front of the cable management tray into the PCIe expansion cage and lower the rear of the cable management tray.NoteOptionally, a USB port assembly and a video port can be installed in the cable management tray of PCIe expansion cage 1. If they are installed, you must remove the drive cage assembly to connect the video port cable
1 and the USB cable 2 to the system board. See Remove the drive cage. Figure 1. USB and Video connectors on the system board
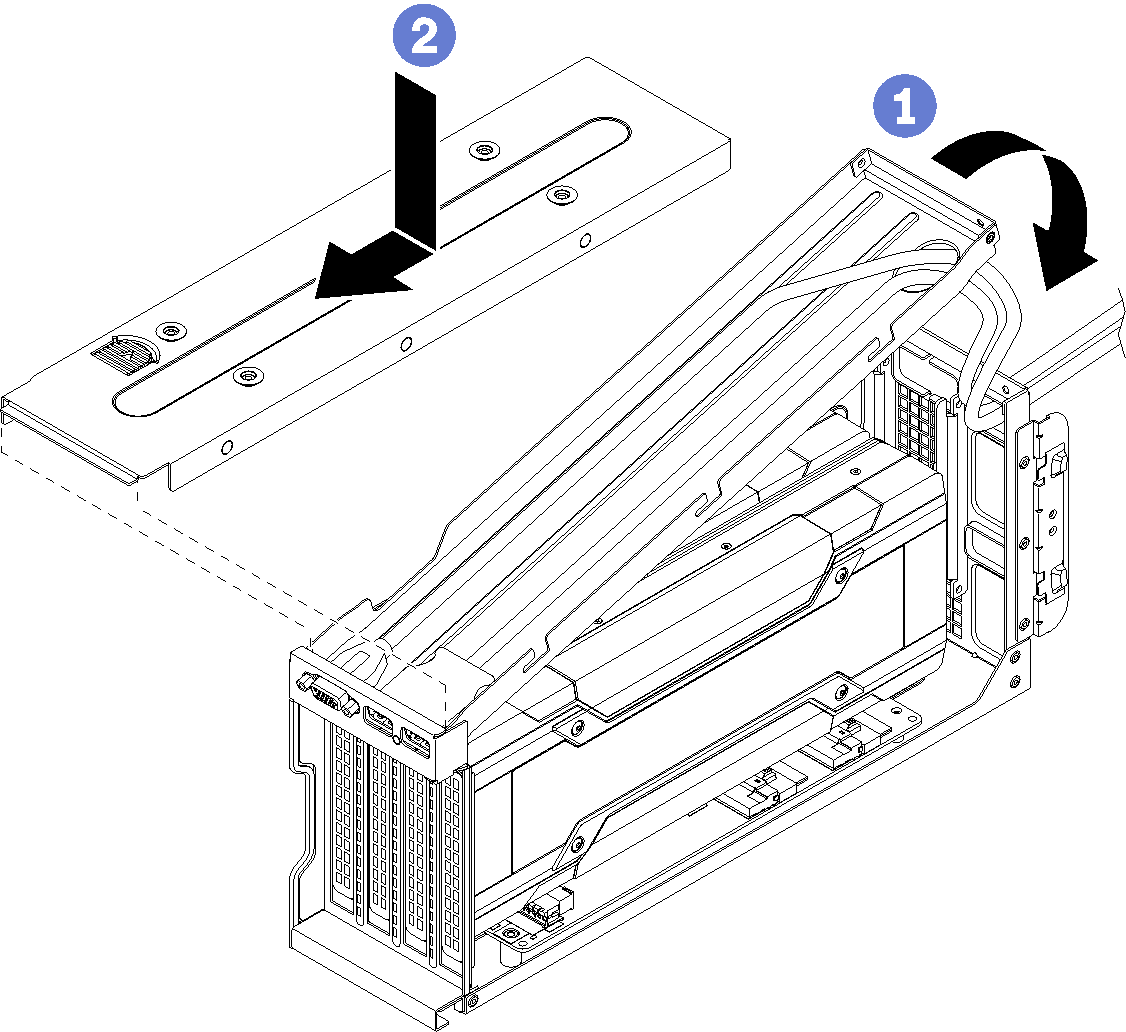
- Lower the expansion cage cover onto the PCIe expansion cage and slide it into place.Figure 2. Installing the PCIe expansion cage cover and cable management tray.
The 3-slot expansion cage is shown in this figure. The process for installing the 4-slot expansion cage is the same.
- Push the USB and VGA cables into the cage to create sufficient slack in the cables; then, position the front of the cable management tray into the PCIe expansion cage and lower the rear of the cable management tray.
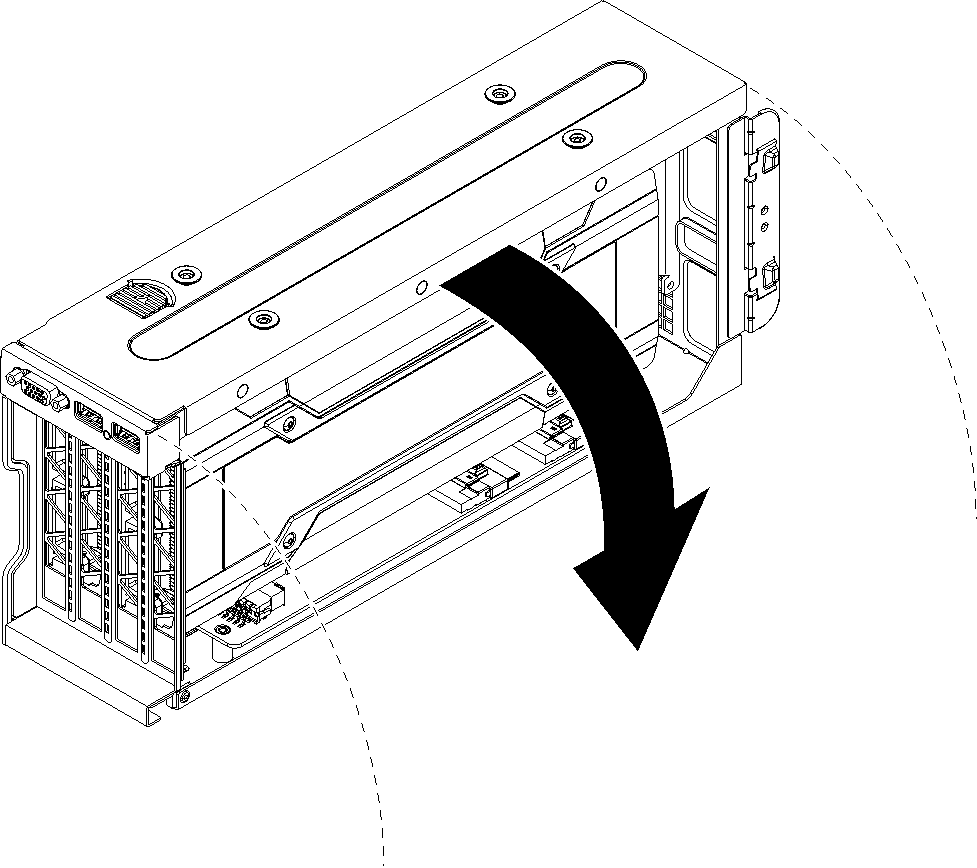
- Rotate the PCIe expansion cage so that the PCIe expansion cage cover is aligned with the right side of the server chassis.Figure 3. Rotating the PCIe expansion cage down
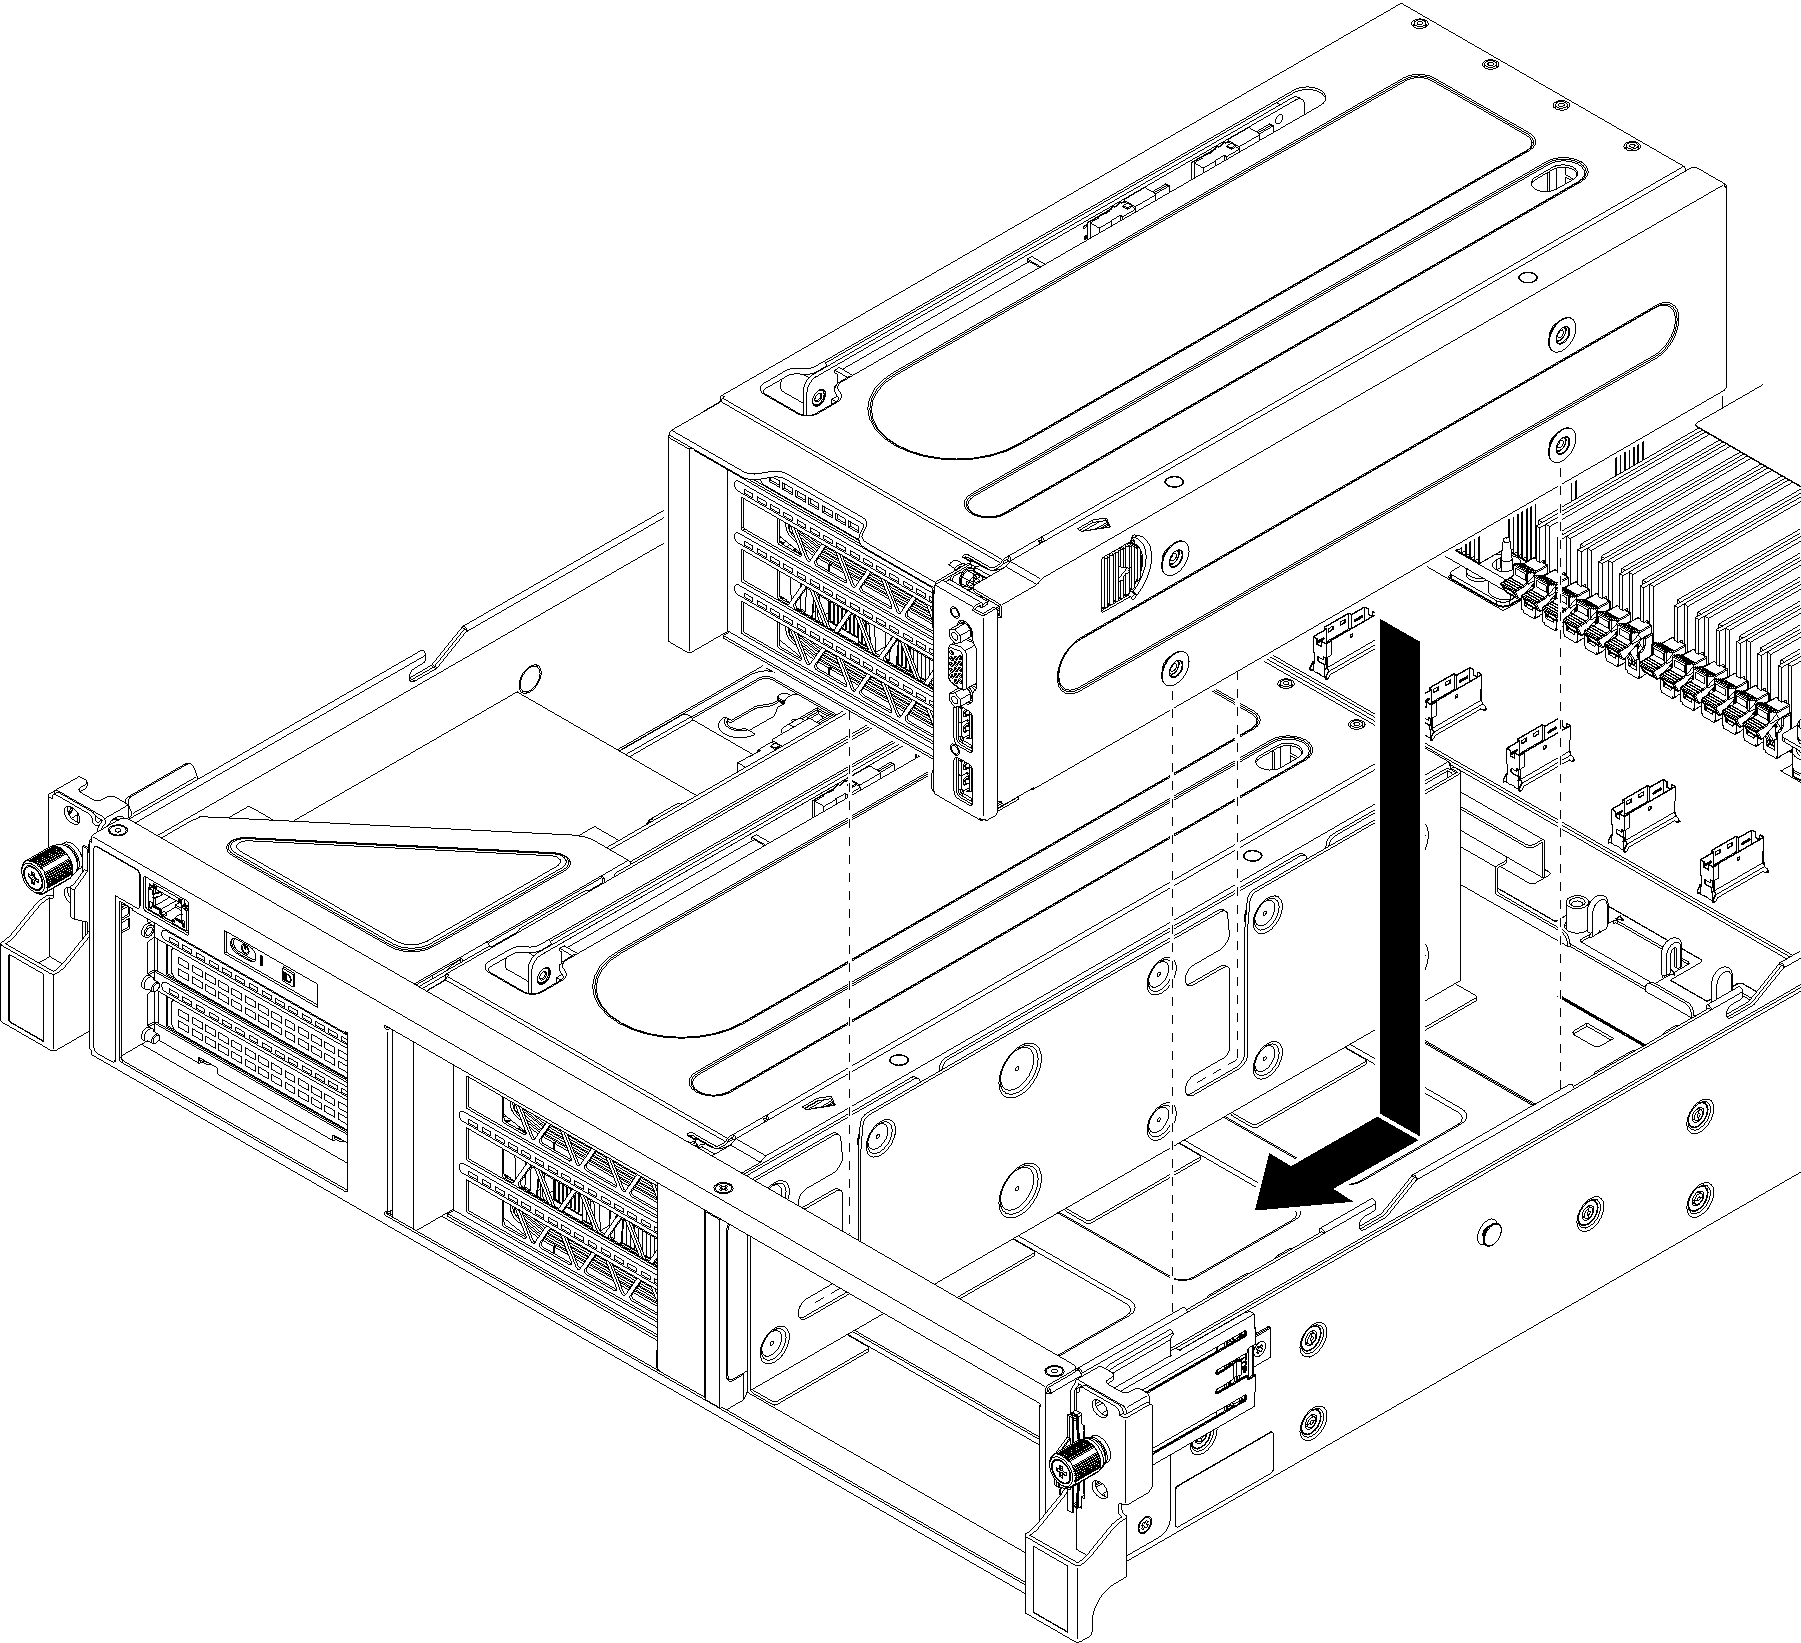
- Slide the expansion cage toward the front of the server until it clicks into place.Figure 4. Installing the PCIe expansion cage.
The 3-slot expansion cage is shown in this figure. The process for installing the 4-slot expansion cage is the same.
Install the fan cage. See Install the system fan cage.
Install the air baffle. See Install the air baffle.
Install the top cover. See Install the top cover.
Push up on the latches on the slide rails and push the server back into the rack.
Tighten the two captive screws located on the front of the server to secure the server in the rack.
NoteAlways secure the system in the rack if your are moving the rack.Connect all cables to the ports on the front of the server, including the management port, if necessary, and all PCIe adapter ports. The management port and PCIe adapter ports are located in the I/O expansion cage.
Connect power cords to both power supplies, which are located at the rear of the server.
Demo video