Remove a CX-7 heat sink
Follow instructions in this section to remove a CX-7 heat sink. The procedure must be executed by a trained technician.
About this task
S002
CAUTION
The power-control button on the device and the power switch on the power supply do not turn off the electrical current supplied to the device. The device also might have more than one power cord. To remove all electrical current from the device, ensure that all power cords are disconnected from the power source.
Attention
- Read Installation Guidelines and Safety inspection checklist to ensure that you work safely.
- Power off the server and peripheral devices and disconnect the power cords and all external cables. See Power off the server.
- If the server is installed in a rack, slide the server out on its rack slide rails to gain access to the top cover, or remove the server from the rack. See Remove the server from rack.
- Prevent exposure to static electricity, which might lead to system halt and loss of data, by keeping static-sensitive components in their static-protective packages until installation, and handling these devices with an electrostatic-discharge wrist strap or other grounding system.
Note
Make sure you have the required tools listed below available to properly replace the component:
- Torx T15 bit
- Torque screwdriver
- Alcohol cleaning pad
- SR675 V3 CX-7 heat sink putty pad kit
Procedure
- Make preparation for this task.
- Disconnect the cables that are connected to the CX-7 carrier board and the CX-7 mezz board.CAUTION
- Hold the cable connector at 45 degree angle when inserting it into the port.
- Have extremely precaution when reseating the connectors that have a 45 degree label on them as they are fragile and will get damage if not installed in the correct 45 degree angle.

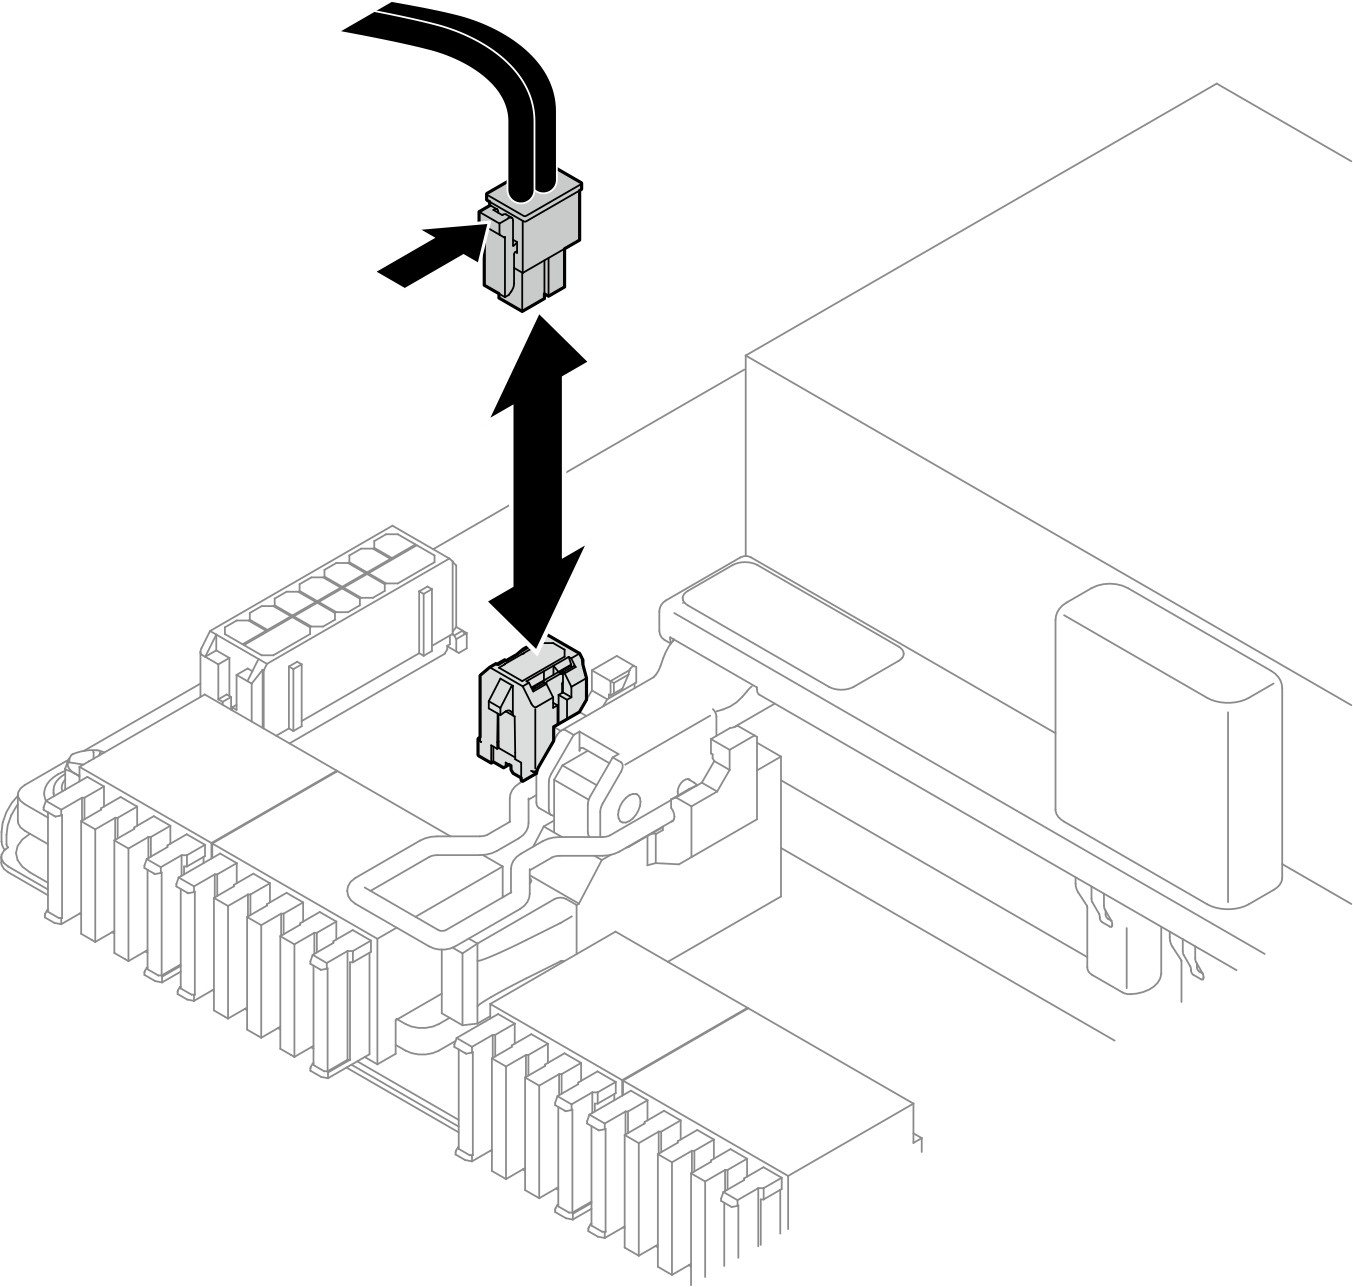
- There is a latch on the power cable connected to the power connector 2 on the CX-7 carrier board. Slightly press and hold the cable latch; then, disconnect the cable from the CX-7 carrier board.Figure 1. Power cable disconnection
- Disconnect the cables that are connected to the CX-7 carrier board and the CX-7 mezz board.
- Remove the CX-7 heat sink.
 Unfasten the four Torx T15 screws on the CX-7 heat sink in the removal sequence shown on the CX-7 heat sink label.NoteLoosen or tighten the screws with a torque screwdriver set to the proper torque. For reference, the torque required for the screws to be fully loosen or tighten is 0.5±0.1 newton-meters, 4.5±0.5 inch-pounds.
 Carefully lift the CX-7 heat sink from the CX-7 mezz board.Figure 2. CX-7 heat sink removal
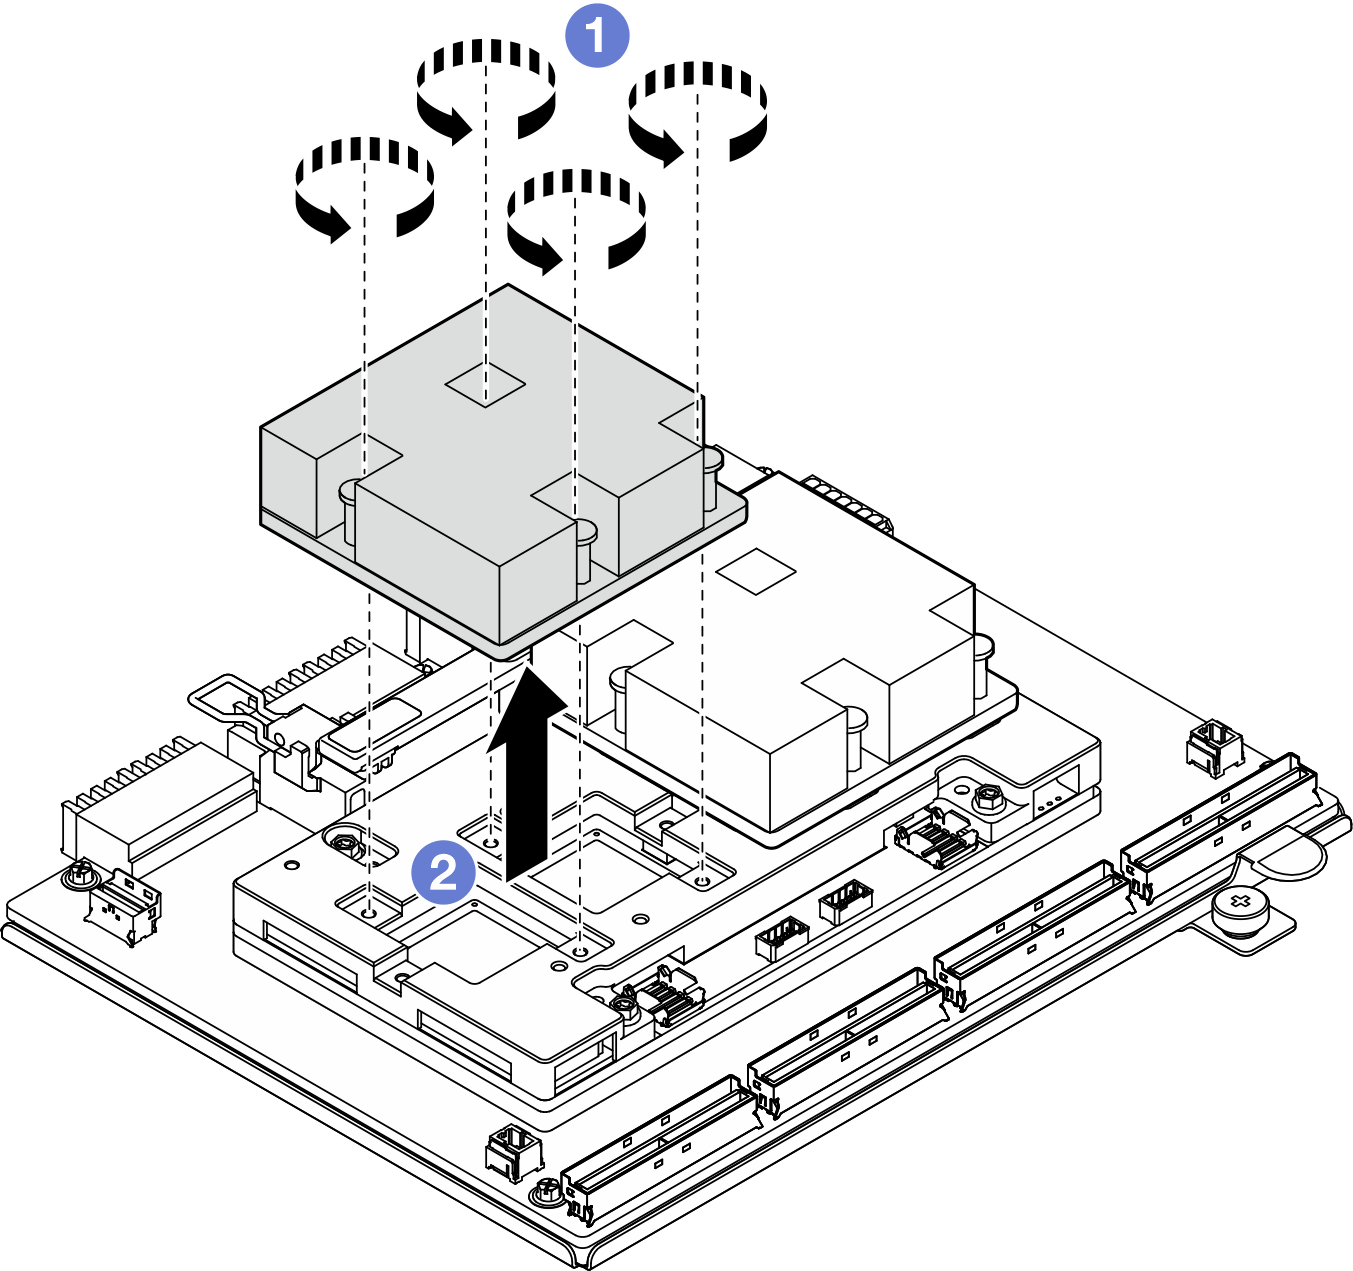
- With alcohol cleaning pads, wipe off any putty pads from the following components:
- Bottom of the CX-7 heat sink
- ASICs on the top of the CX-7 mezz boardNoteDepending on the quantity of the
CX-7 heat sink that is removed, do one of the following: - One CX-7 heat sink: two ASICs on the left or on the right
- Two CX-7 heat sinks: four ASICs
Figure 3. Wiping putty pads off from the CX-7 heat sink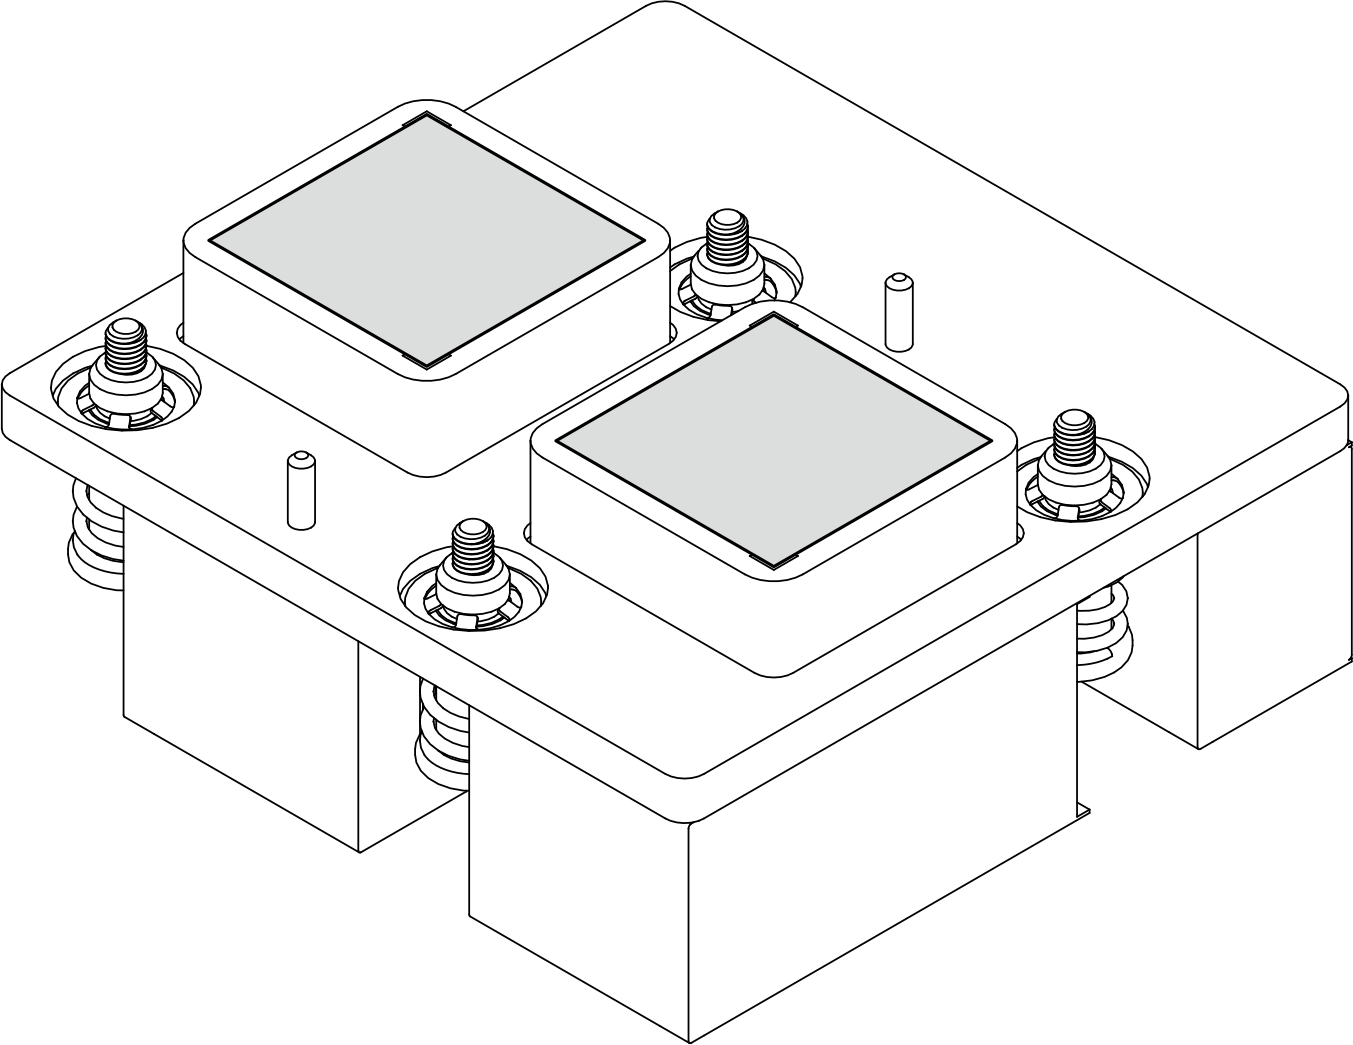 Figure 4. Wiping putty pads off from the ASICs
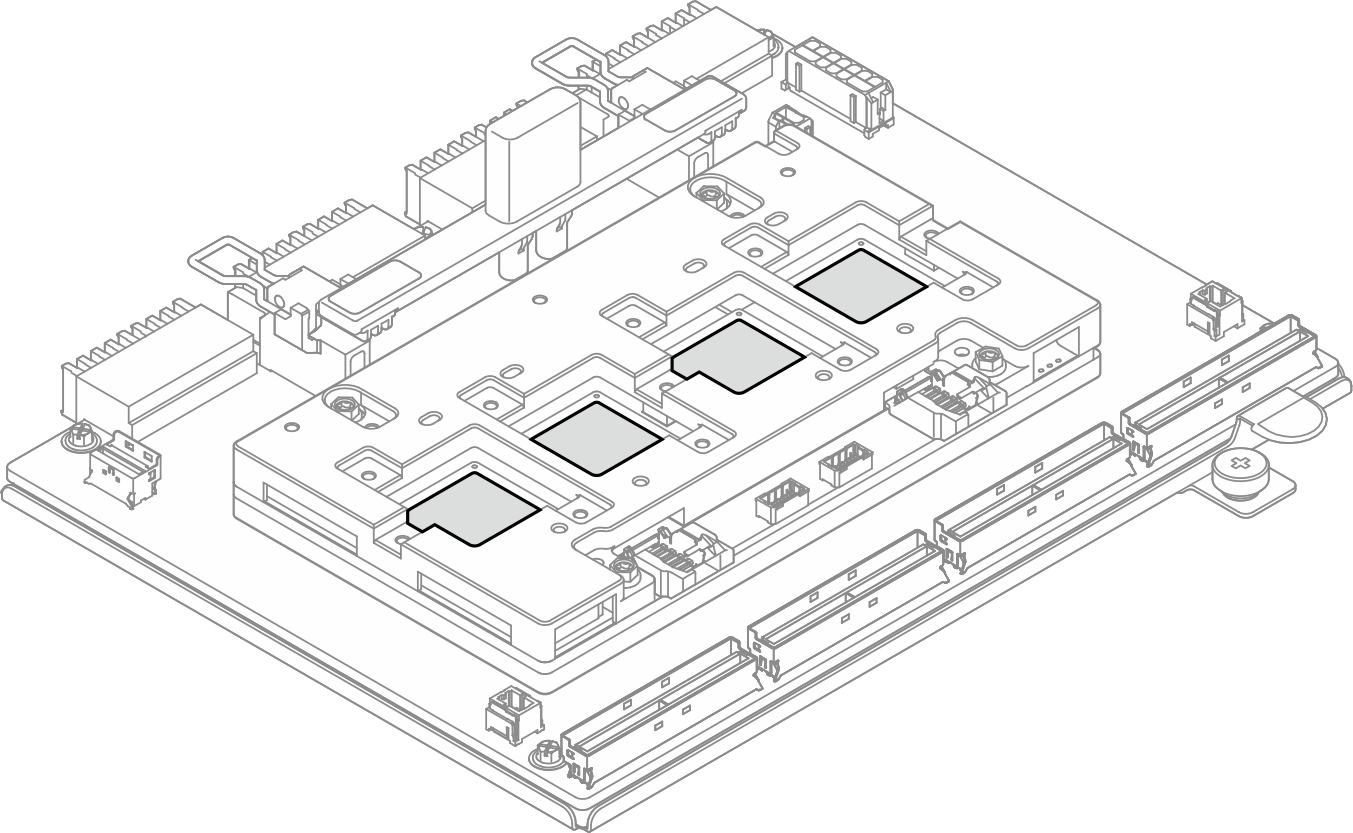
After you finish
- If you are replacing a CX-7 heat sink, install a new CX-7 heat sink. See Install a CX-7 heat sink.
- If you are replacing the CX-7 carrier board or CX-7 mezz board, see Remove the CX-7 carrier board and CX-7 mezz board.
- If you are instructed to return the component or optional device, follow all packaging instructions, and use any packaging materials for shipping that are supplied to you.
Demo video
Give documentation feedback