Install the rail kit to the rack (2.5-inch bay chassis)
Follow the instructions in this section to install the rail kit to the rack.
Note
- The rails are extensible as shown in the following illustration.
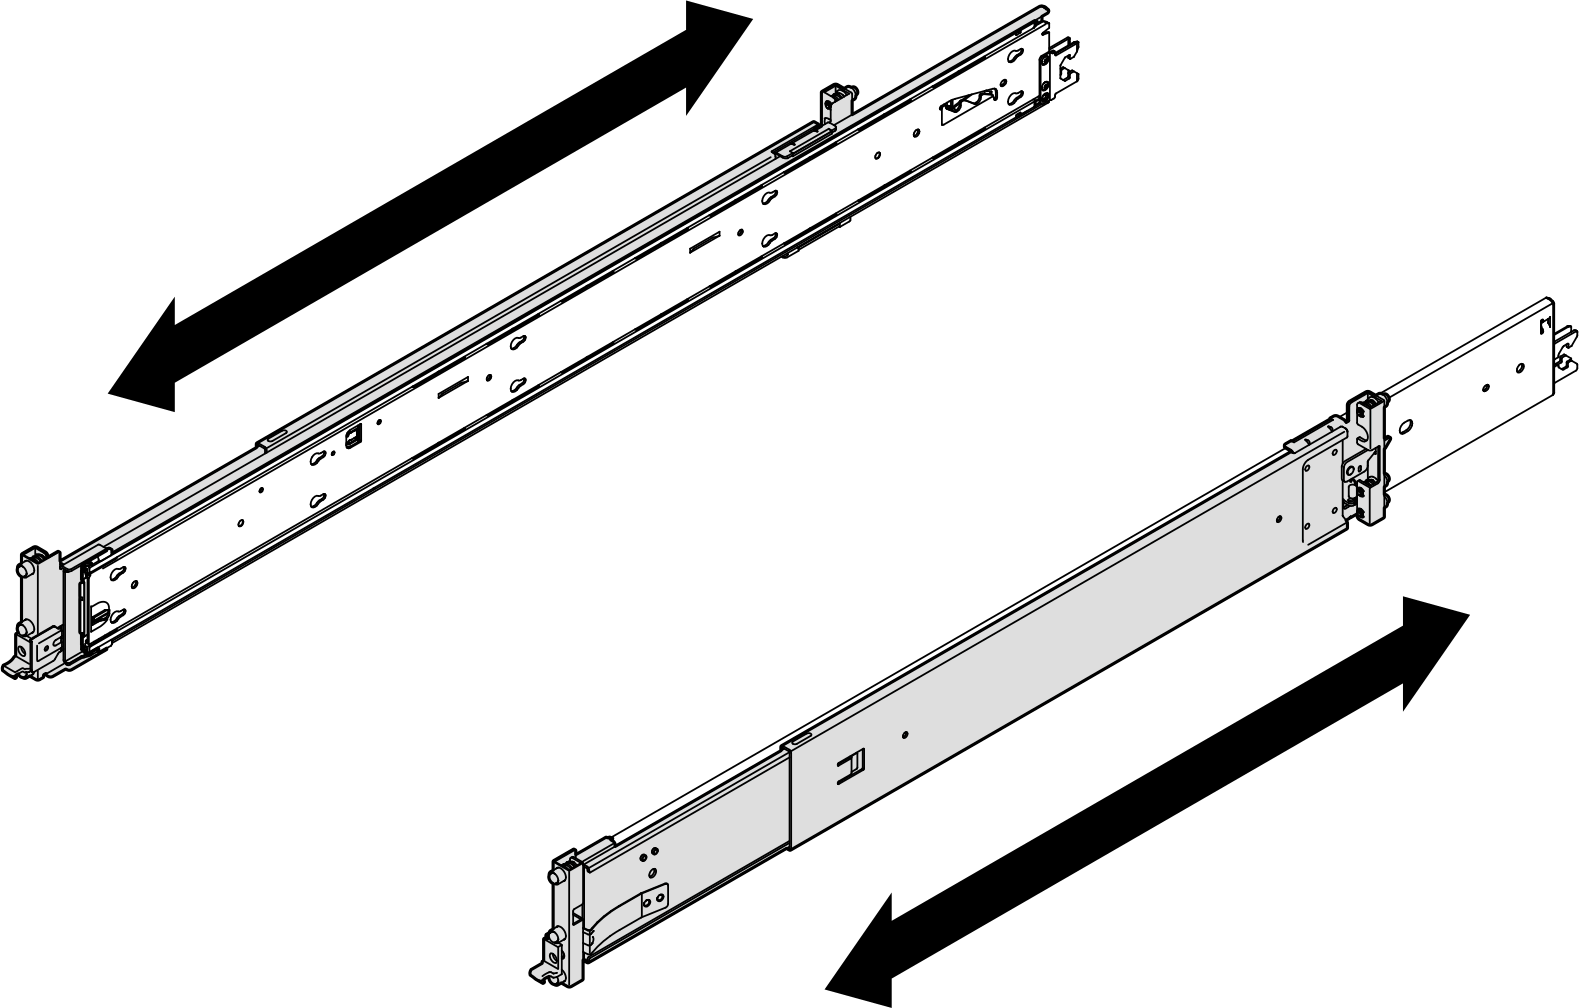
Install the rail to the rack, starting from the rear and proceeding to the front.
Make sure the rail is shortened to the shortest position.
The rail mounting pins take up 2U space. Follow the U space marking on the rack when installing the rail kit.
Procedure
- Install the rear mounting pins to the rack.NoteThere are two rails, left rail (marked with L) and right rail (marked with R). Make sure that you install each rail to the corresponding side of the rack.
Rear (left rail) 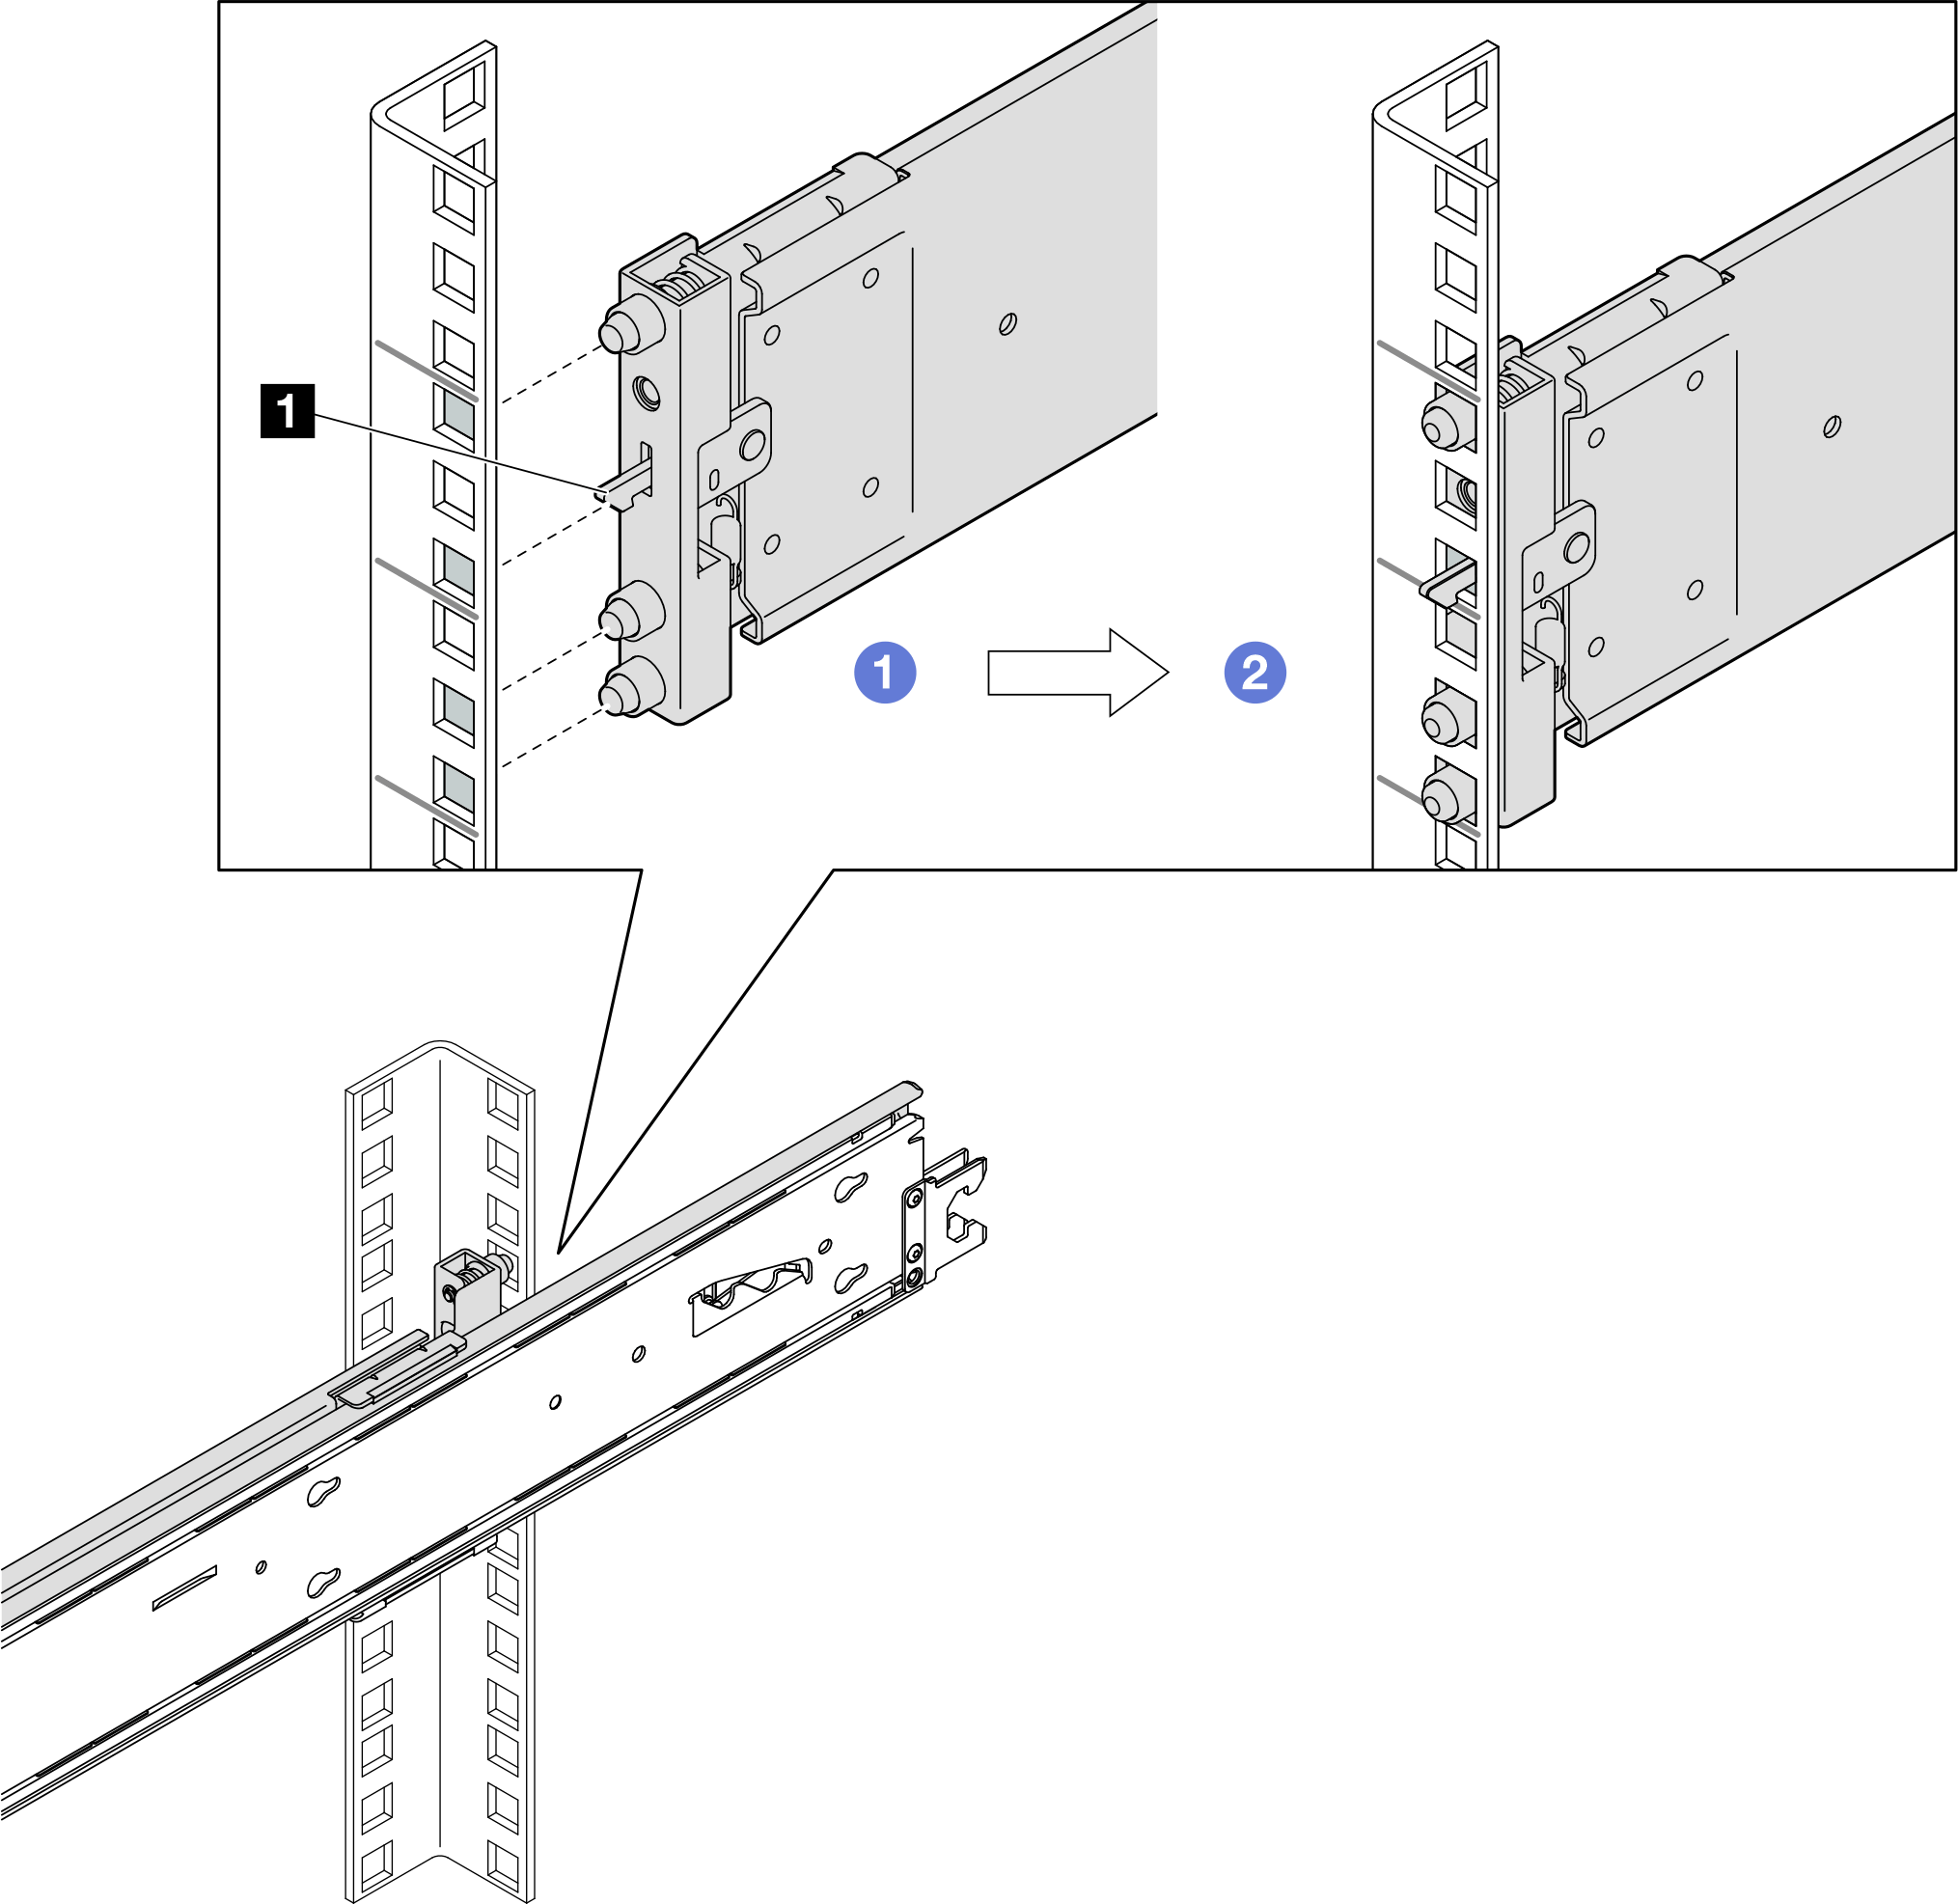
Square hole rack Round hole rack  Align the mounting pins and the hook latch 1 with the rack flanges.
 Push the rail in until the latch clicks into place.
- Install the front mounting pins to the rack.
Front (left rail) 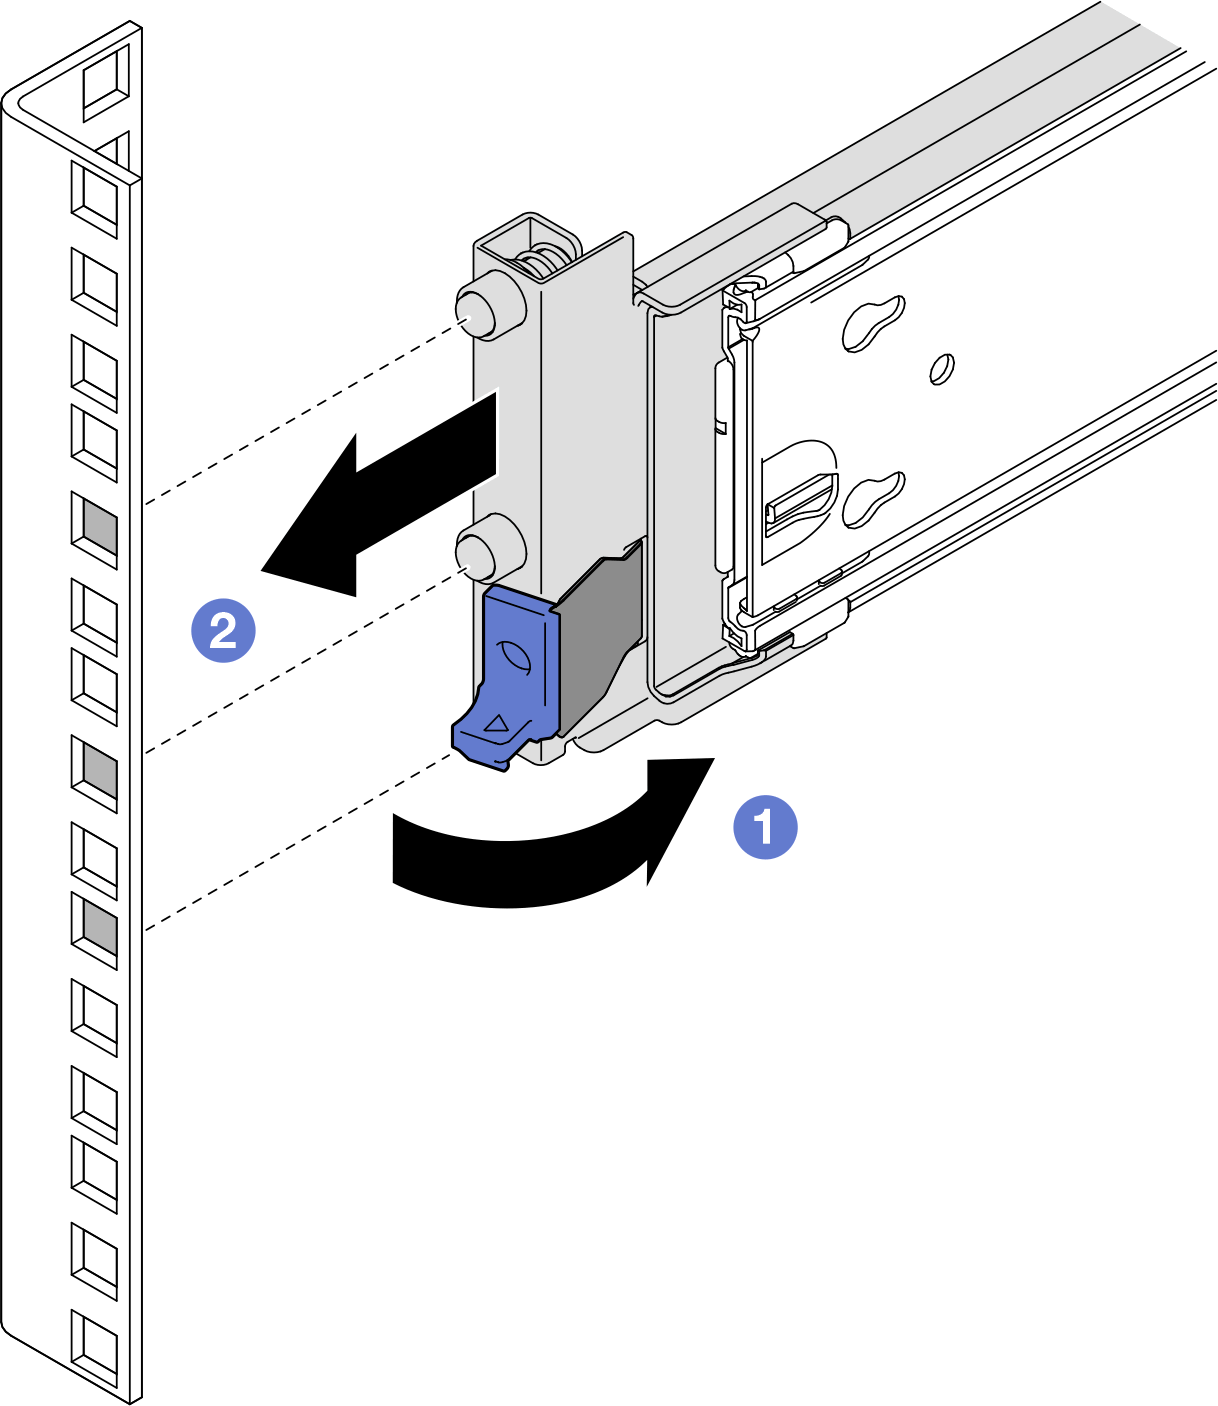
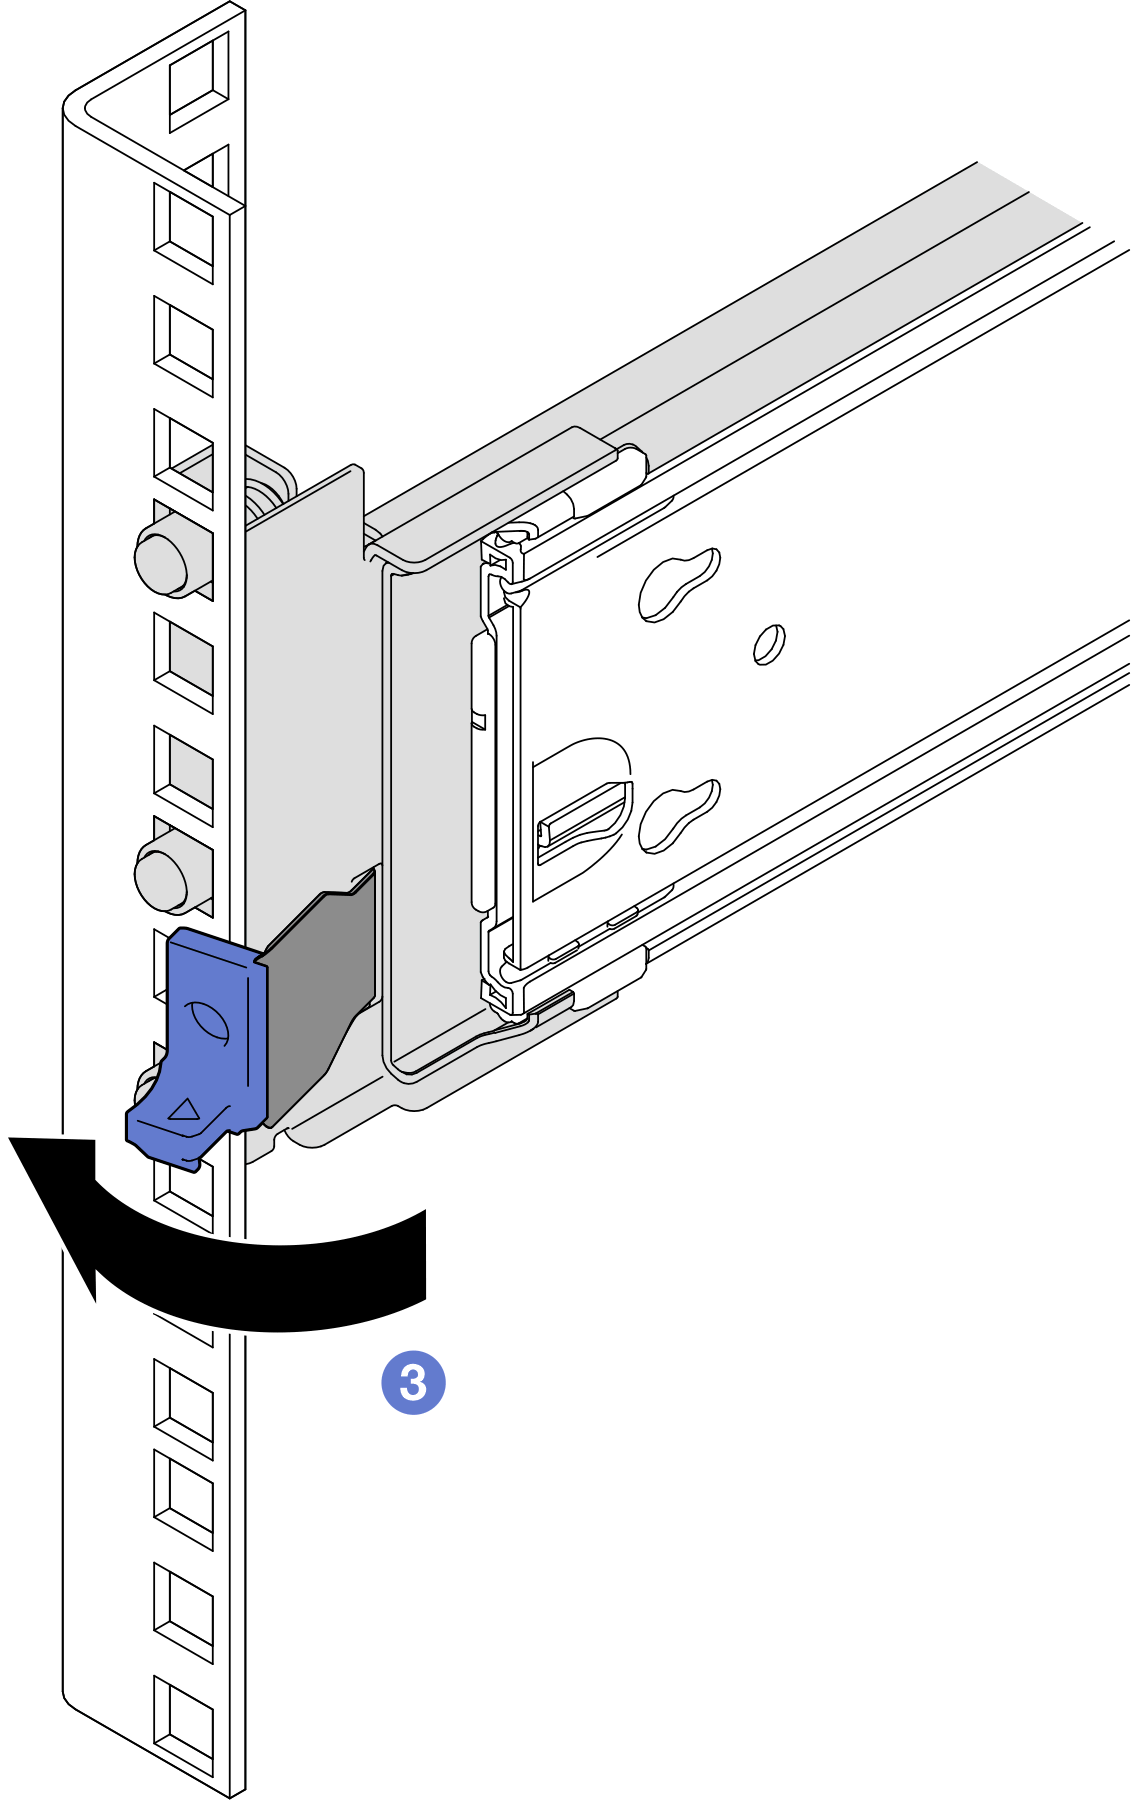
- Rotate and hold the latch.
- Align the mounting pins with the mounting flanges, and pull the rail forward.
 Release the latch to secure the rail to the rack.
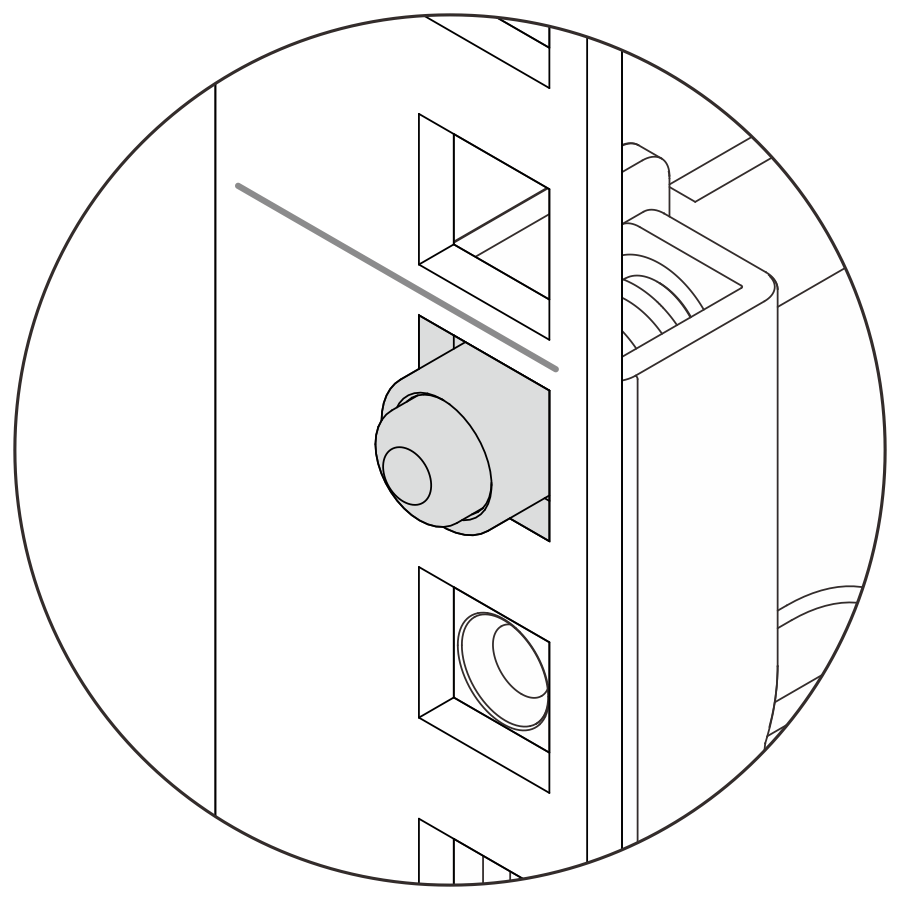
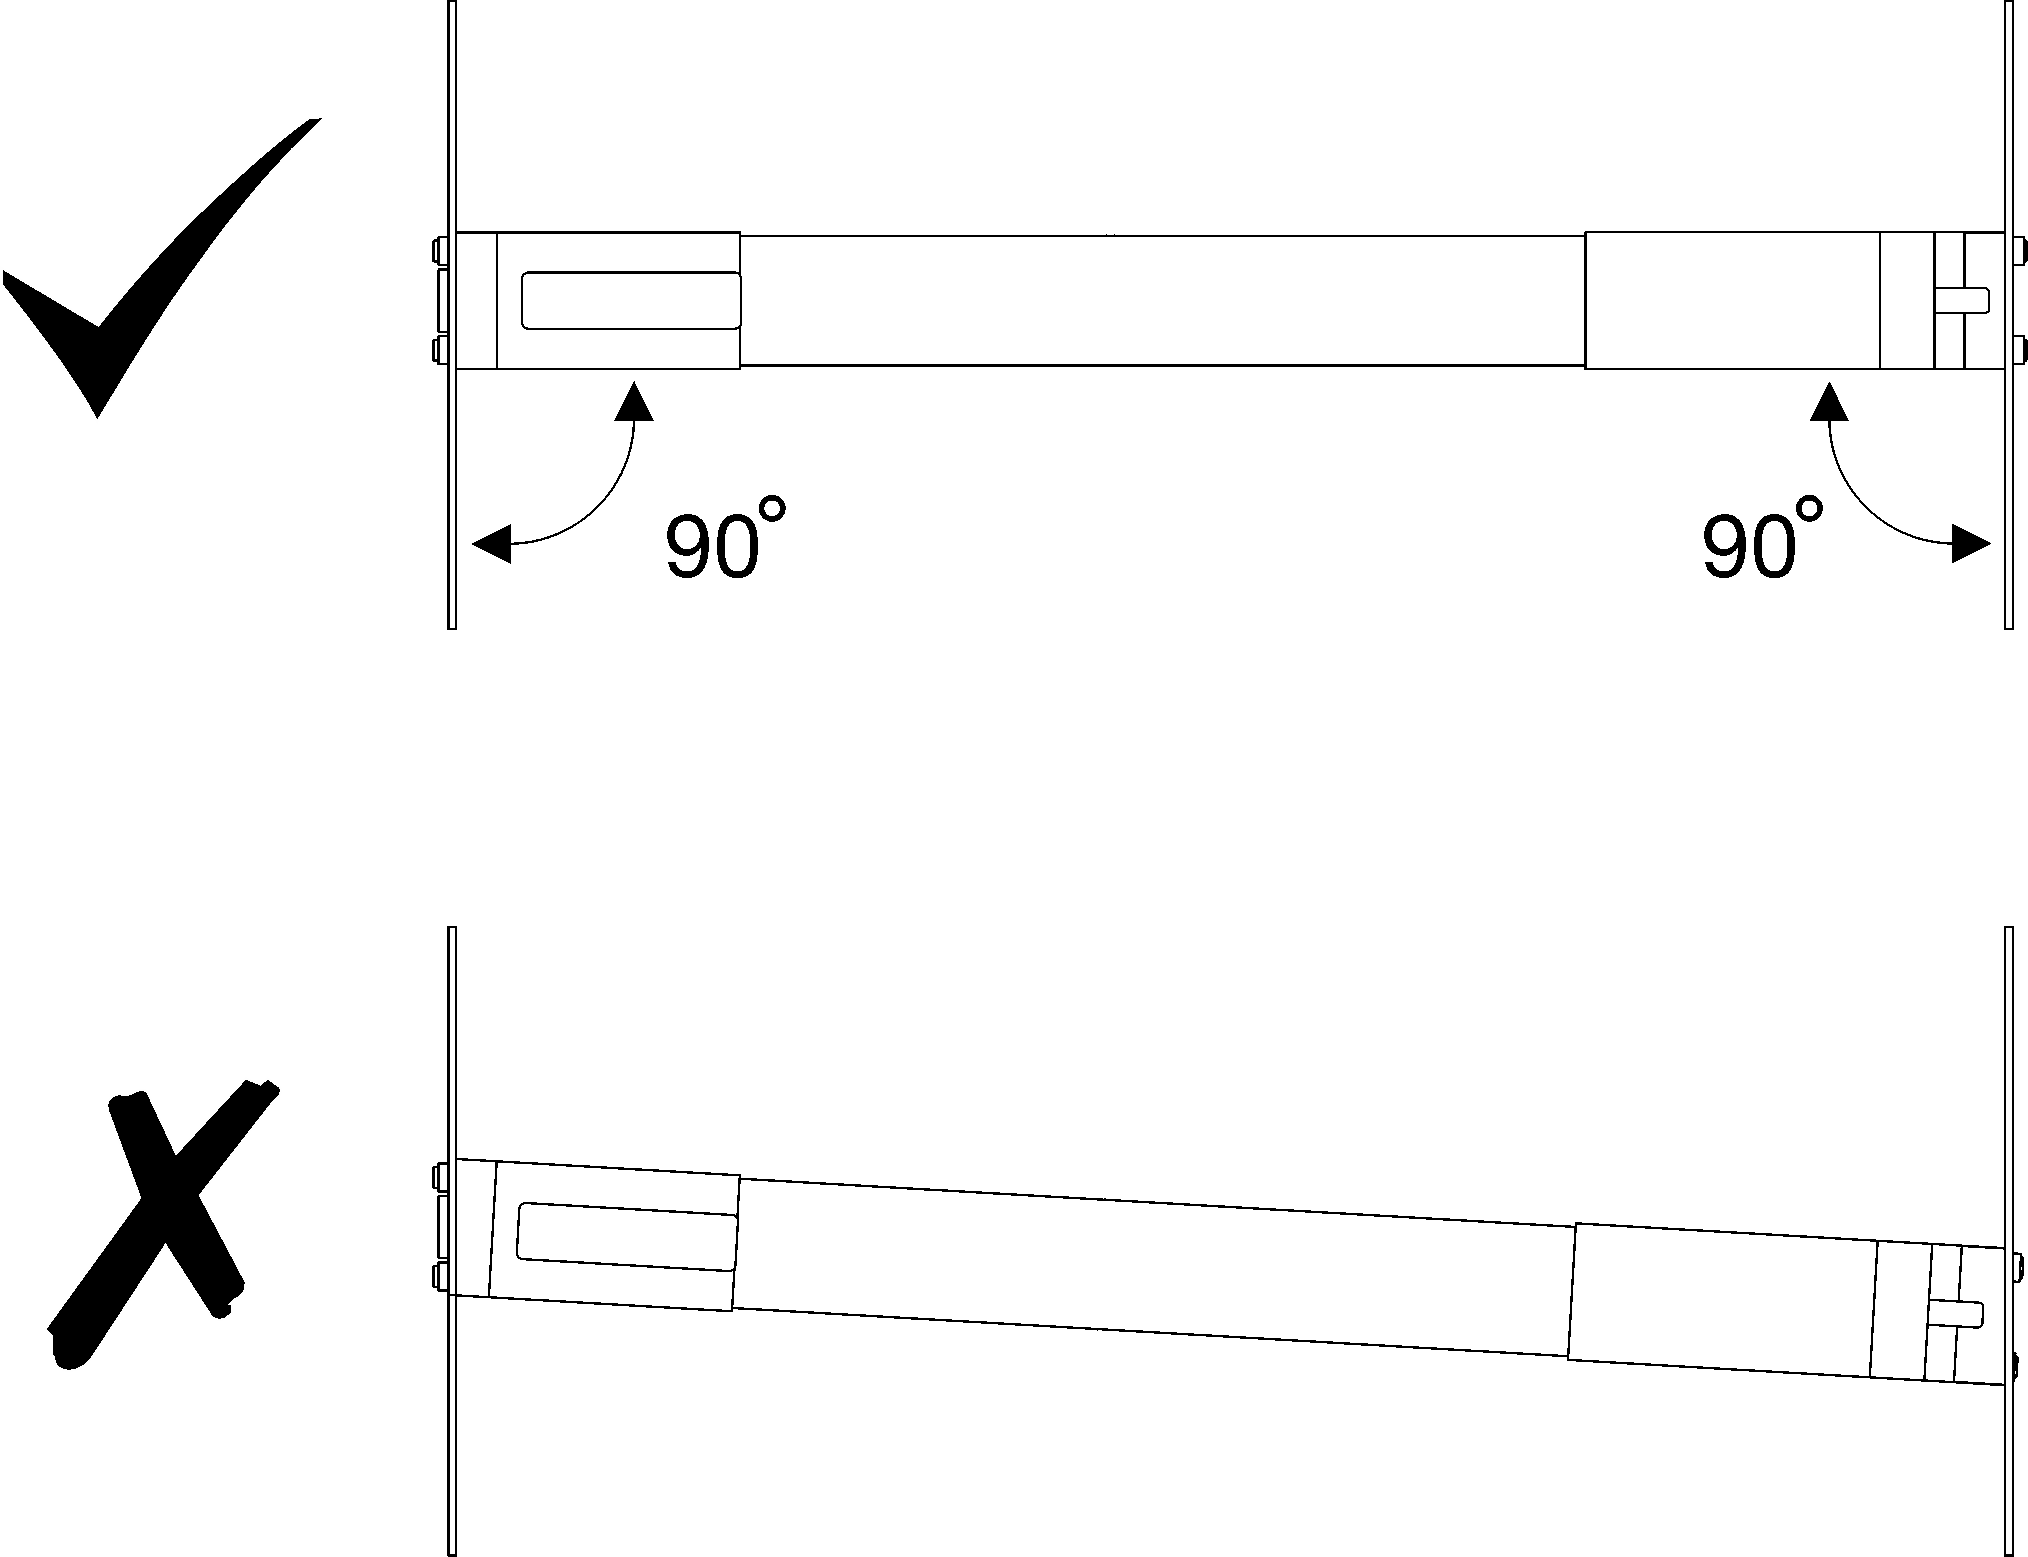
- Make sure that the rail is securely engaged in the flange holes by inspecting that the hook has caught and by sliding back and forward to ensure the rail does not pop out. ImportantMake sure both ends of the rail are seated at the same height.
Give documentation feedback