Install a compute tray
Install a compute tray by inserting it in the front of the chassis, pushing it in until it stops, and closing the release levers.
S002

CAUTION
The power-control button on the device and the power switch on the power supply do not turn off the electrical current supplied to the device. The device also might have more than one power cord. To remove all electrical current from the device, ensure that all power cords are disconnected from the power source.


CAUTION
Make sure that all server power cords are disconnected from their power sources before performing this procedure.
Before you install the compute tray:
Make sure that all cables, adapters, and other components are installed and seated correctly and that you have not left loose tools or parts inside the server.
Make sure that all internal cables are correctly routed. See Internal cable routing.
Complete the following steps to install the compute tray when it is fully removed from the chassis:
Figure 1. Compute tray installation (fully removed)
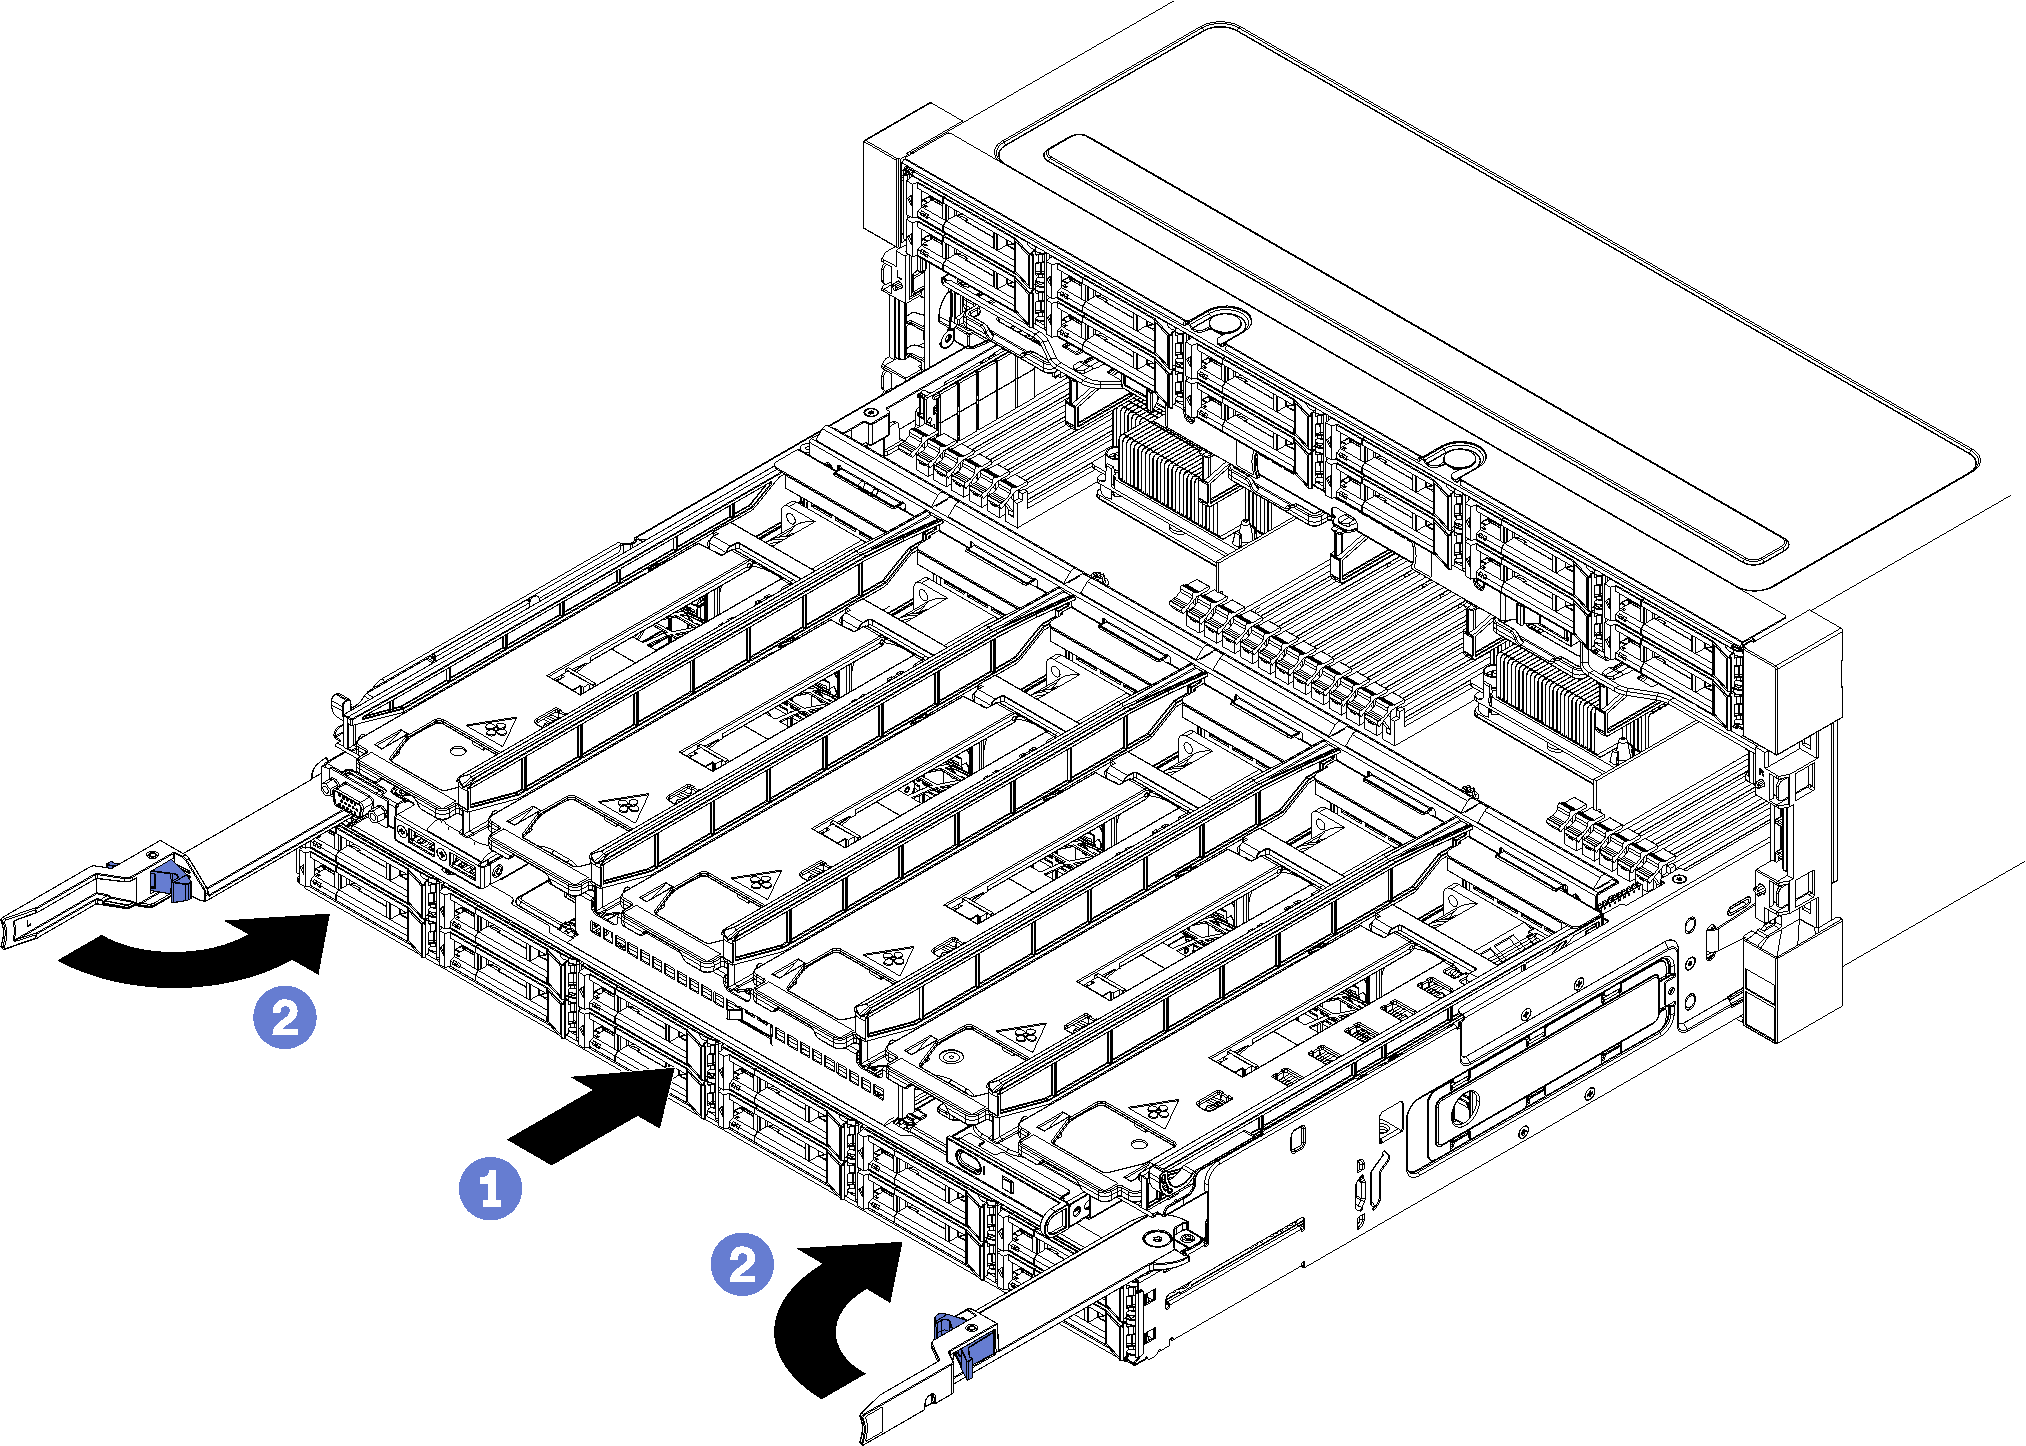
Important
Compute trays must be inserted in the chassis with the processors and memory visible from the top.
- Align the compute tray with its opening in the front of the chassis and insert.
- Fully open the compute tray release levers and push the compute tray into the chassis until it stops.
- Rotate the compute tray release levers until they lock, fully closed.
If you are done performing installation or maintenance procedures at the front of the chassis, install the front cover. See Install the front cover.
Demo video
Give documentation feedback