Remove a compute tray
The upper and lower compute trays are accessed from the front of the server. Open the release levers to extract the compute tray, pressing the release tabs when it stops to remove the tray fully from the chassis.


Before you remove the compute tray, remove the front cover. See Remove the front cover.
Complete the following steps to remove the compute tray:
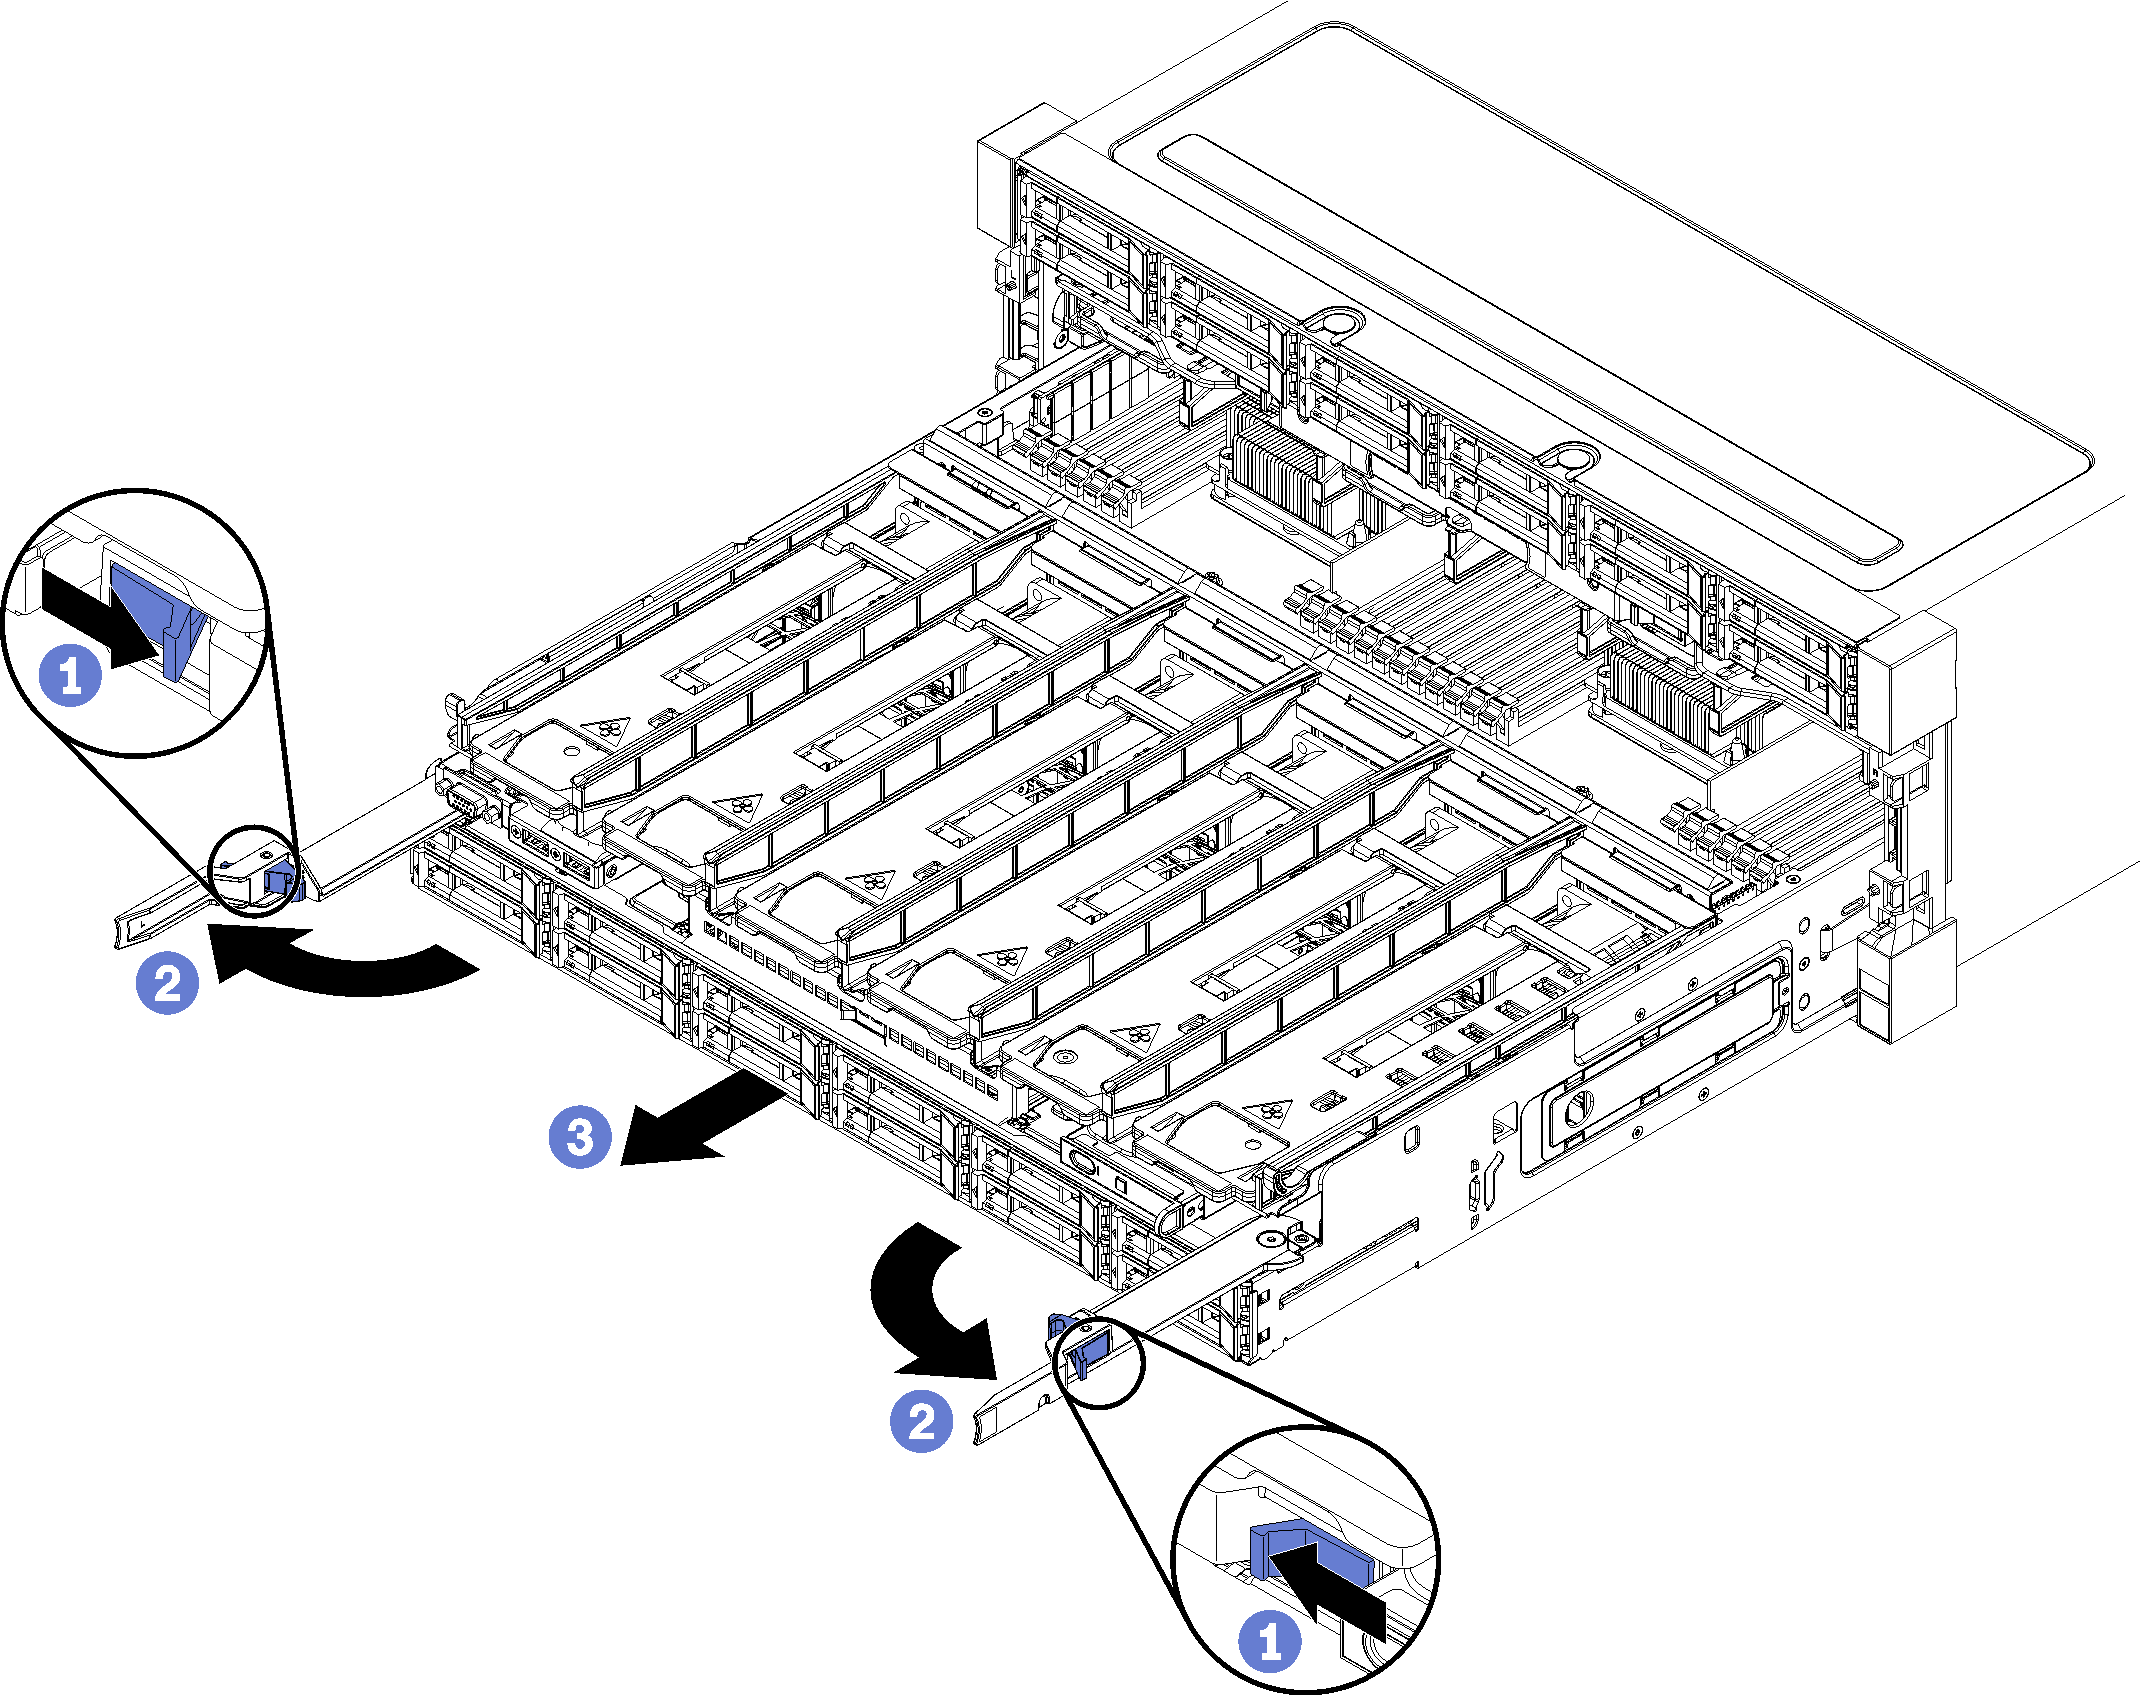
- Press the release tabs on either side of the tray; then, slide the tray fully forward evenly and remove it from the chassis.Attention
Be prepared to support the full weight of the compute tray when you remove it from the chassis.
Do not use the release levers as handles to support the compute tray.
Figure 2. Compute tray removal from chassis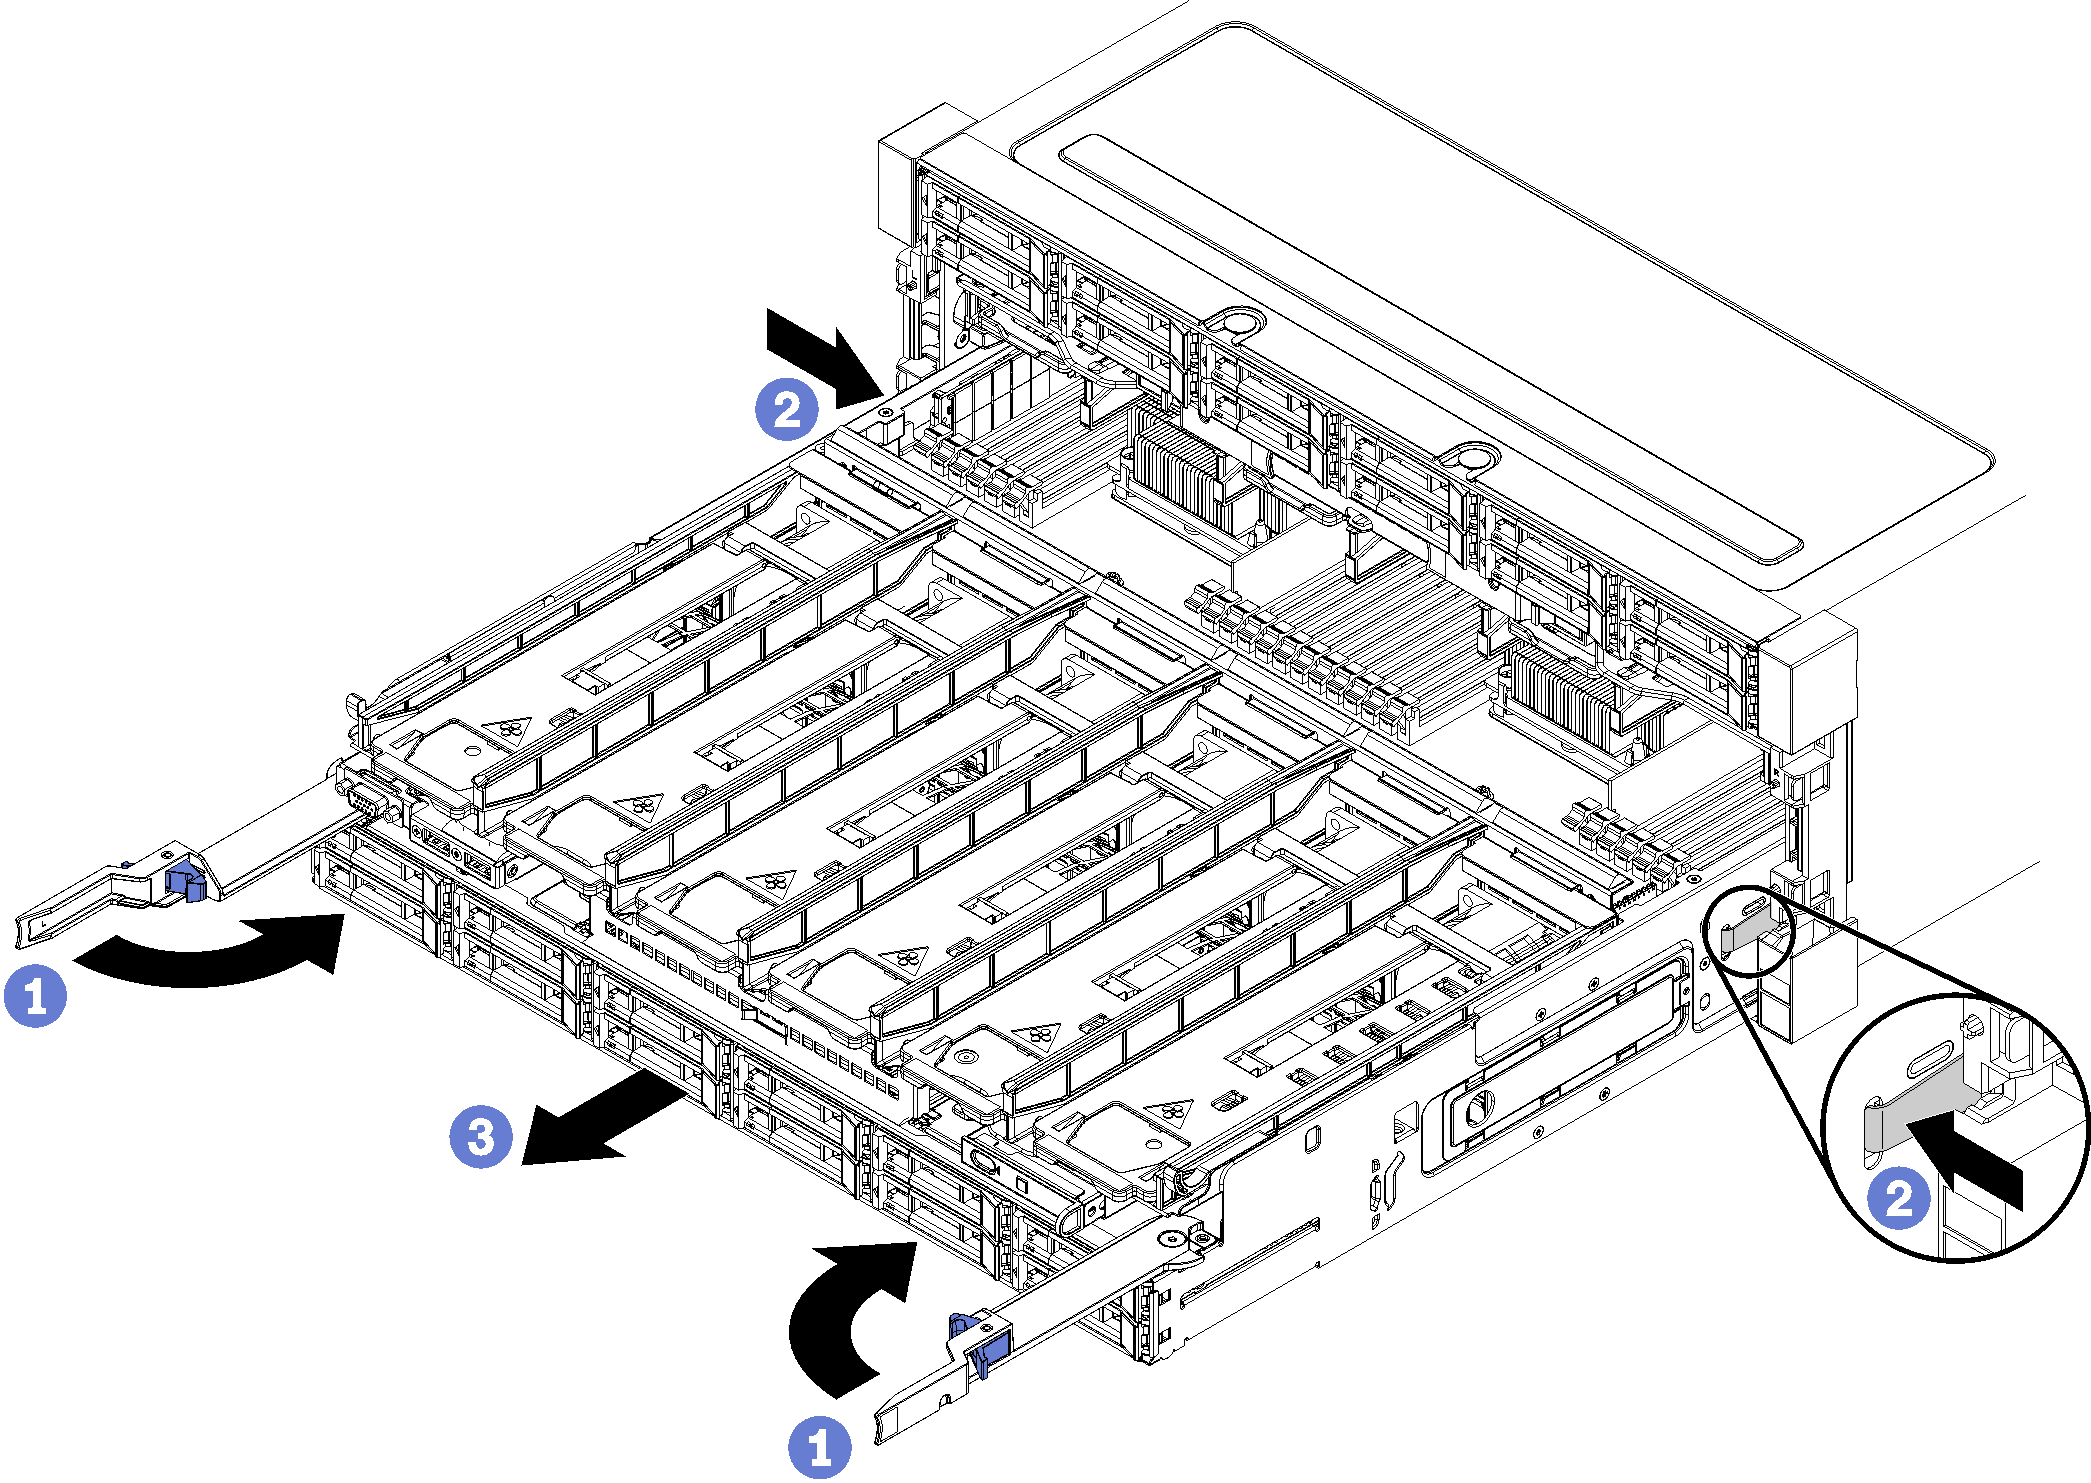
After you remove the compute tray:
If you are replacing the compute tray as part of a maintenance operation, remove all of the following components from the tray; then, place them on a static-protective surface or install them on the new compute tray:
System boards (see System board replacement)
Fan cages (see Fan cage replacement)
Storage interposer (see Storage interposer replacement)
RAID card (see RAID card replacement)
Hard disk drive backplane (see Hard disk drive backplane replacement)
Hard disk drives and fillers (see Hard disk drive replacement)
Cables (see Internal cable routing)
If you are instructed to return the compute tray, follow all packaging instructions, and use any packaging materials for shipping that are supplied to you.
Demo video