Remove the front panel board assembly
Follow instructions in this section to remove the front panel board assembly.
About this task
To avoid potential danger, read and follow the following safety statements.
- S002
 CAUTIONThe power-control button on the device and the power switch on the power supply do not turn off the electrical current supplied to the device. The device also might have more than one power cord. To remove all electrical current from the device, ensure that all power cords are disconnected from the power source.
Attention
Read the Installation guidelines to ensure that you work safely.
Turn off the server and peripheral devices, and disconnect the power cords and all external cables (see Power off the server).
If the server is in a rack, remove it from the rack.
Remove any locking device that secures the server cover, such as a Kensington lock or a pad lock.
Procedure
- Remove the front panel board assembly.
 Press the release tab in the direction as shown in the illustration.
 Pivot the front panel board assembly outwards. Pull the cables out to completely remove the front panel board assembly from the chassis.
Figure 1. Removing the front panel board assembly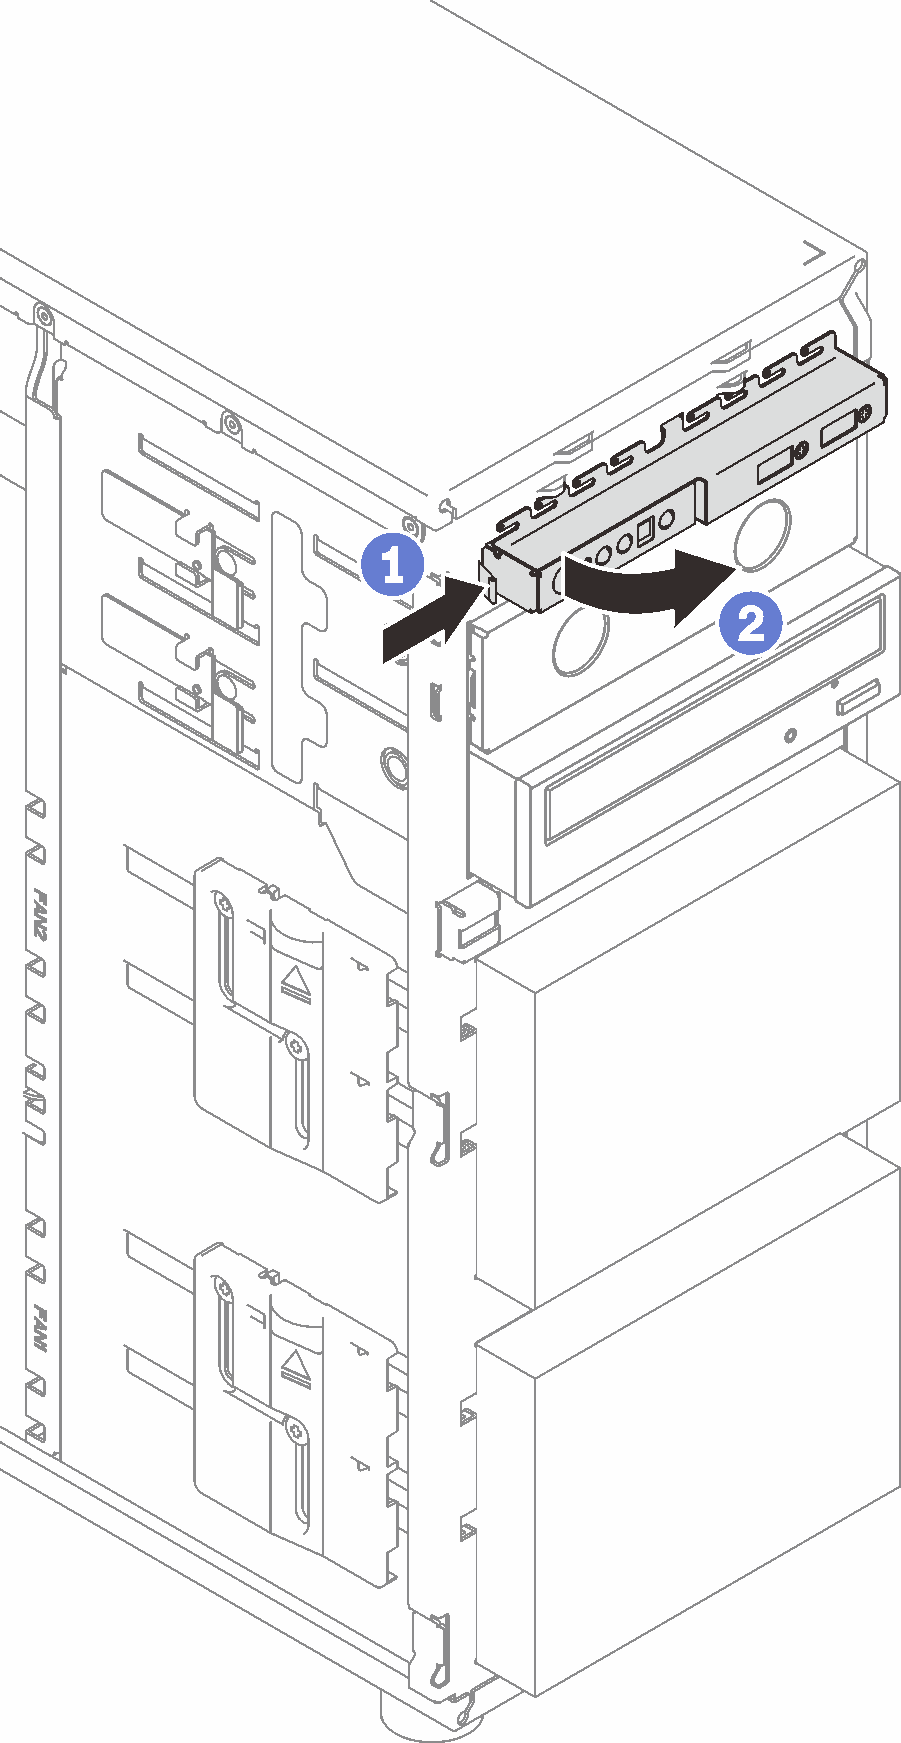
After this task is completed
If you are instructed to return the component or optional device, follow all packaging instructions, and use any packaging materials for shipping that are supplied to you.
Demo video
Give documentation feedback