A firewall override can be used to override any existing firewall profiles for a specific VDC. Infrastructure admin users and VDC manager users can set up firewall overrides.
For more information about firewall profiles, see the following topic:
Manage firewall profiles
Complete the following steps to set up a firewall override:
- Log in to the ThinkAgile CP Cloud Controller.
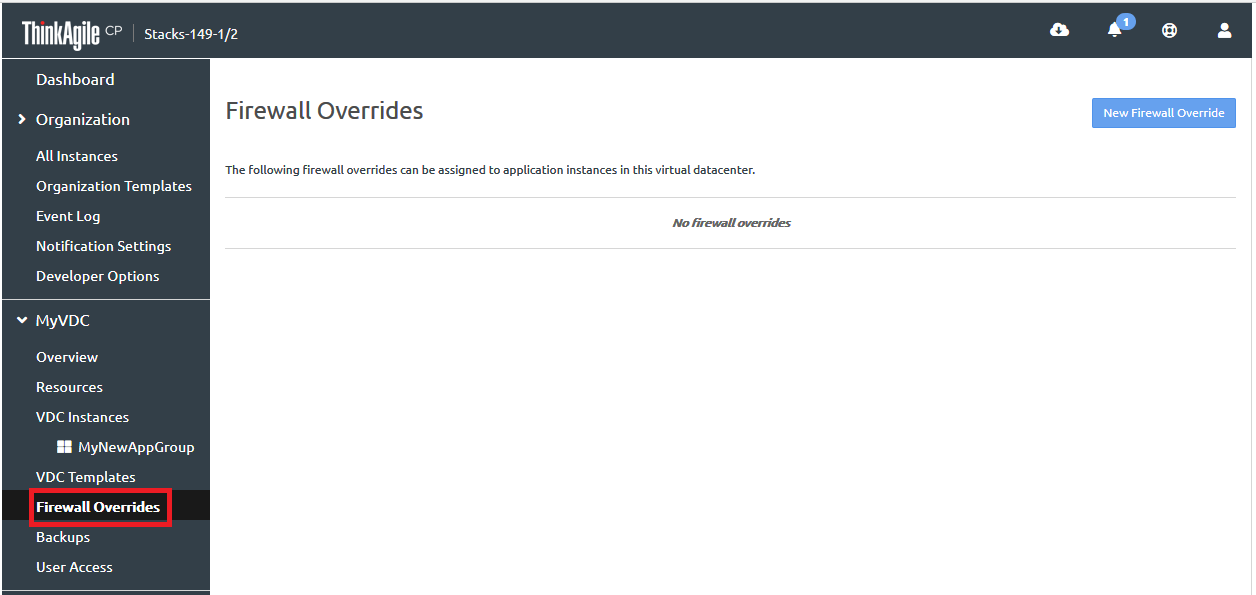
- In the left navigation menu, click to select and expand the virtual datacenter you want to view, and then click Firewall overrides to view the Firewall Overrides page.
Figure 1. Firewall Overrides page 
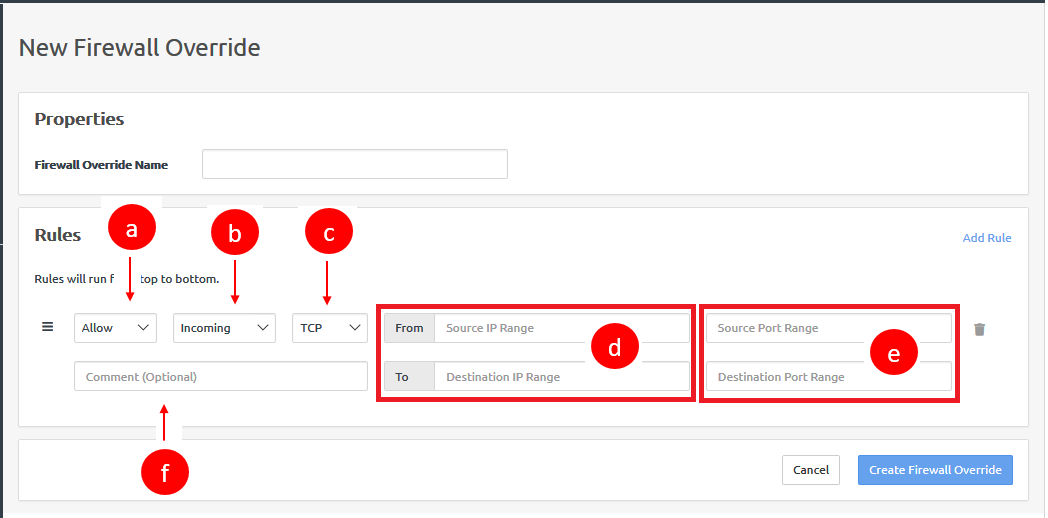
- Click New Firewall Override to display the New Firewall Override dialog.
Figure 2. New Firewall Overrides dialog 
- In the Firewall Override Name field, enter a name for the firewall override.
- Click Add Rule to add a new rule to the firewall override as needed.
- Define the rule as follows:
- In the first drop-down, select the type of rule as Allow, Drop, or Reject.
- In the second drop-down, select the type of traffic to apply the rule to as either Incoming or Outgoing.
- In the third drop-down, select the traffic protocol type as All, TCP, UDP, or ICMP.
For the fields, From Source IP Range and To Destination IP Range, you can enter an IP range in the format 198.168.100-198.168.0.100 or 198.168.0.100, or you can leave the fields blank for all IPs.
- For the Source Port Range and Destination Port Range fields, you can enter a port range in the format 1-65535 or 65535, or you can leave the fields blank for all ports.
For the Comment field, you can enter a comment for this rule. (optional)
- Add all necessary rules. Then, click Create Firewall Override.
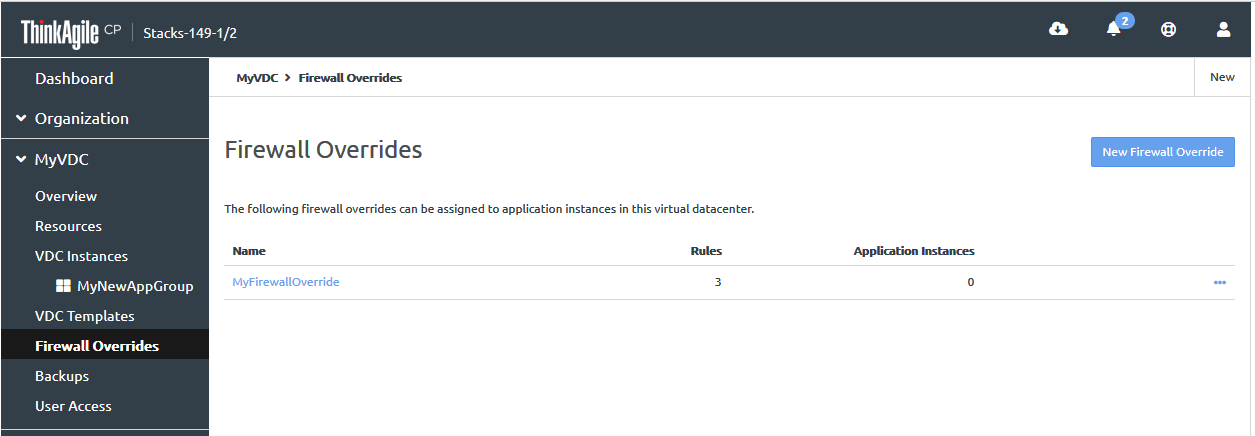
The firewall override is added for the VDC.
Figure 3. Firewall override added 
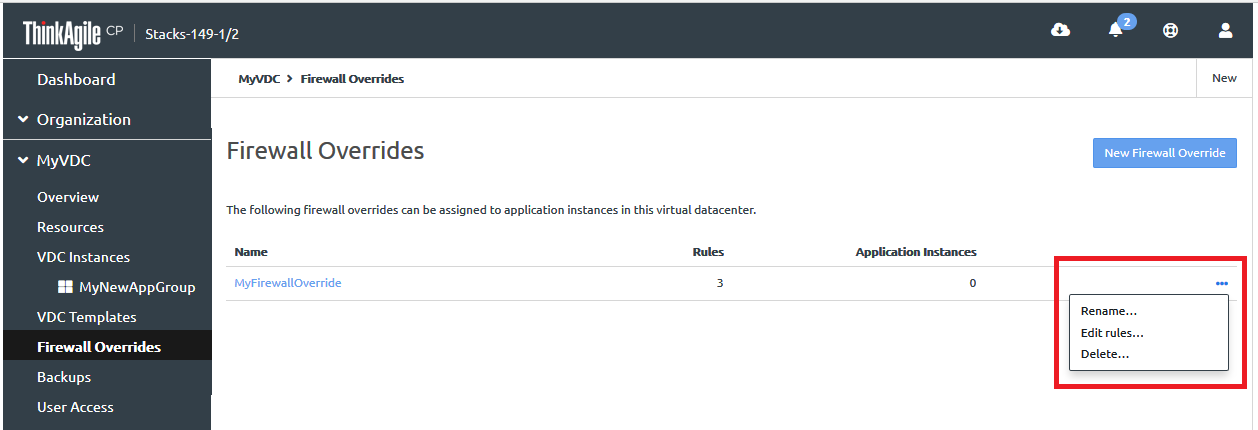
Click the Actions menu ( ) to the right of the firewall override to rename the override, update the rules, or delete the override.
Figure 4. Firewall override Actions menu 


![]() ) to the right of the firewall override to rename the override, update the rules, or delete the override.
) to the right of the firewall override to rename the override, update the rules, or delete the override.


