Creating Virtual Datacenters
Infrastructure admin users can create new virtual datacenters and allocate resources to those virtual datacenters in the ThinkAgile CP Cloud Controller.
For more information about user roles in ThinkAgile CP, see the following topic:
Complete the following steps to create a new virtual datacenter:
- To launch the VDC creation process, use one of the following methods:
From the left-side navigation menu, select + Create New and then click on New Virtual Datacenter.... The New Virtual Datacenter page opens.
Figure 1. Create new virtual datacenter option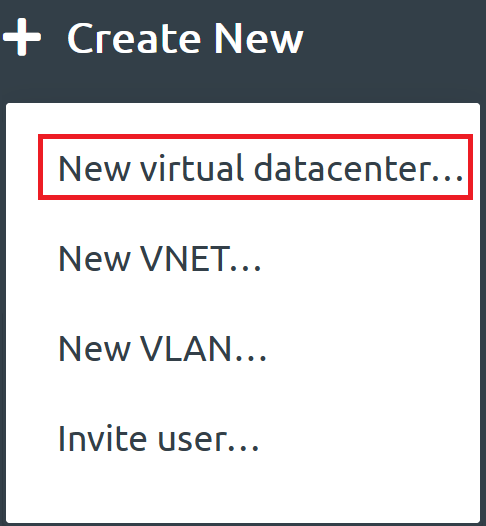
From the left-side navigation menu, expand Resources, and click Allocations. From the Allocations page, click New Virtual Datacenter.
Figure 2. New Virtual Datacenter button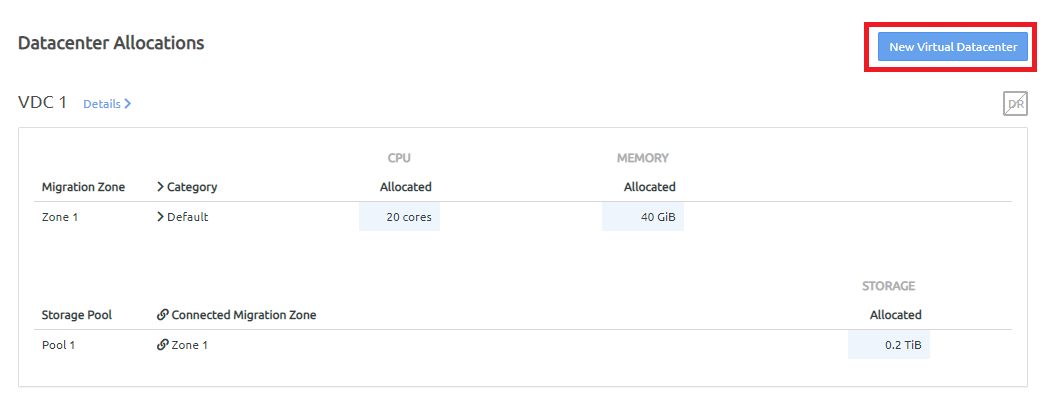
- Enter a name for the new VDC. Figure 3. New Virtual Datacenter Name
 Note
NoteThis name must be unique across all virtual datacenters in your ThinkAgile CP Cloud Controller infrastructure.
- Allocate resources to your new VDC.Note
The Resources Summary section is provided for your reference to show the resources that are available for allocation. It displays your available resources per migration zone and storage pool. Resources in migration zones are organized by category.
Figure 4. Resources Summary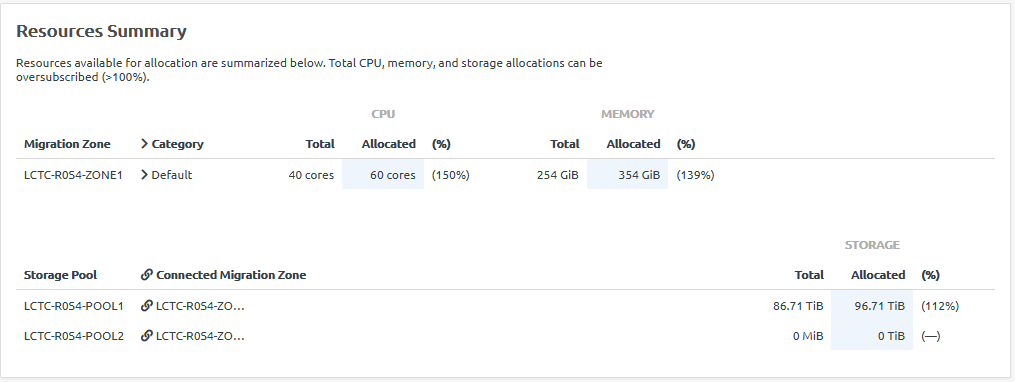
- Under the Datacenter Allocation section, allocate compute resources (CPU cores and Memory) from one or more compute categories within the migration zone(s). Enter the number of cores and the amount of memory in GiB.Figure 5. CPU cores and memory allocation
 Attention
Compute allocations must include both CPU cores and memory from the same compute category.
- Allocate storage resources from the listed storage pool(s) by entering an amount in TiB.NoteTo enable quick DR backups, you must allocate resources to at least two storage pools. For more information about disaster recovery, see the following topic:Figure 6. Storage allocation

- Under the Datacenter Allocation section, allocate compute resources (CPU cores and Memory) from one or more compute categories within the migration zone(s). Enter the number of cores and the amount of memory in GiB.
- By default, the Chat Support widget is disabled for VDC manager and VDC viewer users. You can enable the Chat Support widget by selecting the Enable support widget for VDC users checkbox.
For more information about the Chat Support widget, see the following topic:
Enabling the chat support widget
Figure 7. Enable Chat Support widget
- Click Create Virtual Datacenter.
The new VDC is created.
Figure 8. New VDC resources page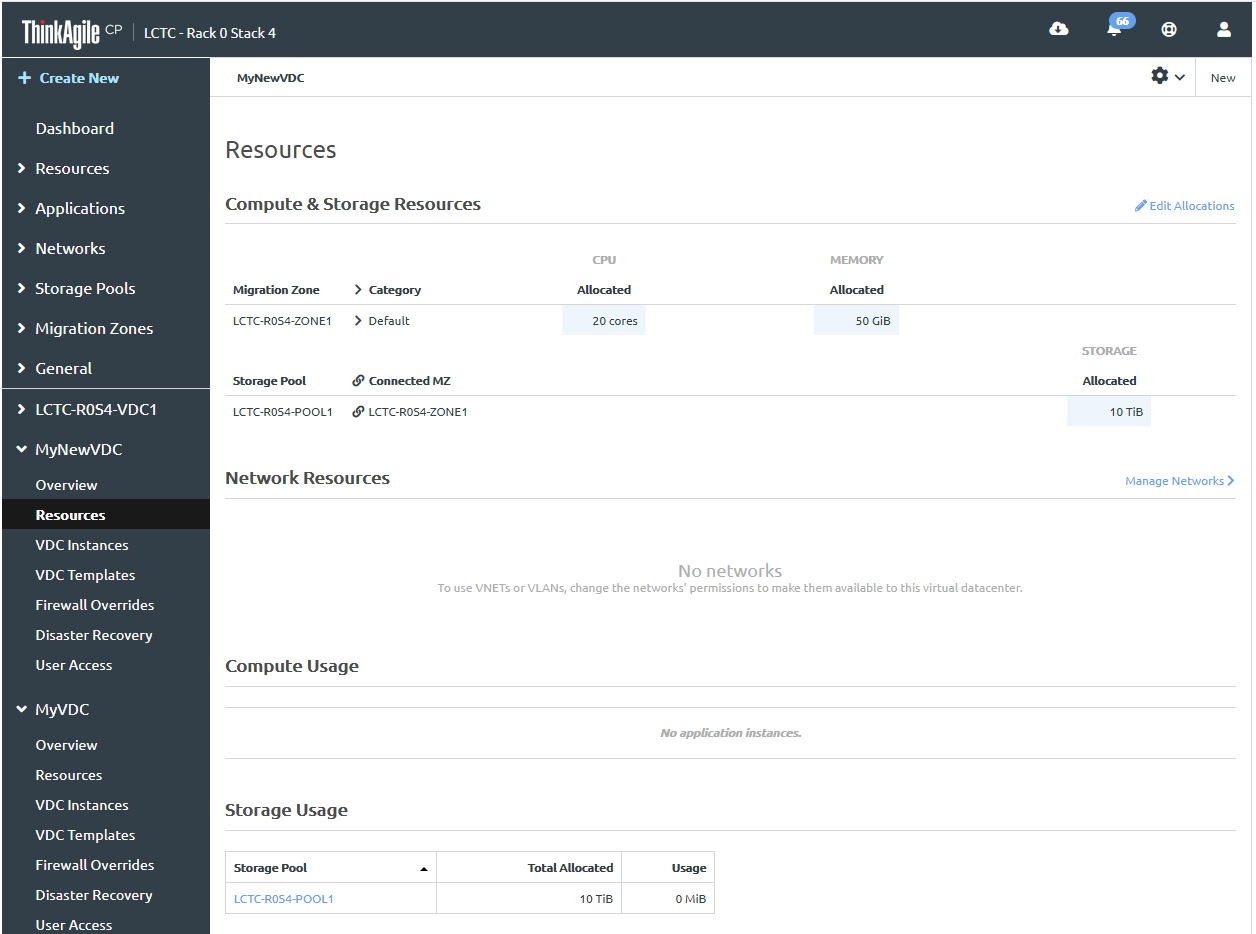
- Before you can run application instances (VMs) on the new VDC, you must allocate network resources (VLANs or VNETs) to the VDC.
For more information about creating VLANs or VNETs, see the following topic:
- Click Manage Networks.

- To assign a specific VLAN or VNET to the new VDC, click on the Actions menu (
 ) next to it. Then select Assign virtual datacenters... from the drop-down menu.Figure 9. Assign virtual datacenters option on Networks page
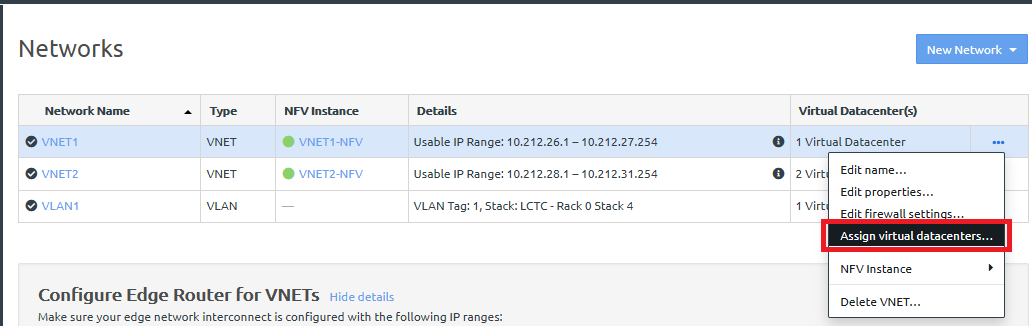
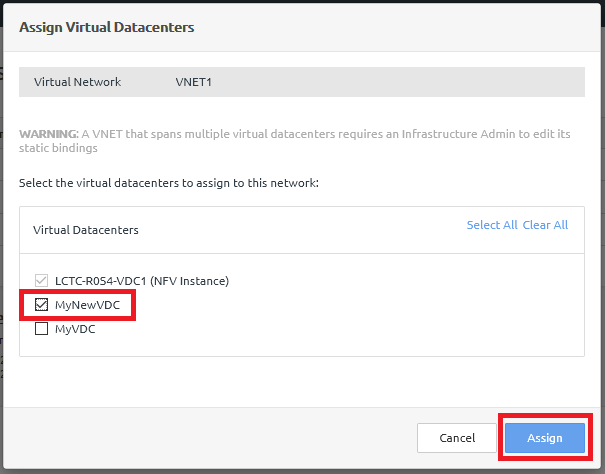
- A dialog box opens. Select the checkbox next to the new VDC to assign it to the specified VNET or VLAN. Then click Assign.
Verify that the network resource allocation is successful. From the left-side navigation menu, expand the menu for the newly created VDC and click Resources. The VLAN or VNET you selected appears in the Network Resources section.
Figure 10. VDC Network Resources
- Click Manage Networks.