Video Recording
Use the information in this topic to select the video recording preference.
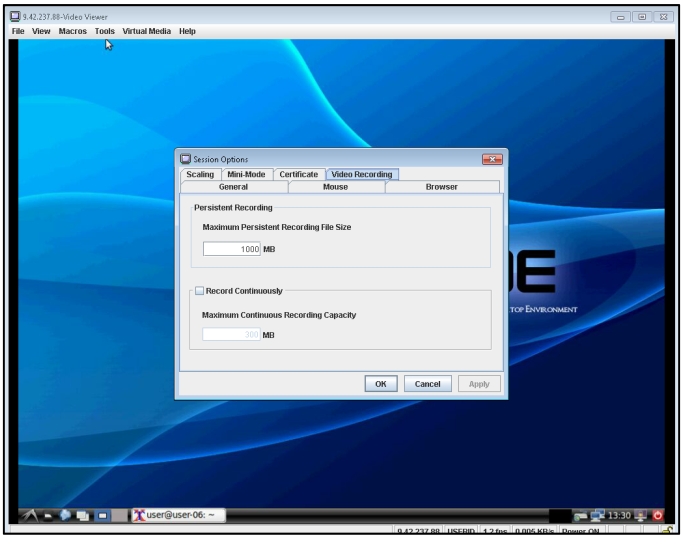
The client contains a built-in video recorder and player. The live recorder can operate the entire length of time a session is in progress. The live recorder can continuously store video in blocks of 30 seconds up to a maximum retained video of 30 minutes. If the maximum retained video limit is exceeded the earliest blocks of video are released. To initiate video recording, complete the following steps:
- In the Video Viewer window click Tools > Session Options.
- In the Session Options window click the Video Recording tab to choose one of the following recording preferences, (as shown in the following illustration).
- Enter the maximum file size for persistent recordings in the Maximum Persistent Recording File Size field.
- Click the Record Continuously check box if continuous recording is in effect; then, enter the maximum space taken by the continuous recording buffer in the Maximum Continuous Recording Capacity field.
- Click OK to save your selection.
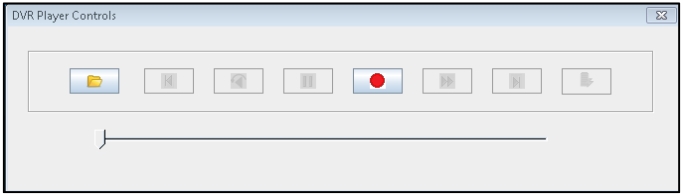
From the Video Viewer window, click Tools > Recorder/Playback Controls to playback the video and operate the recording controls. The DVR Player Controls window is displayed, (as shown in the following illustration).
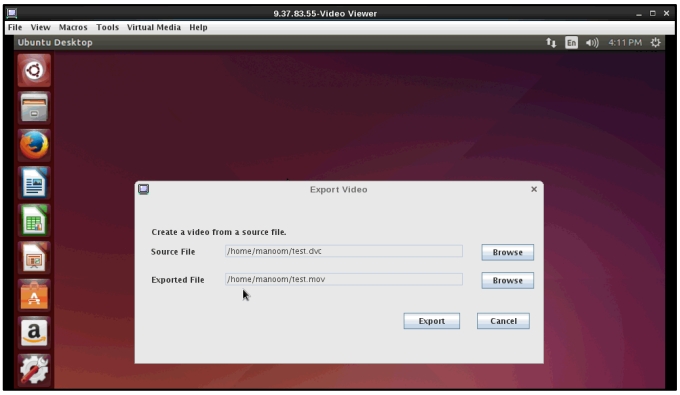
From the Video Viewer window click Tools > Export Video to transform recorded video to a standard type of format that can be played back with commercial products such as Windows Media or Quicktime Player, (as shown as the following illustrations).