Importing operating-system images
Before you can deploy a licensed operating system to managed servers, you must import the image into the XClarity Administrator OS images repository.
About this task
For information about operating system images that you can import and deploy, see Supported operating systems.
For a list of supported base and custom operating systems, see Supported operating systems.
You can import only one image at a time. Wait until the image is displayed in the OS images repository before attempting to import another image. Importing the operating system might take a while.
For ESXi only, you can import multiple ESXi images with same major/minor version to the OS images repository.
For ESXi only, you can import multiple customized ESXi images with same major/minor version and build number to the OS images repository.
- Ensures that there is sufficient space in the OS images repository before importing the operating system. If you do not have sufficient space to import an image, delete an existing image from the repository and attempt to import the new image again.
- Creates one or more profiles of that image and stores the profile in the OS images repository. Each profile includes the OS image and installation options. For more information about predefined OS image profiles, see Operating-system image profiles.
Internet Explorer and Microsoft Edge web browsers have an upload limit of 4 GB. If the file that you are importing is greater than 4 GB, consider using another web browser (such as Chrome or Firefox) or copy the file to a remote file server and import using the Remote import option.
Windows 2025 and Windows 11 24H2 have the same OS identifier. When importing these operating systems, the XClarity Administrator needs to further inspect the images to distinguish between them. As a result, importing these operating systems takes more time and consumes a higher processor usage rate.
Procedure
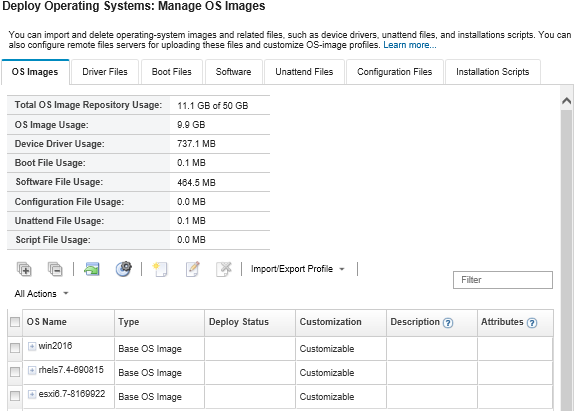
To import an operating-system image into the OS images repository, complete the following steps.
Results

From this page, you can perform the following actions.
Create a remote-file-server profile by clicking the Configure File Server icon (
 ).
).Customize an OS image by clicking the Create Customized Profile icon (
 ).
).Modify an OS image by clicking the Edit icon (
 ).
).Import a customized OS image profile and apply to a base OS image by clicking (see Importing a customized OS image profile).
Delete a selected OS image or customized OS image profile by clicking the Delete icon (
 ).
).Export a selected customized OS image profile by clicking .