Installation du noyau de ferrite
Les informations suivantes vous indiquent comment installer le noyau de ferrite. Selon la configuration, il se peut qu’aucun noyau de ferrite ne soit fixé au câble latéral du système.
À propos de cette tâche
Lisez Conseils d’installation et Liste de contrôle d’inspection de sécurité pour vous assurer que vous travaillez en toute sécurité.
- Une vidéo de cette procédure est disponible sur YouTube.
Procédure
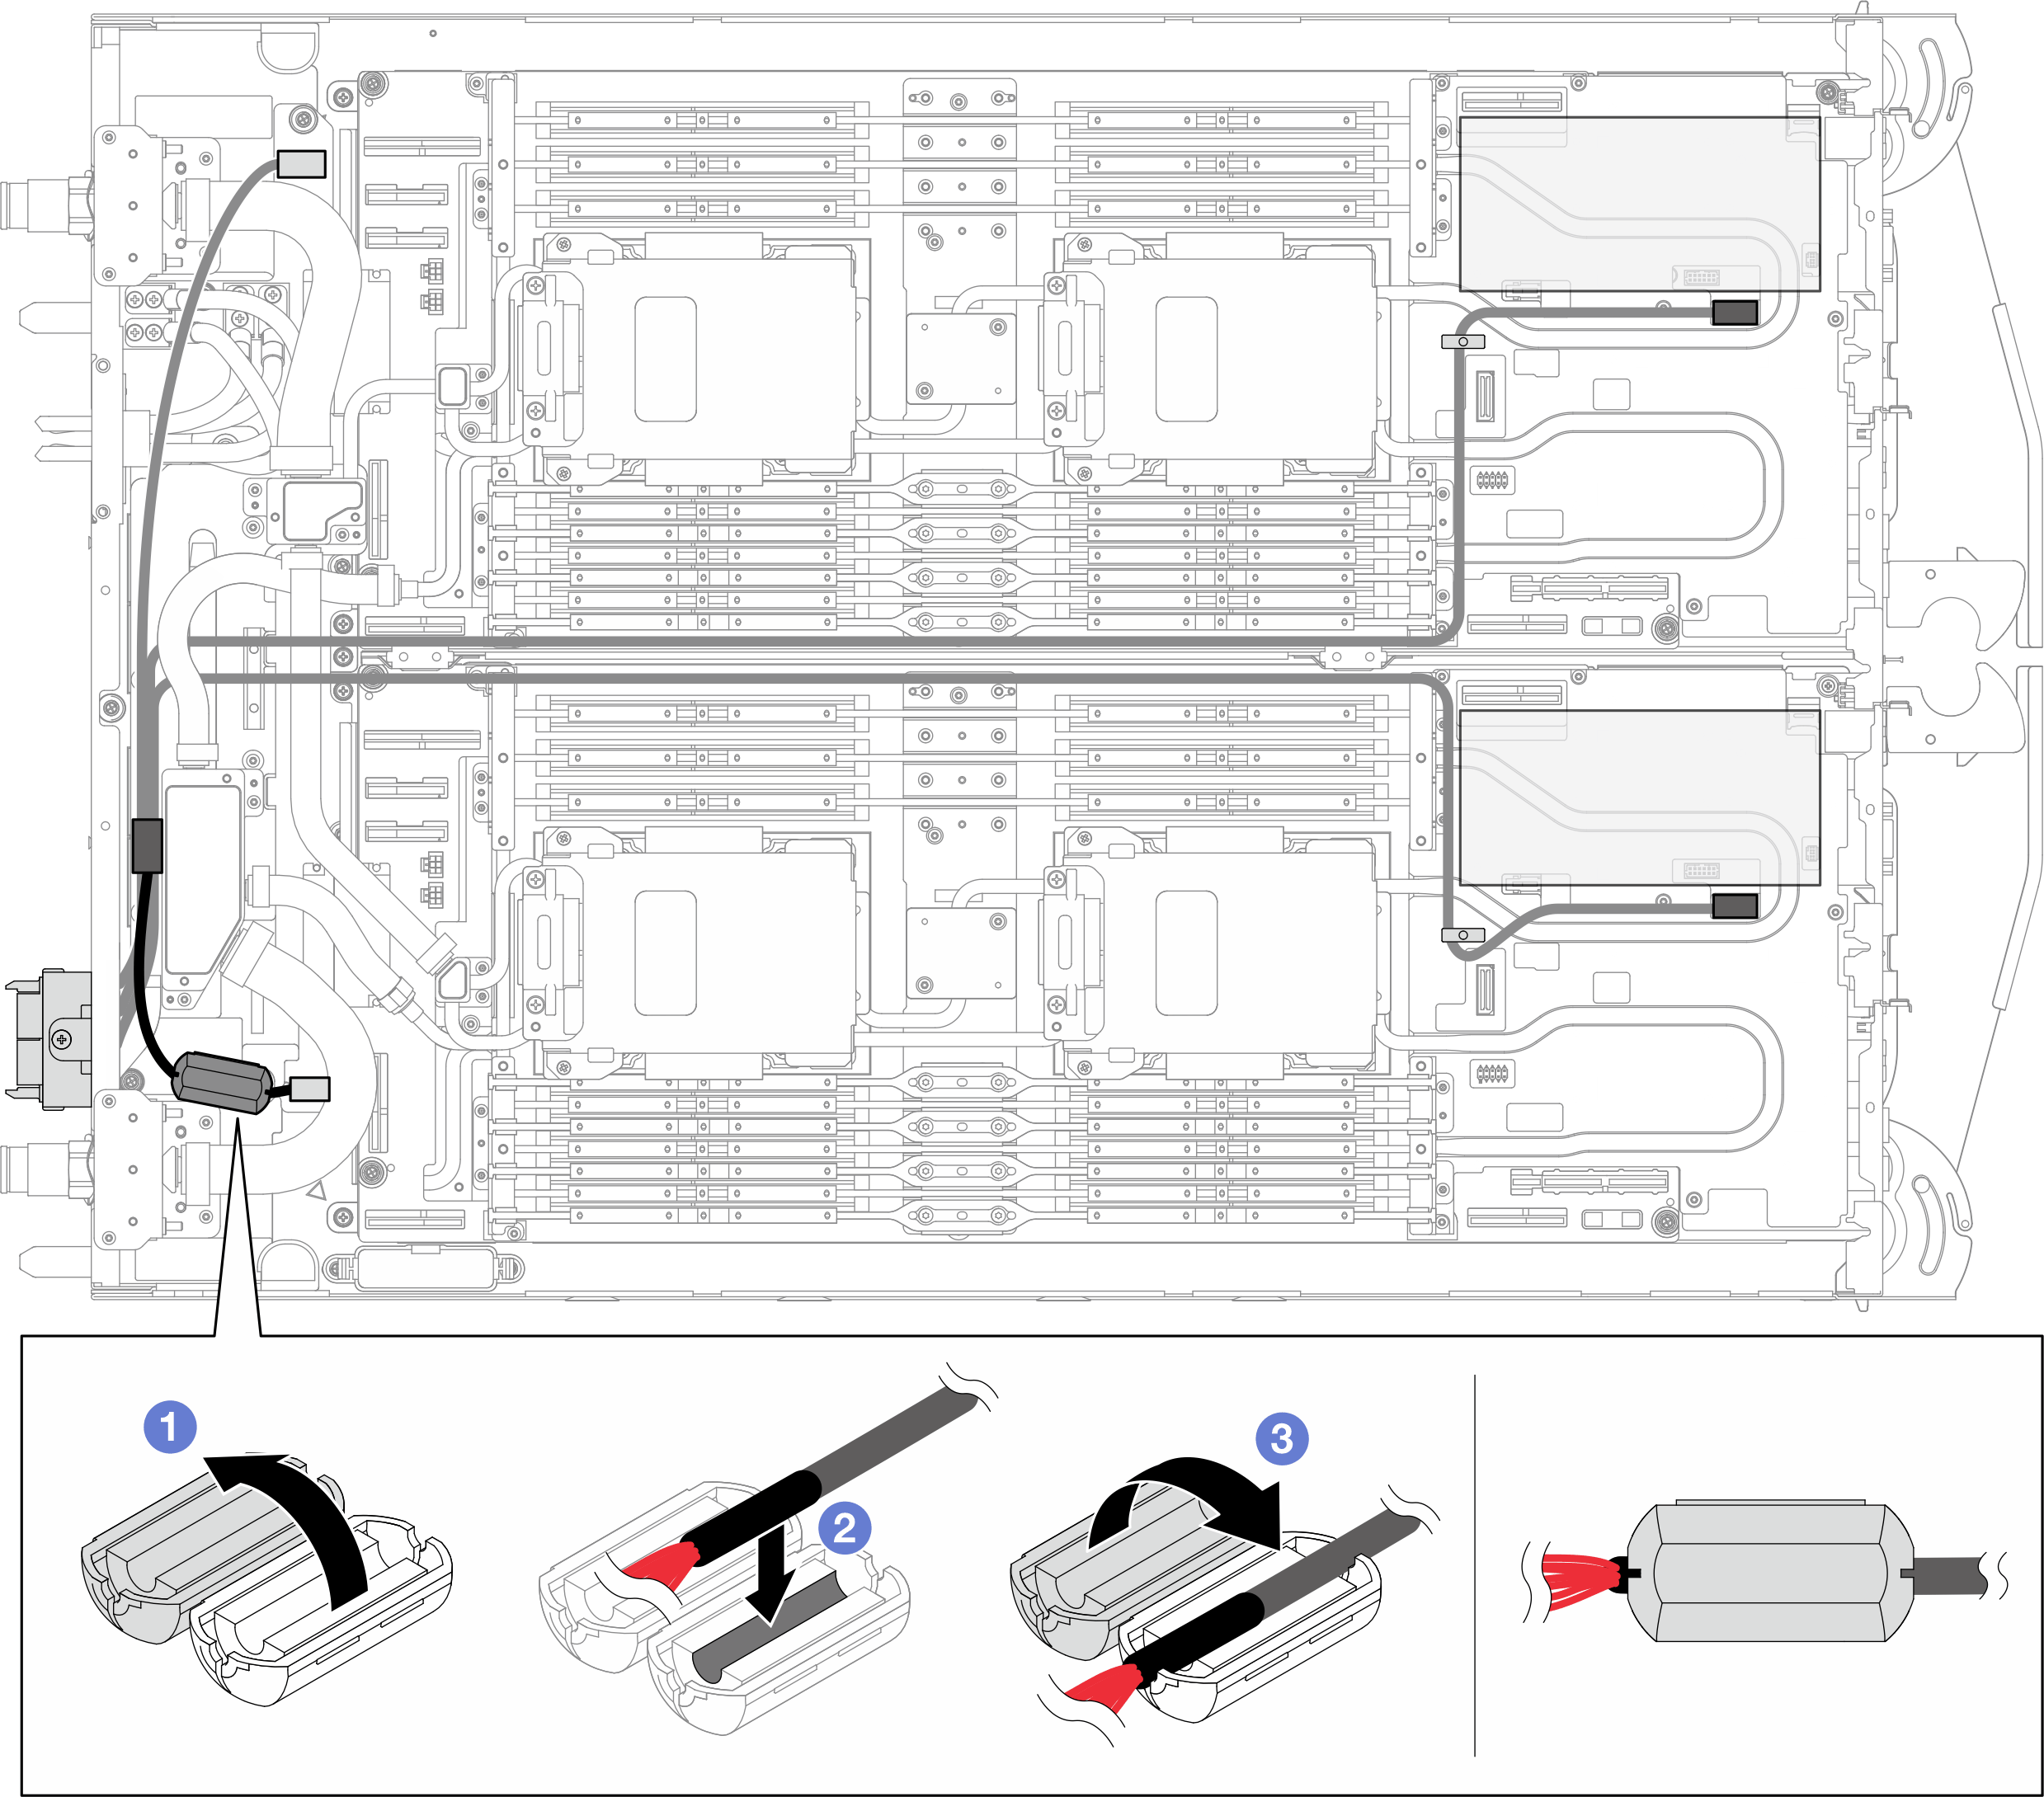
 Ouvrez le noyau de ferrite.
 Insérez le câble latéral dans la rainure située à l’intérieur du noyau de ferrite. Assurez-vous que la partie du câble recouverte de ruban adhésif est enfermée dans le noyau de ferrite.
 Fermez le noyau de ferrite et fixez les clips en position.
Installez les traverses. Voir Installation des traverses.
Installez le cache du plateau. Voir Installation d'un cache de plateau.
Installez le plateau dans le boîtier. Voir Installation d’un plateau dans le boîtier.
- Branchez tous les câbles externes requis sur la solution.RemarqueExercez une force supplémentaire pour connecter les câbles QSFP à la solution.
- Vérifiez le voyant d’alimentation de chaque nœud afin de vous assurer qu’il passe d’un clignotement rapide à un clignotement lent pour indiquer que tous les nœuds sont sous tension.Remarque
La configuration d’E-S partagées nécessite une séquence spécifique de mise sous tension des nœuds. Lors de la mise sous tension du système, allumez d’abord le nœud B, puis allumez le nœud A. Pour plus d’informations, voir Cheminement des câbles d’adaptateur PCIe.