Remove an E3.S 1T middle drive
Use this information to remove an E3.S 1T middle drive.
About this task
Required tools
Screwdriver for PH 1 screws
MID E3.S TOP Gap Pad (SC750 V4)
Attention
Read Installation Guidelines and Safety inspection checklist to ensure that you work safely.
Turn off the corresponding DWC tray that you are going to perform the task on.
Disconnect all external cables from the enclosure.
Use extra force to disconnect QSFP cables if they are connected to the solution.
Watch the procedure
- A video of this procedure is available at YouTube.
Procedure
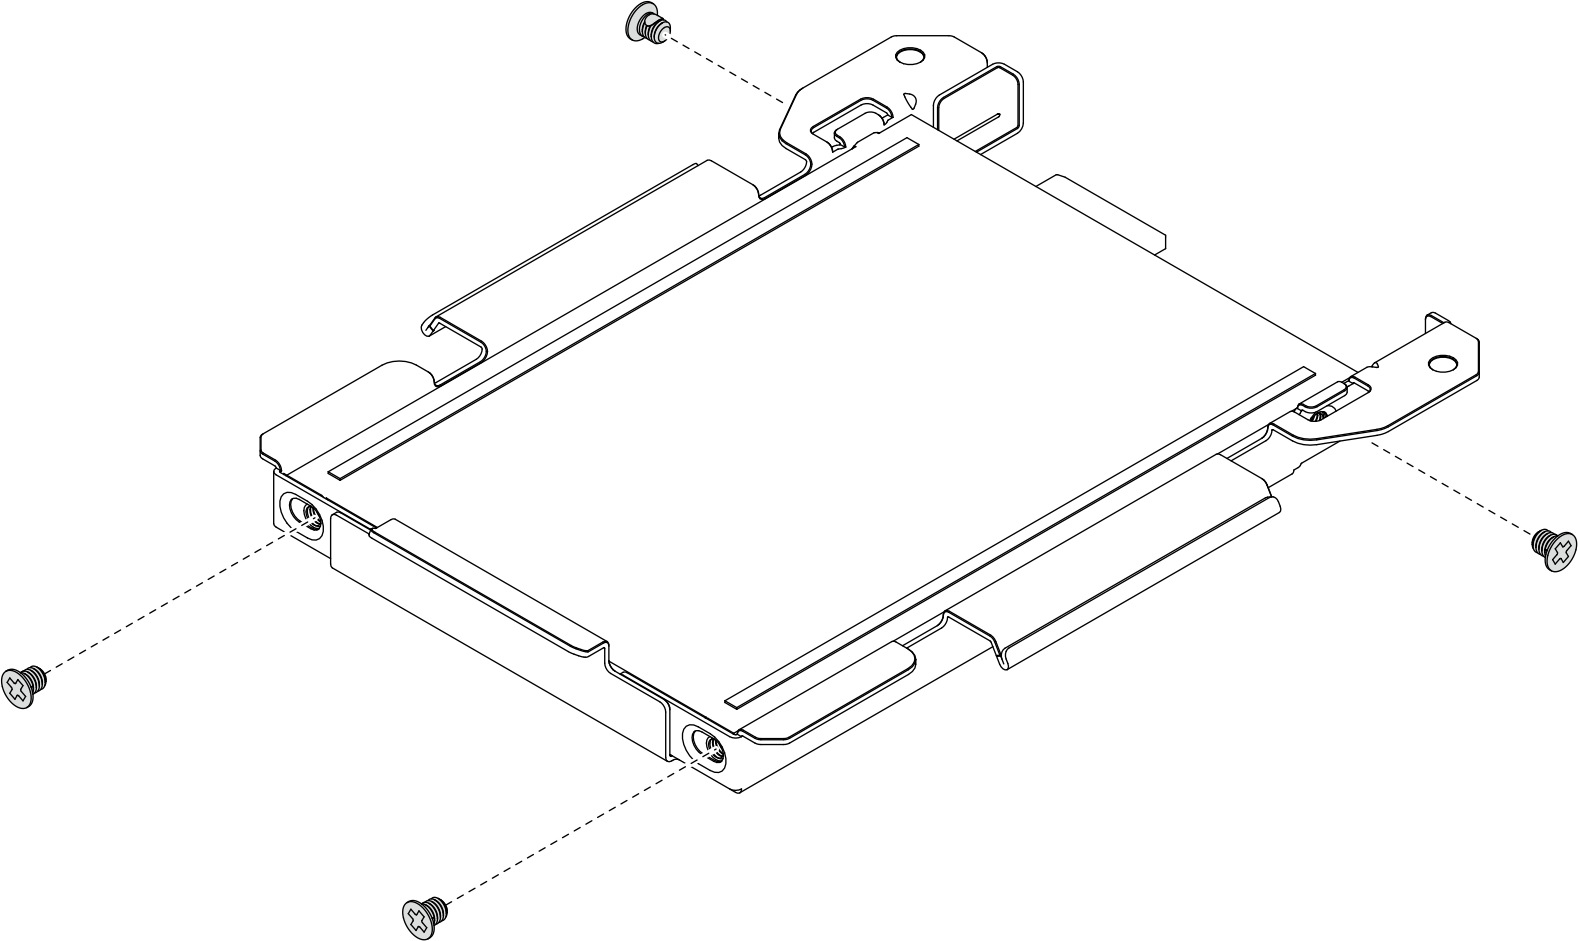
- Remove the four PH 1 screws from the drive cage.Figure 1. Removing screws from the drive cage
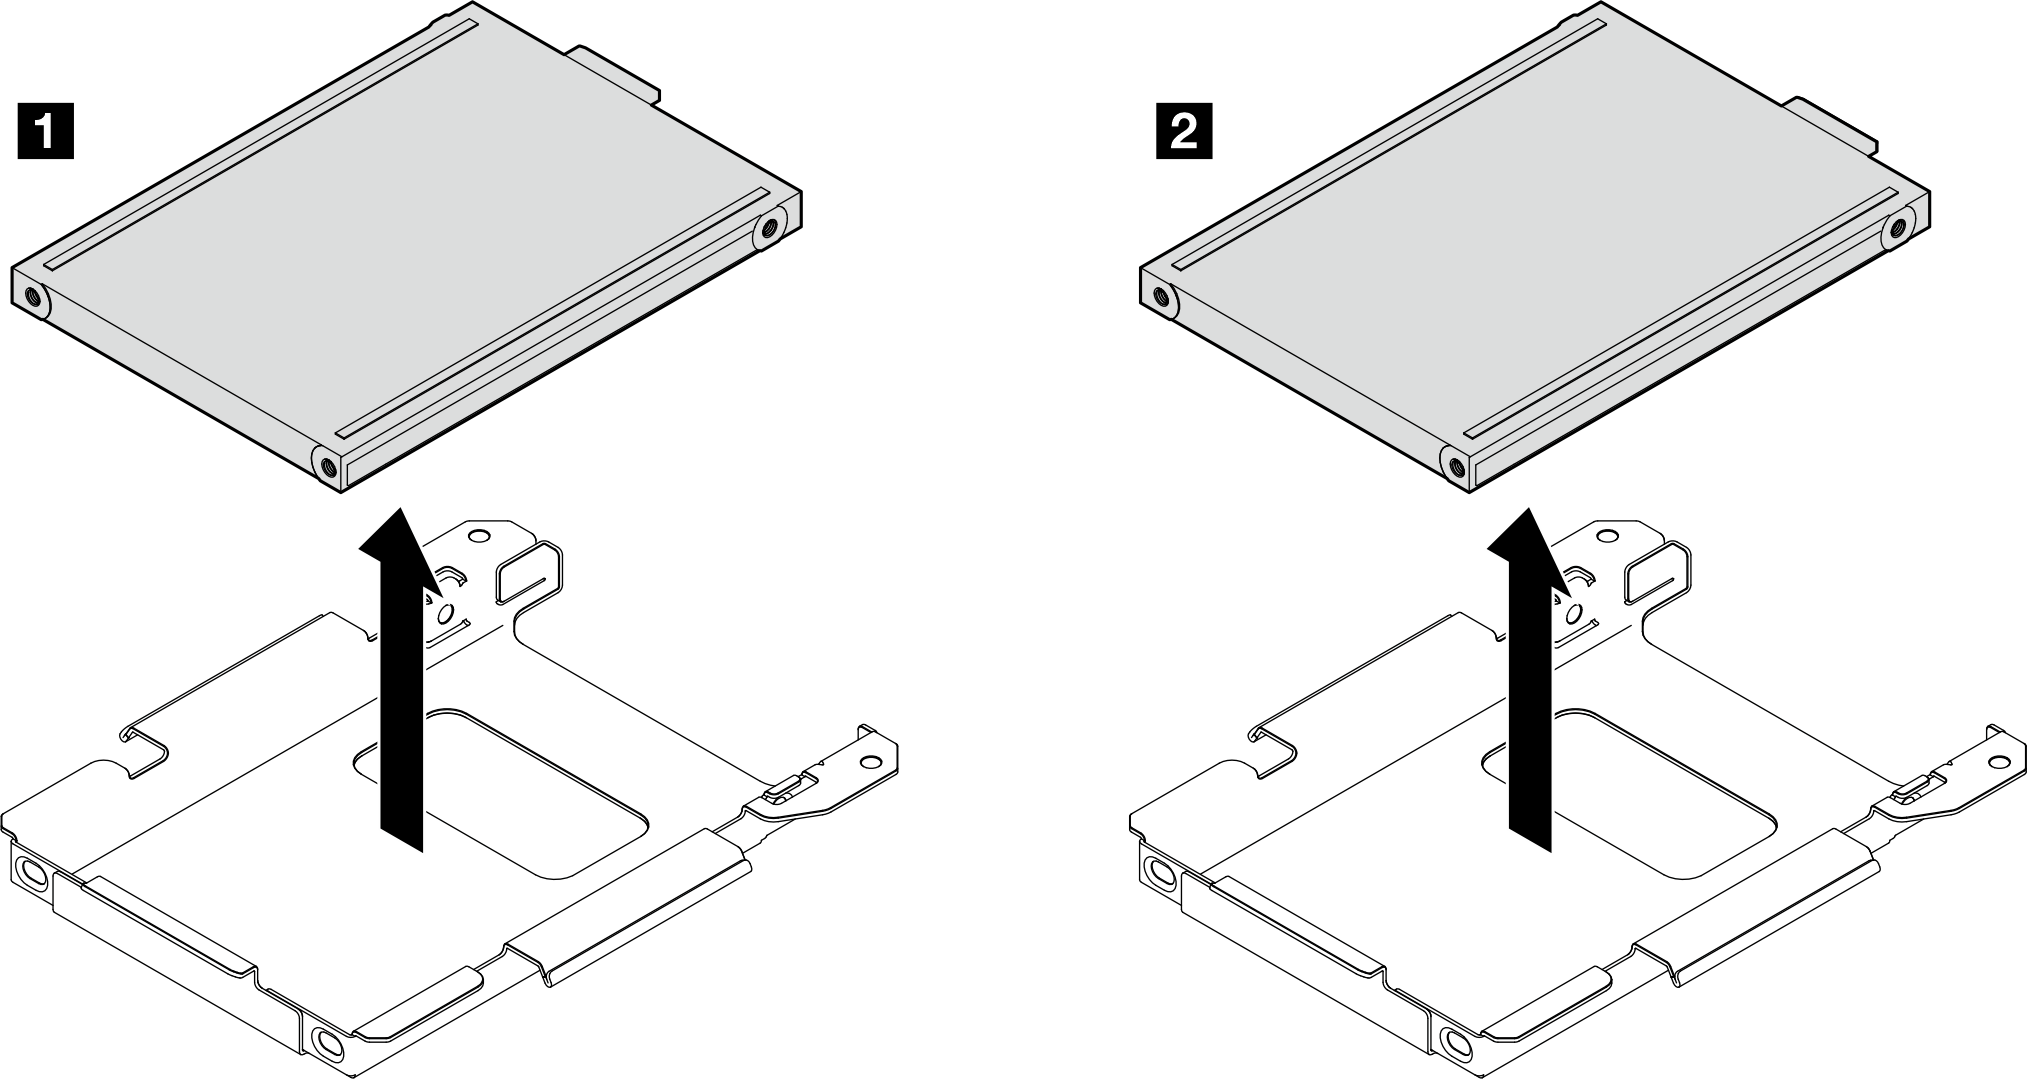
- Remove the drive from the drive cage. (1 Top-side cooling drive, 2 Bottom-side cooling drive)Figure 2. Removing the drive from the drive cage
After you finish
If you are instructed to return the component or optional device, follow all packaging instructions, and use any packaging materials for shipping that are supplied to you.
Give documentation feedback