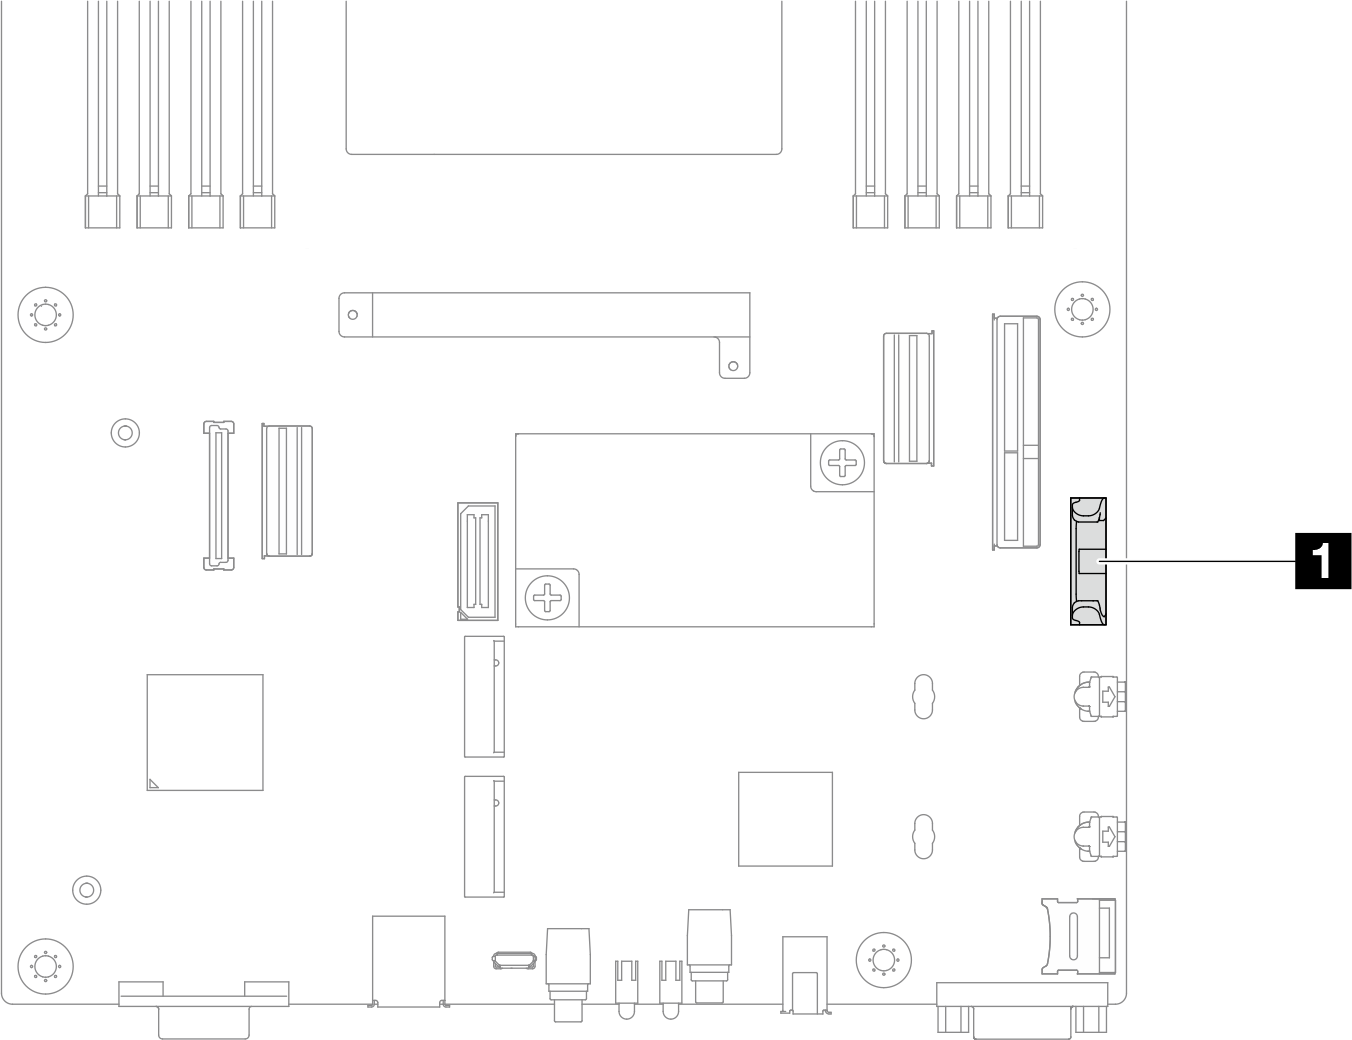
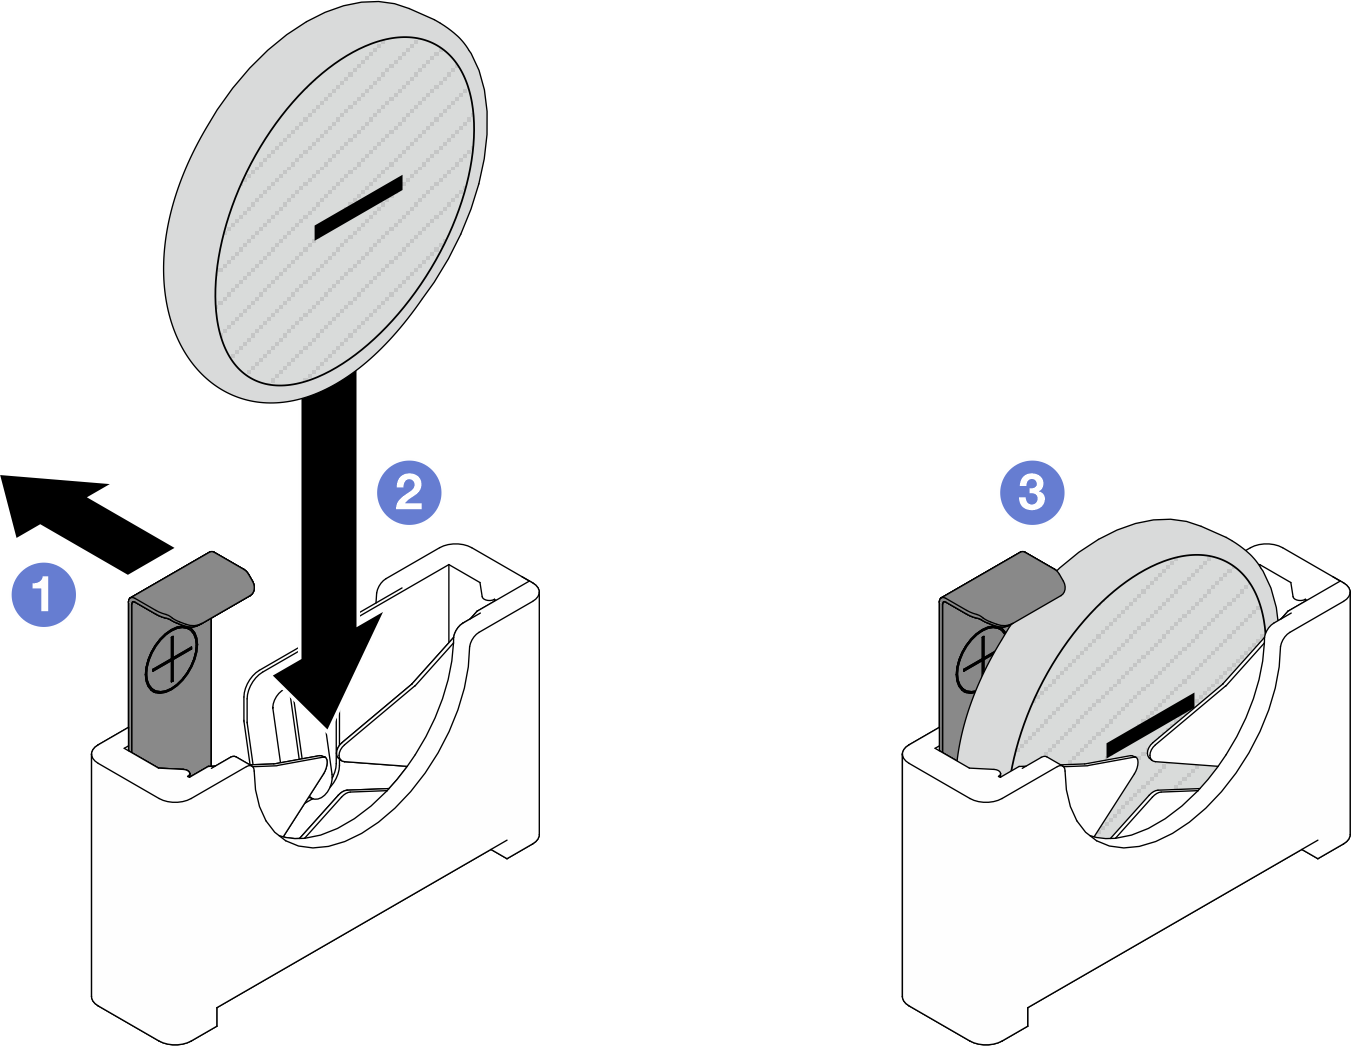
Install a CMOS battery (CR2032)
Follow instructions in this section to install a CMOS battery (CR2032).
About this task
To avoid potential danger, make sure to read and follow the safety information.

When replacing the lithium battery, use only Lenovo specified part number or an equivalent type of battery recommended by the manufacturer. If your system has a module containing a lithium battery, replace it only with the same module type made by the same manufacturer. The battery contains lithium and can explode if not properly used, handled, or disposed of.
- Throw or immerse into water
- Heat to more than 100°C (212°F)
- Repair or disassemble
Dispose of the battery as required by local ordinances or regulations.

Read Installation Guidelines and Safety inspection checklist to make sure that you work safely.
Touch the static-protective package that contains the component to any unpainted metal surface on the node and chassis; then, take the component out of the package and place it on a static-protective surface.
- Make sure to read the following notes carefully before replacing the CMOS battery in the node.
- Do not make CMOS battery in contact with any metal surface during the replacement. Any contact with a metal surface, such as the node and chassis side, can cause damages to the battery.
- When replacing the battery, you must replace it with another CMOS battery of the exact same type (CR2032) made by the same manufacturer.
- After replacing the battery, make sure to reconfigure the node and reset the system date and time.
- Dispose of the battery as required by local ordinances or regulations.
Procedure
After you finish
- Reconnect all the required cables to the drive backplane; then, reinstall the drive cage assembly to the node (see E3.S drive backplane cable routing and Install a drive cage assembly).
- Make sure that all the required cables are routed and connected correctly; then, reinstall the top cover (see Install the top cover).
- Reinstall the node into the chassis (see Install a node to the chassis).
- Reinstall all drives and drive fillers (if any) to the node (see Install a hot-swap drive).
- Make sure that the required power supply units are installed and power cords are connected; then, power on the node (see Install a hot-swap power supply and Power on the node).
- Proceed to complete the parts replacement (see Complete the parts replacement).
- Set the date, time, and any passwords via the Setup Utility. After the CMOS battery installation, the node must be reconfigured, and the system date and time must be reset.
Demo video


