Install a hot-swap solid-state drive
Use this information to install a hot-swap solid-state drive. This section applies to 7mm 2.5-inch SATA/NVMe and 15mm 2.5-inch NVMe solid-state drives.
About this task
Attention
Read the Installation Guidelines to ensure that you work safely.
Touch the static-protective package that contains the drive to any unpainted metal surface on the solution; then, remove the drive from the package and place it on a static-protective surface.
The following notes describe the type of drives that the compute node supports and other information that you must consider when you install a drive. For a list of supported drives, see Lenovo ServerProven website.
- Locate the documentation that comes with the drive and follow those instructions in addition to the instructions in this chapter.
- You can install up to two 7mm 2.5-inch SATA/NVMe solid-state drives or one 15mm 2.5-inch NVMe solid-state drive into each drive cage.
- The electromagnetic interference (EMI) integrity and cooling of the solution are protected by having all bays and PCI and PCIe slots covered or occupied. When you install a drive, PCI, or PCIe adapter, save the EMC shield and filler panel from the bay or PCI or PCIe adapter slot cover in the event that you later remove the device.
- For a complete list of supported optional devices for the node, see Lenovo ServerProven website.
Procedure
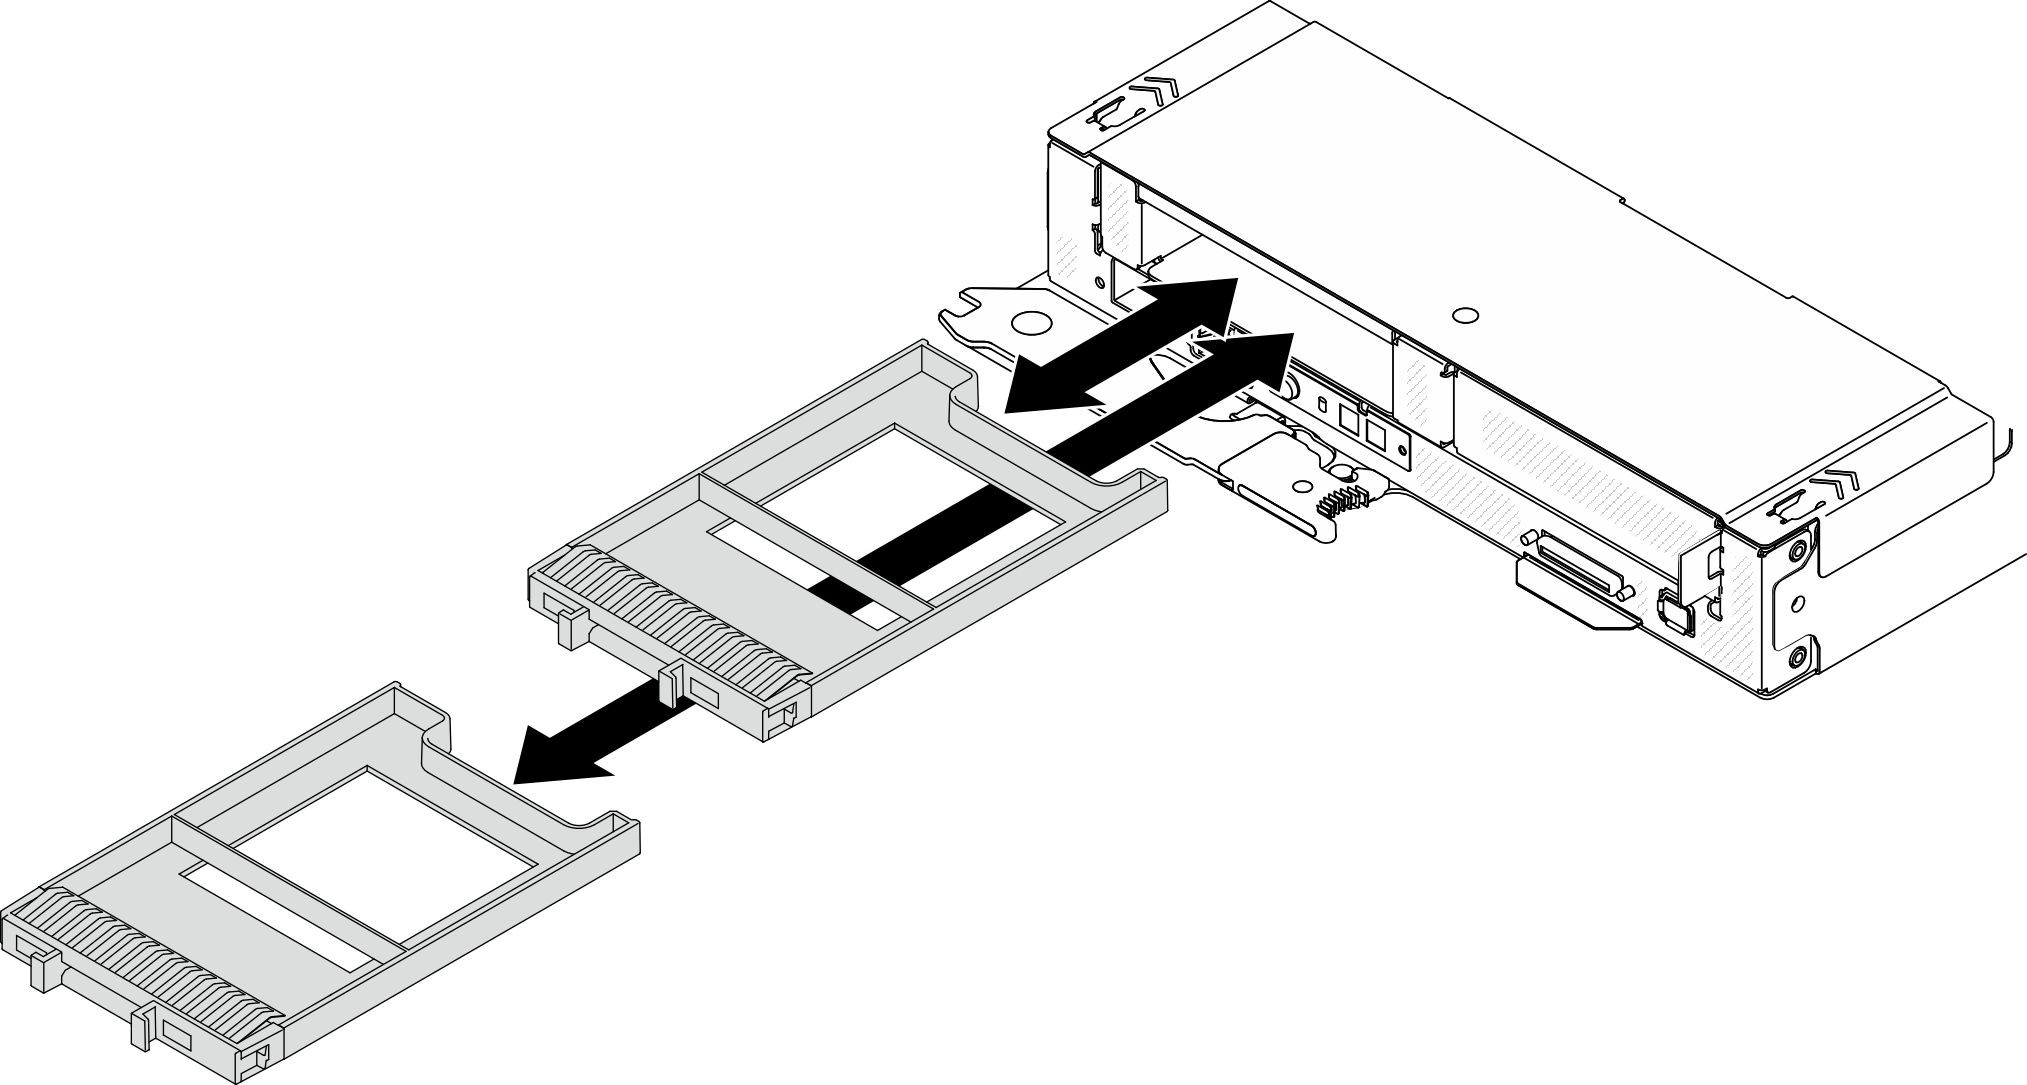
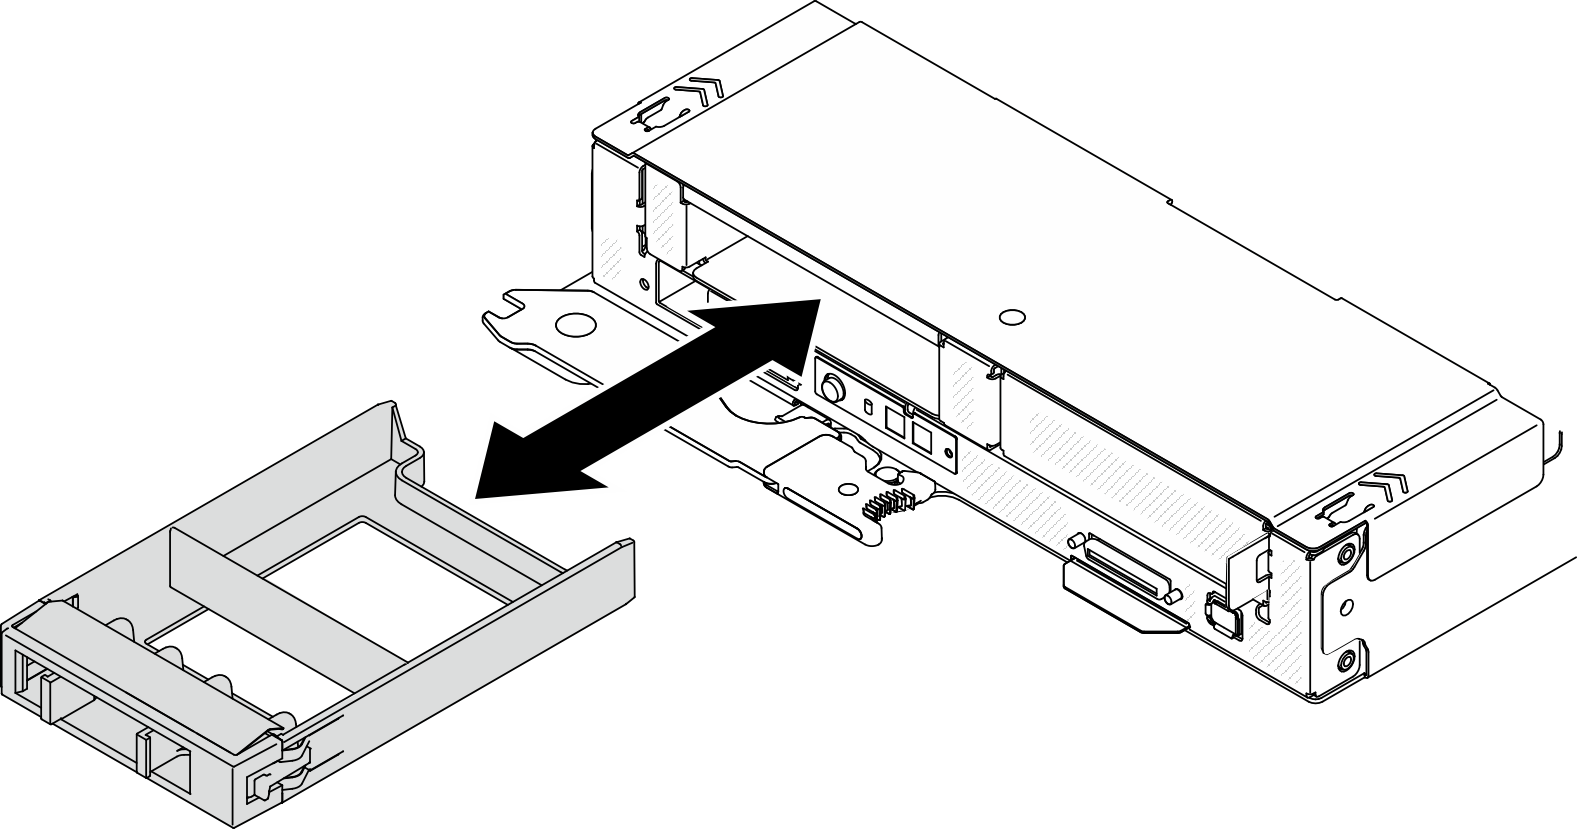
- If a drive filler has been installed in the drive bay, remove it.Figure 1. 7mm / 15mm solid-state drive fillers removal
- Based on your configuration, follow the corresponding procedures to install a 7mm 2.5-inch SATA/NVMe or 15mm 2.5-inch NVMe solid-state drive.
Install a 7mm 2.5-inch SATA/NVMe solid-state drive:
 Make sure that the drive handle is in the open position. Then, align the drive with the guide rails in the bay and gently push the drive into the bay until the drive stops.
 Rotate the drive handle to the fully closed position until the handle latch clicks.Figure 2. 7mm solid-state drive installation
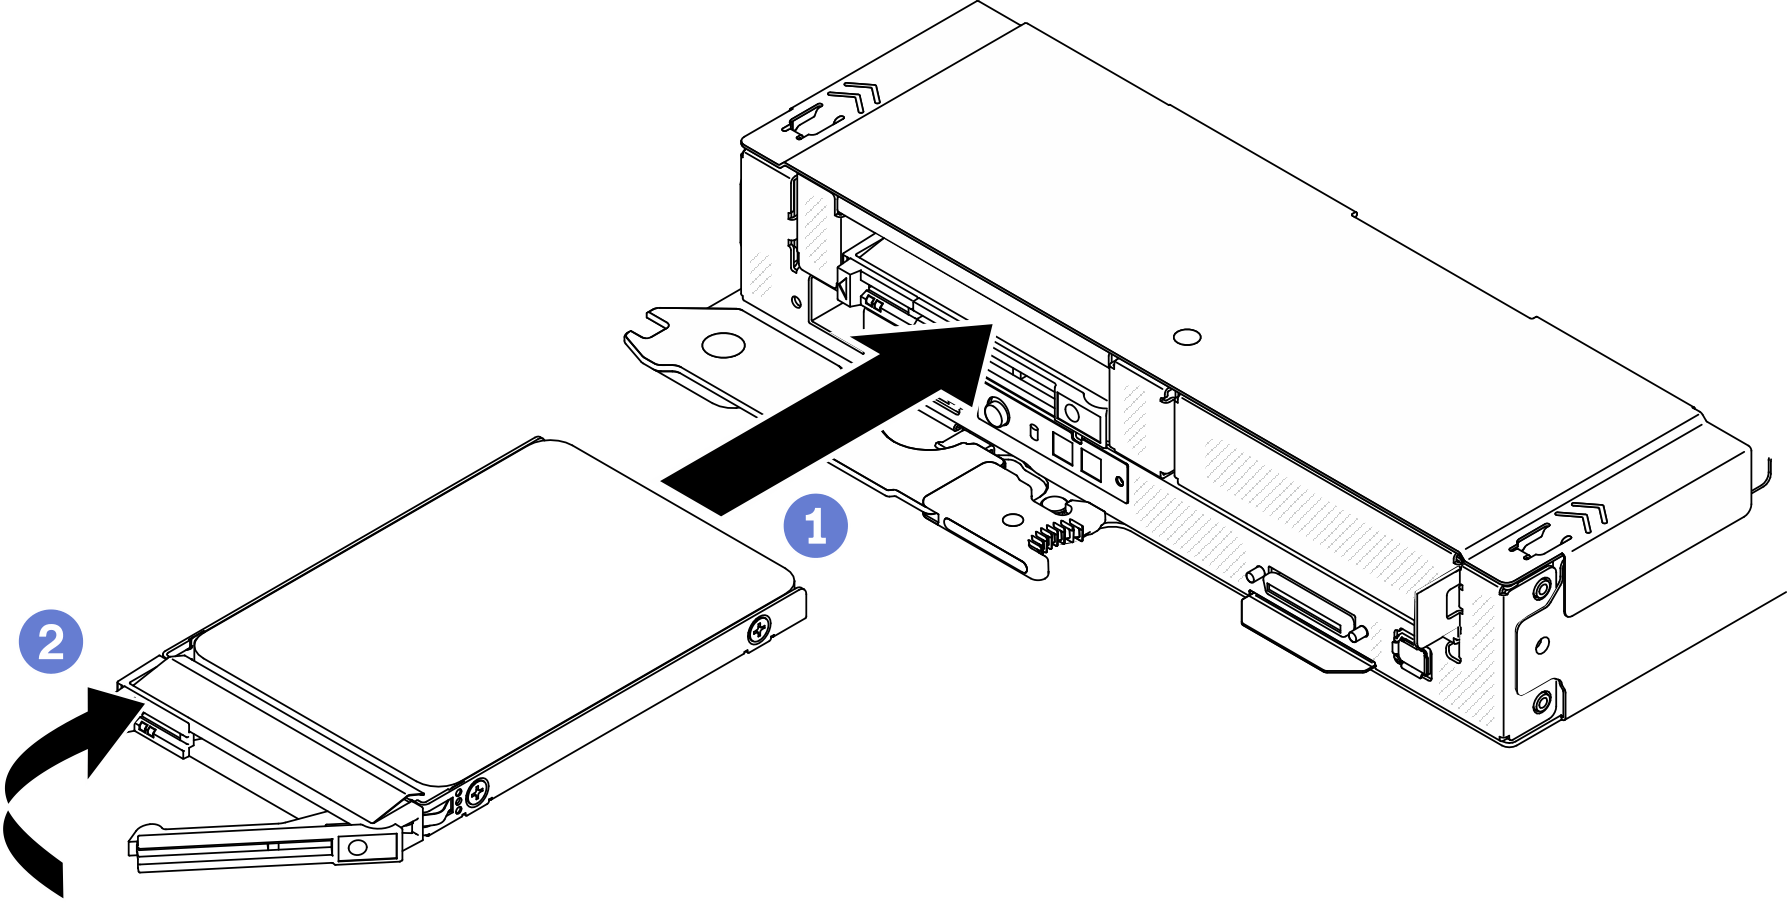
Install a 15mm 2.5-inch NVMe solid-state drive:
- Make sure that the drive handle is in the open position. Then, align the drive with the guide rails in the bay and gently push the drive into the bay until the drive stops.
- Rotate the drive handle to the fully closed position until the handle latch clicks.Figure 3. 15mm solid-state drive installation

Demo video
Give documentation feedback