Remove the drive cage assembly
Use this information to remove the drive cage assembly.
About this task
Attention
Read the Installation Guidelines to ensure that you work safely.
Procedure
Based on your existing configuration, follow the corresponding procedures to remove a 7mm or 15mm drive cage assembly.
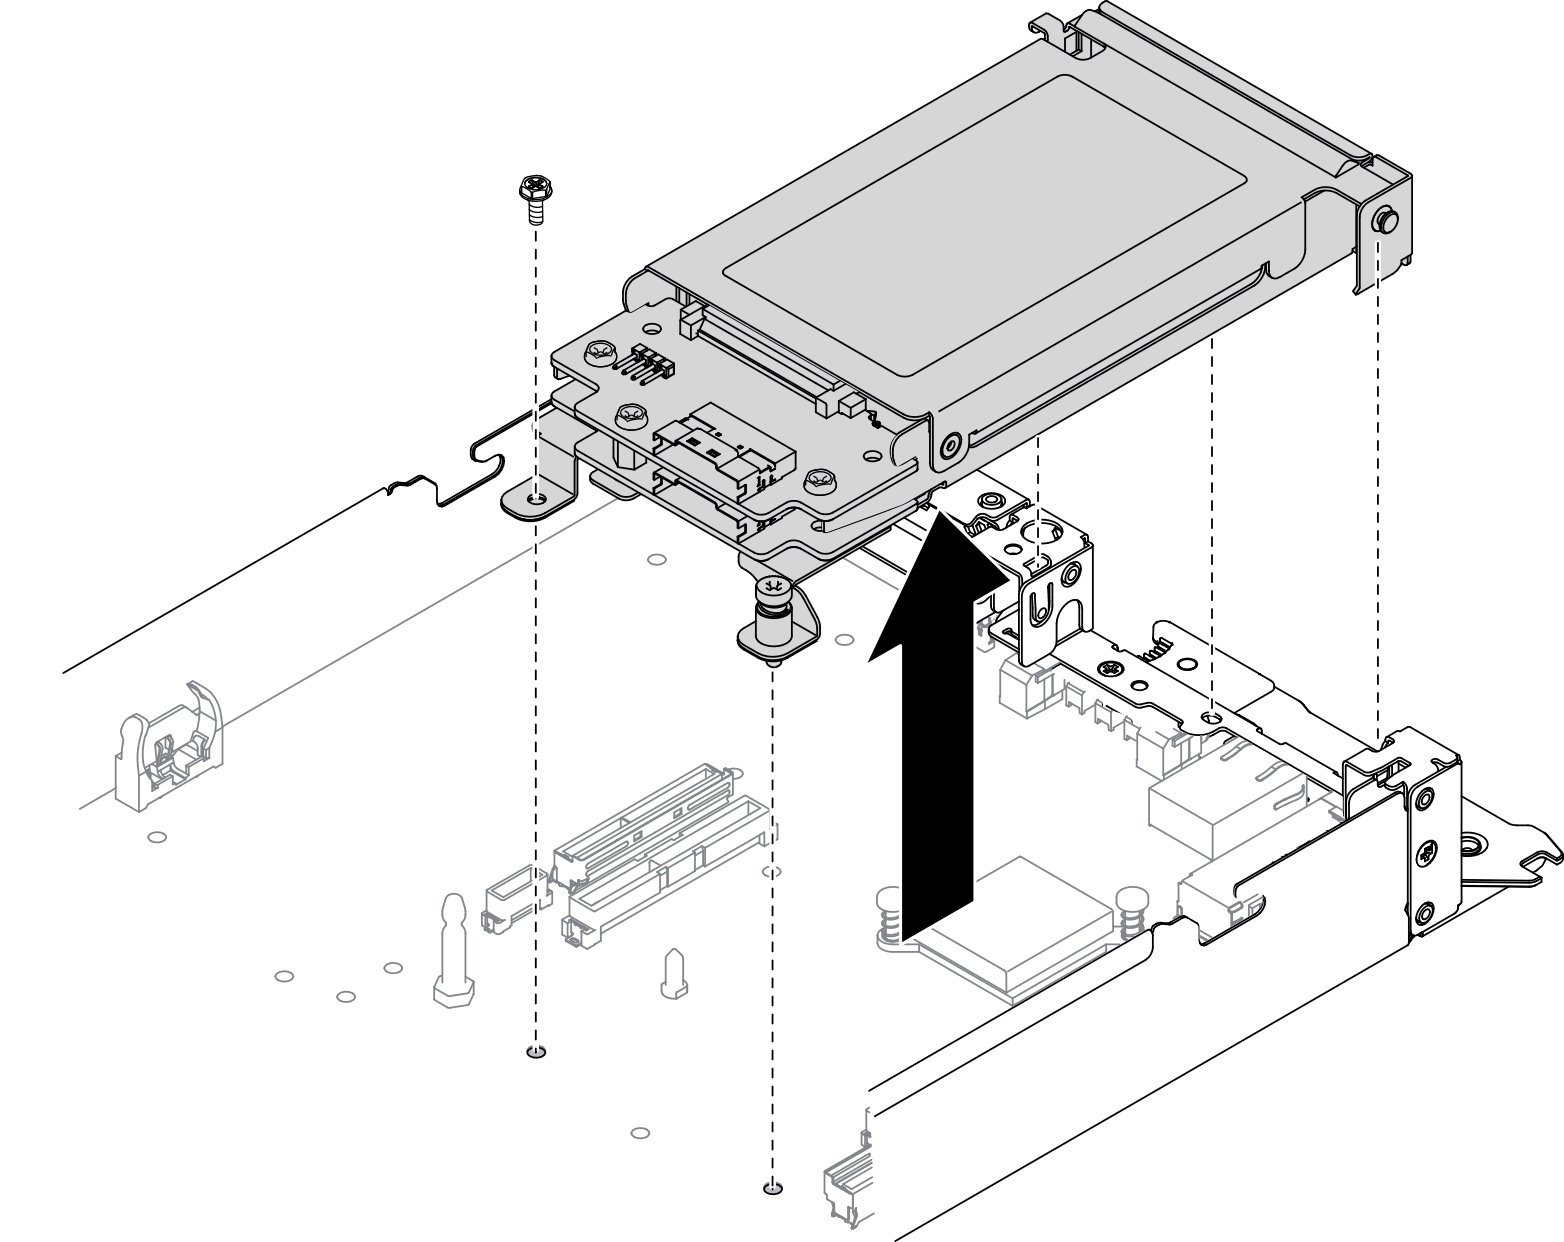
Remove a 7mm drive cage assembly:
- Lift the drive cage assembly out of the compute node tray.Figure 1. 7mm drive cage assembly removal
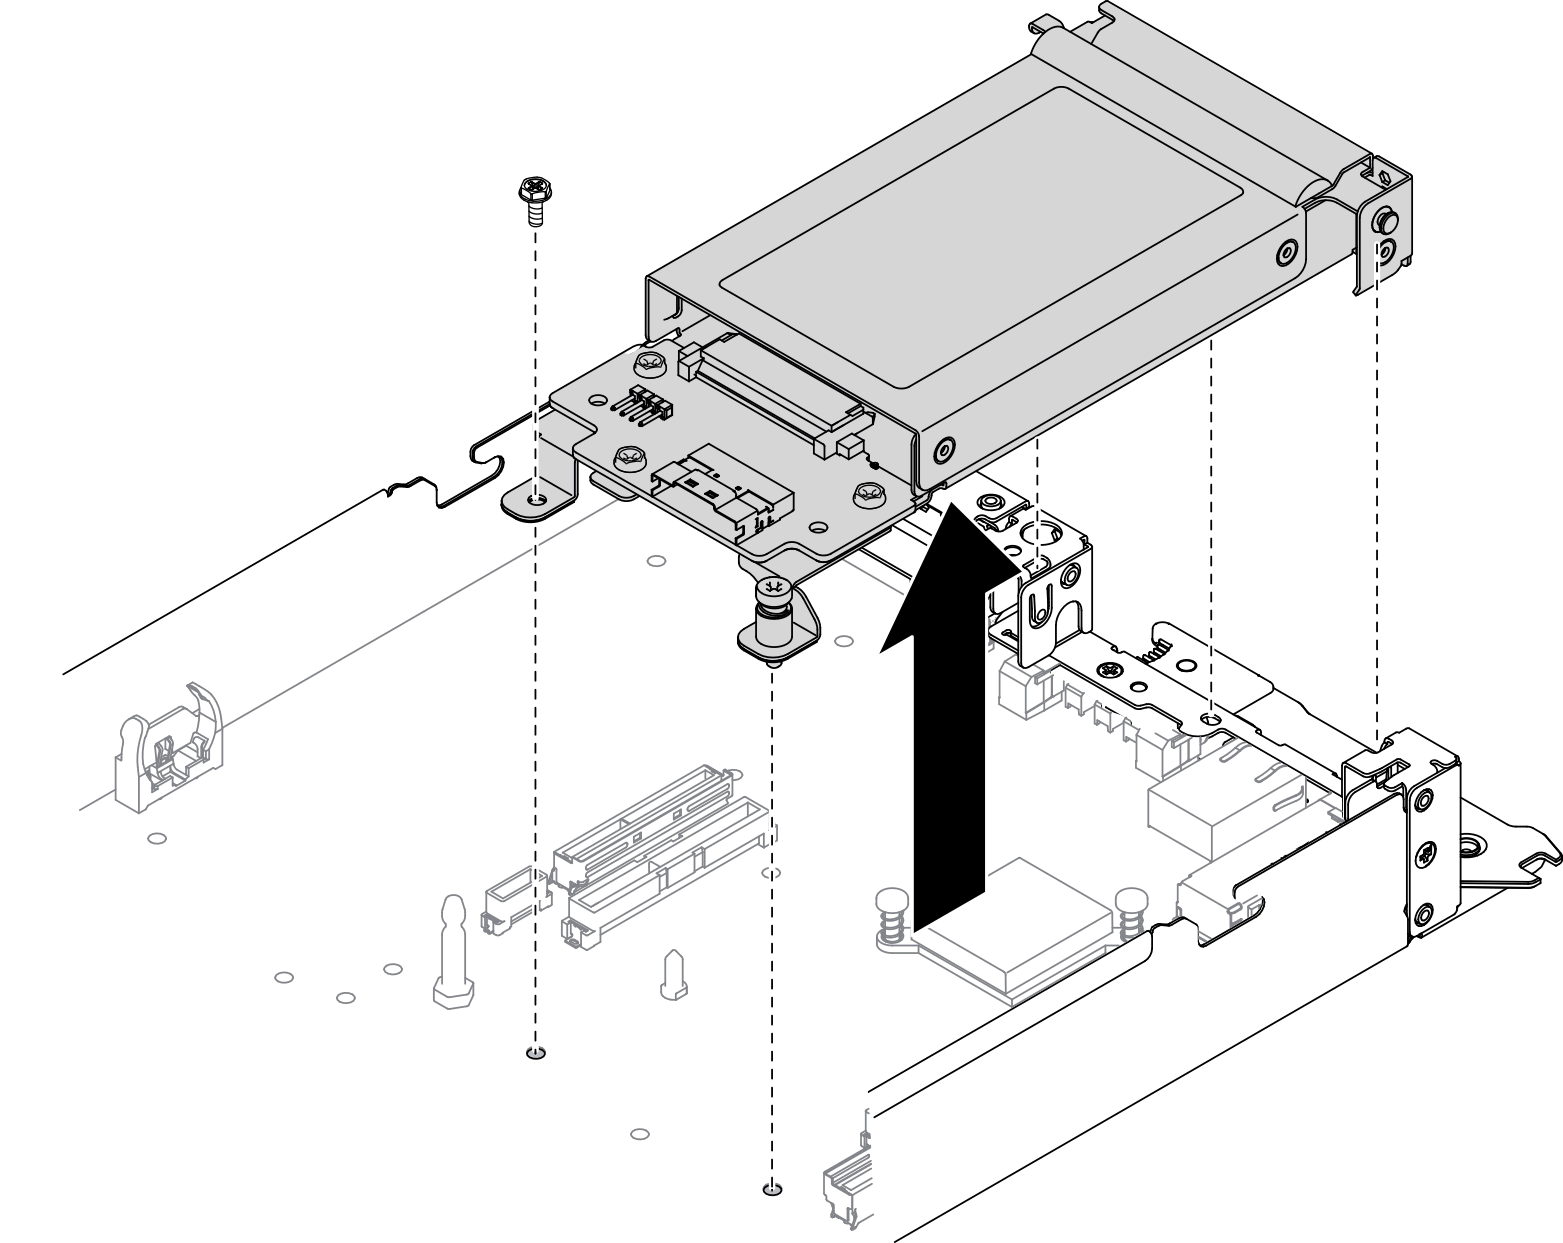
Remove a 15mm drive cage assembly:
- Lift the drive cage assembly out of the compute node tray.Figure 2. 15mm drive cage assembly removal
Demo video
Give documentation feedback