Install an M.2 drive into the M.2 backplane
Use this information to install an M.2 drive into the M.2 backplane.
About this task
To avoid potential danger, read and follow the following safety statements.
- S001
 DANGERdangerElectrical current from power, telephone, and communication cables is hazardous.
To avoid a shock hazard:
- Connect all power cords to a properly wired and grounded electrical outlet/source.
- Connect any equipment that will be attached to this product to properly wired outlets/sources.
- When possible, use one hand only to connect or disconnect signal cables.
- Never turn on any equipment when there is evidence of fire, water, or structural damage.
- The device might have more than one power cord, to remove all electrical current from the device, ensure that all power cords are disconnected from the power source.
Attention
Read the Installation Guidelines to ensure that you work safely.
Procedure
Figure 1. M.2 drive installation
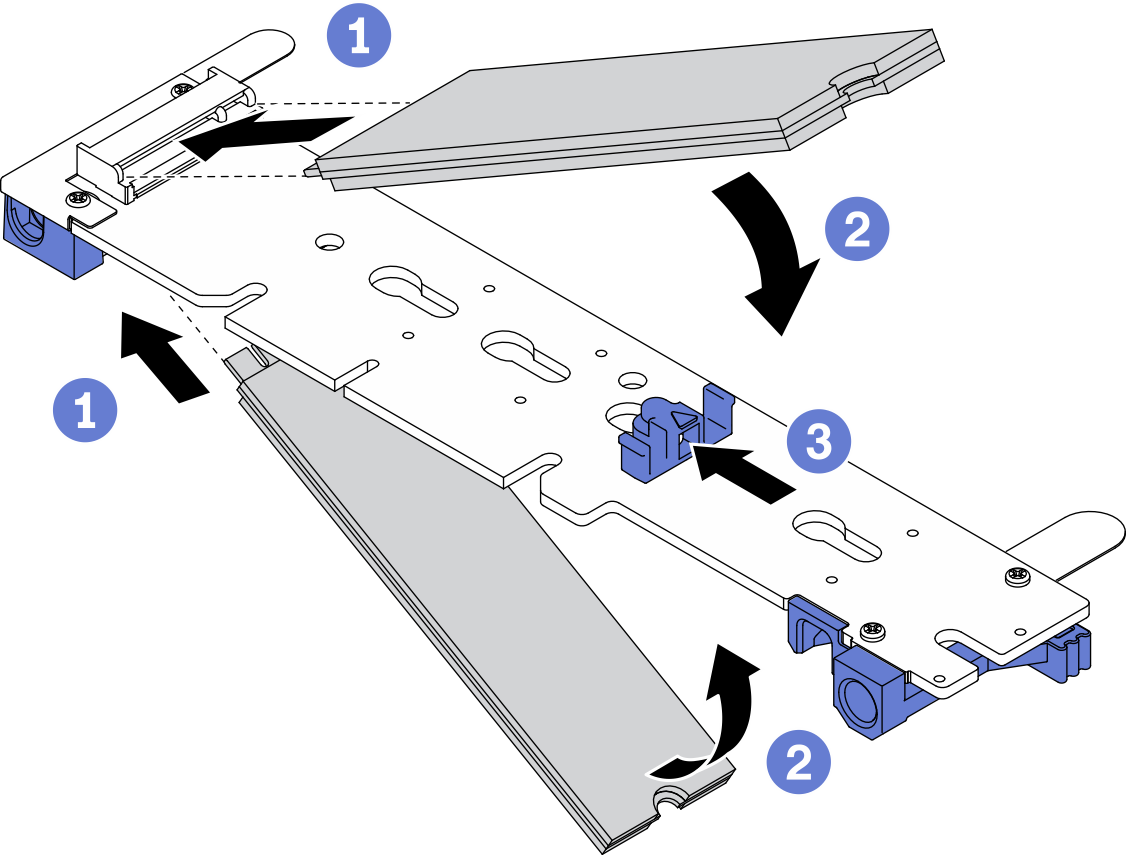
Install an M.2 drive into the M.2 backplane.
 Locate the connector on each side of the M.2 backplane and insert the M.2 drive at an angle (approximately 30 degrees) into the connector.
 Rotate the M.2 drive until the notch catches on the lip of the retainer.
 Slide the retainer forward (toward the connector) to secure the M.2 drive in the M.2 backplane.NoteSome M.2 backplanes support two identical M.2 drives. When two drives are installed, align and support both drives when sliding the retainer forward to secure the drives.
Attention
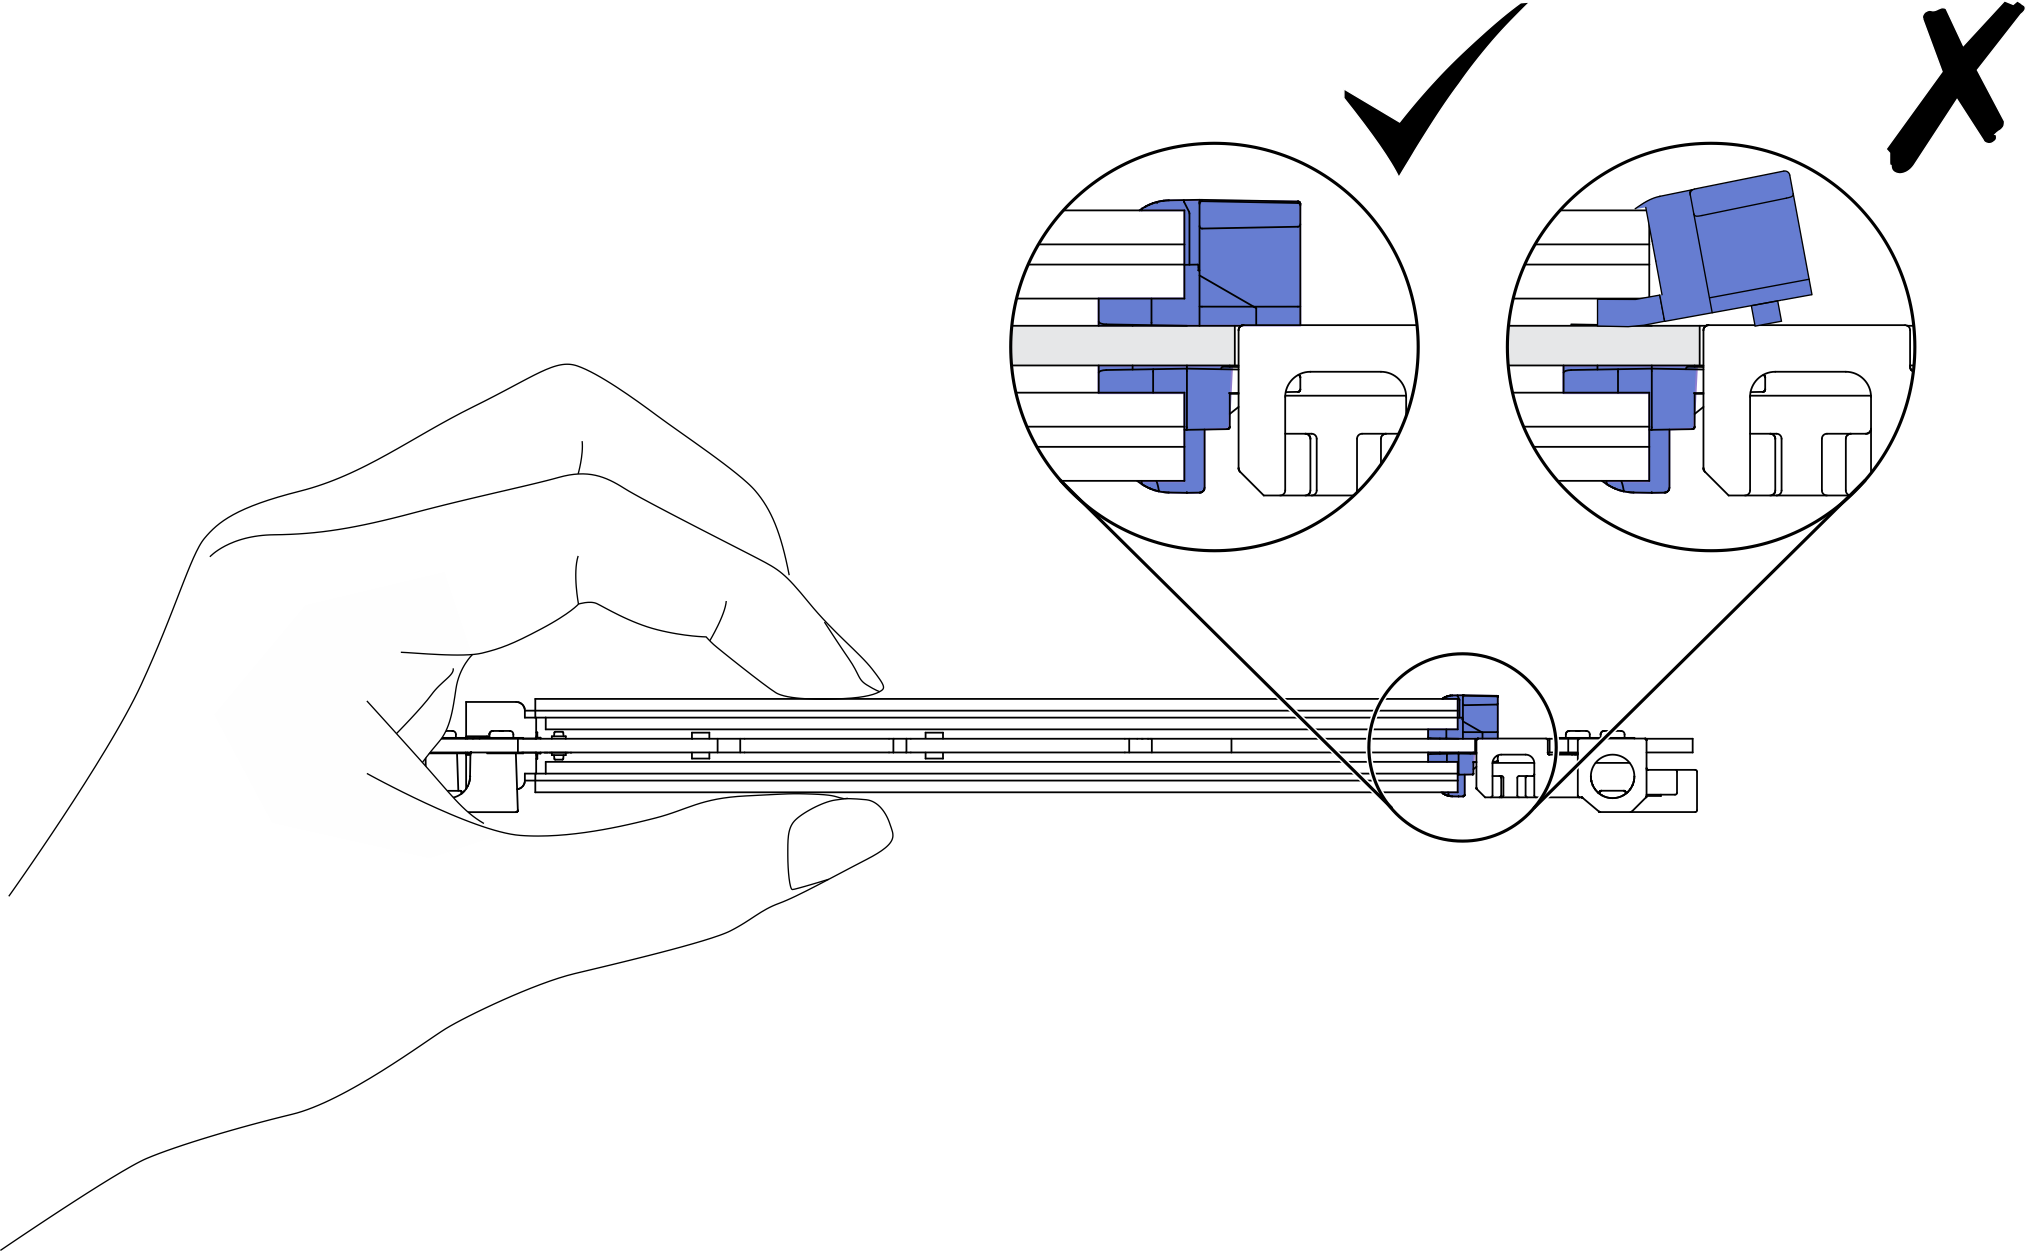
When sliding the retainer forward, make sure the two nubs on the retainer enter the small holes on the M.2 backplane. Once they enter the holes, you will hear a soft “click” sound.
Figure 2. M.2 drive installation
Demo video
Give documentation feedback