Change the processor air baffle combination for 1U heat sink
Follow instructions in this section to change the processor air baffle combination for the configurations with 1U heat sink.
About this task
Attention
Read Installation Guidelines and Safety inspection checklist to ensure that you work safely.
Identify the parts of the processor air baffle supporting different configurations with 1U heat sink.

| 1 Riser 1 filler | 3 Middle filler |
| 2 Riser 2 filler |
| PCIe riser 2 | ||||
| With FL adapter | No FL adapter | No adapter | ||
| PCIe riser 1 | With FL adapter | 2 | 2 | |
| No FL adapter | 1 | 1 2 3 | 1 2 3 | |
| No adapter | 1 | 1 2 3 | 1 2 3 | |
Procedure
- If necessary, remove or install the riser 1 filler.
- To remove the filler, loosen the screw that secures the filler; then, grasp and lift the filler from the air baffle.
- To install the filler, align the filler with the edge of the air baffle, and lower the filler down until the guide pins on the bottom of the filler are seated in place; then, fasten one screw to secure the filler.
Figure 1. Replacing the riser 1 filler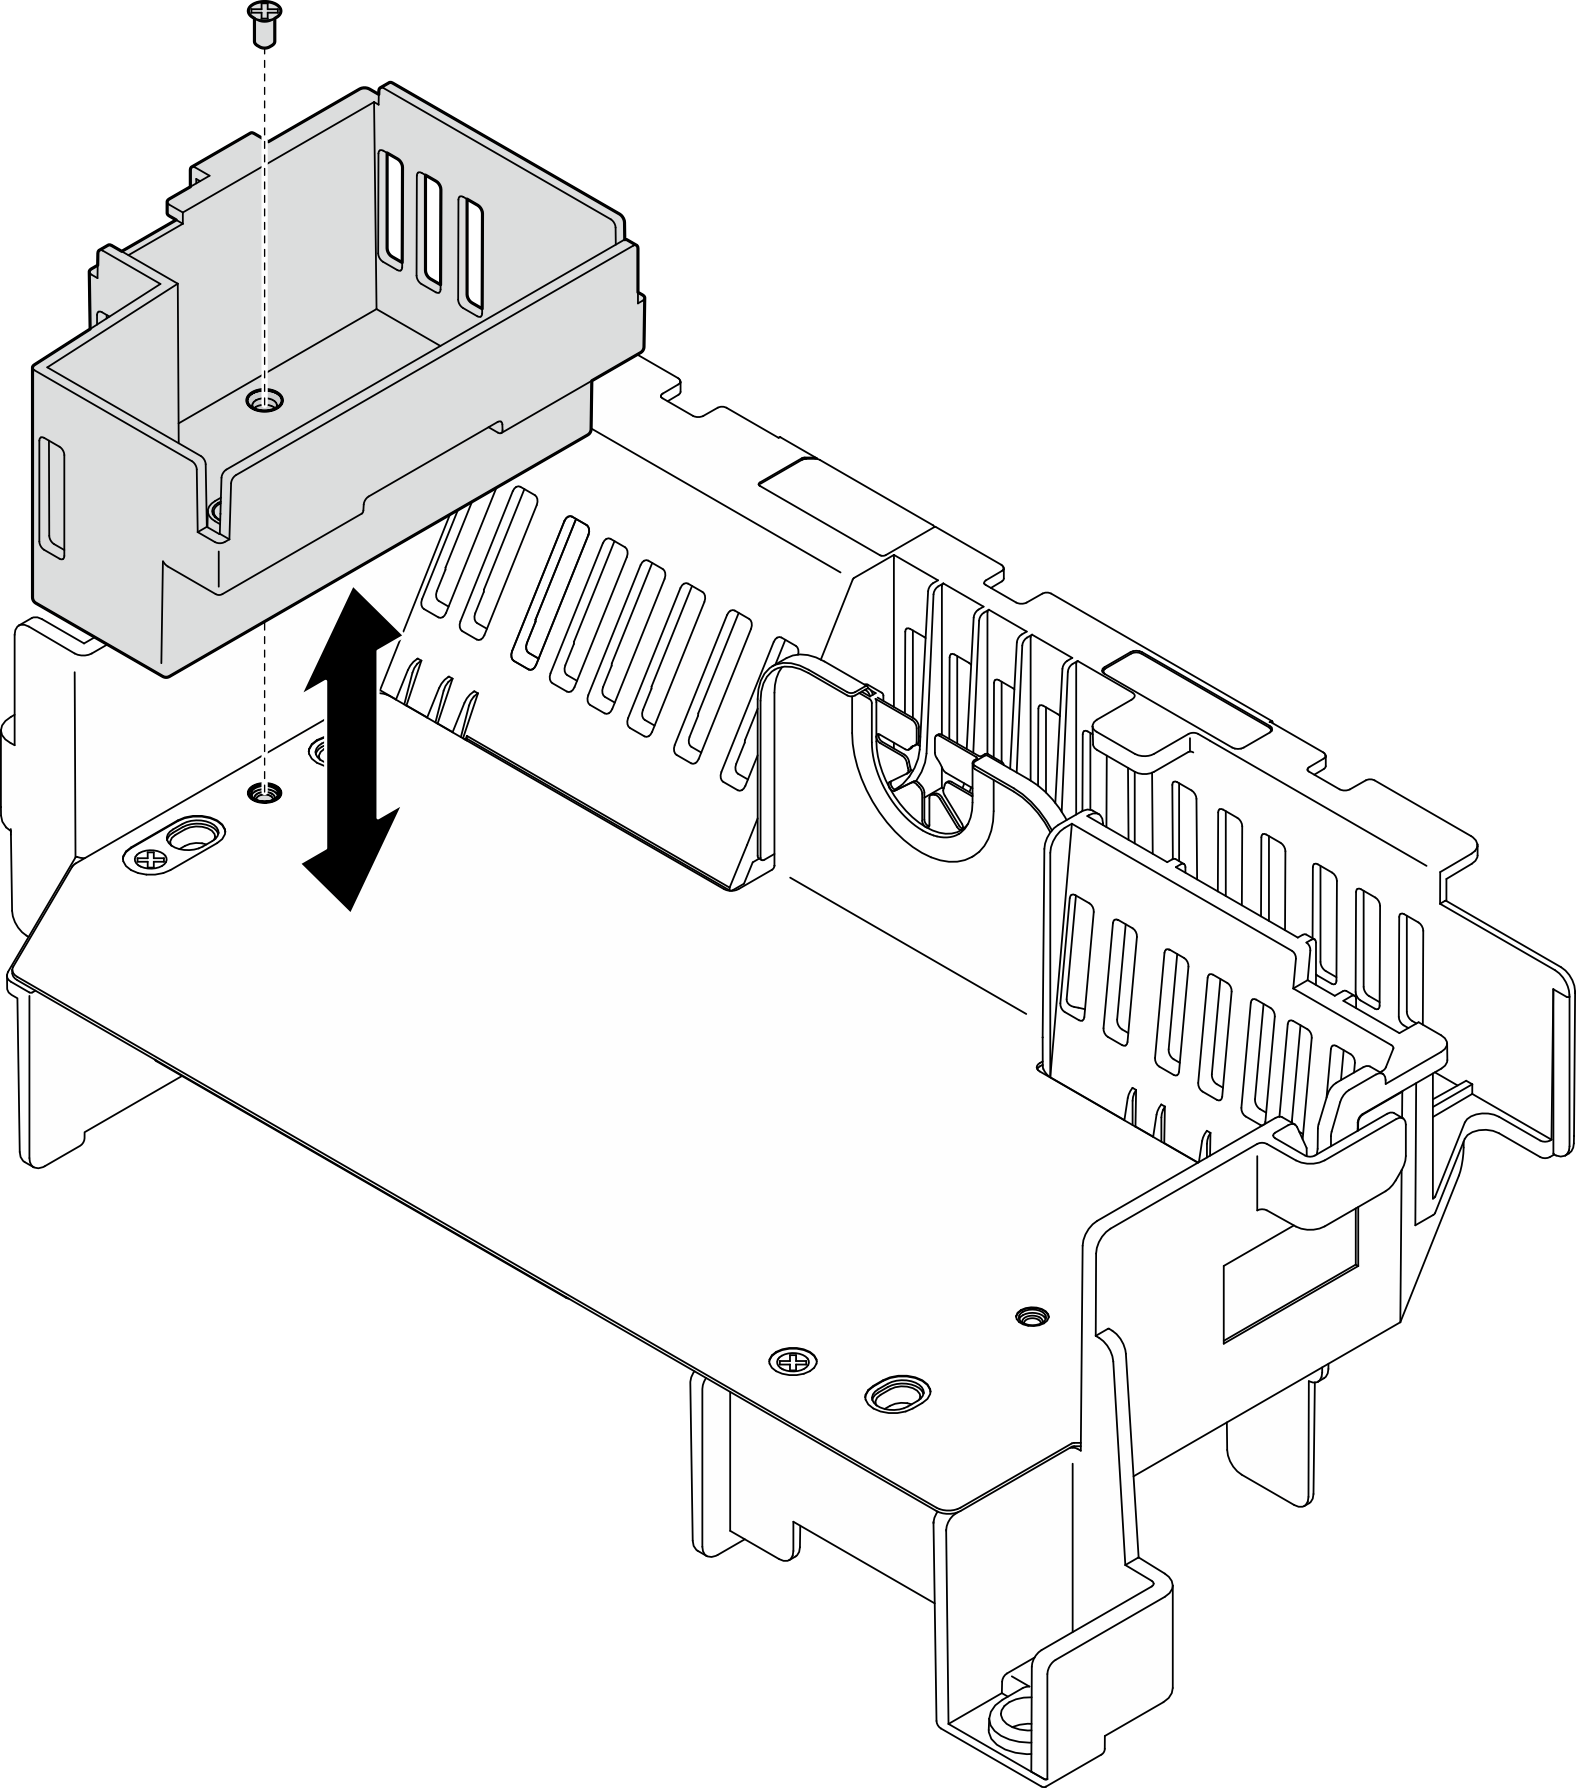
- If necessary, remove or install the riser 2 filler.
- To remove the filler, loosen the screw that secures the filler; then, grasp and lift the filler from the air baffle.
- To install the filler, align the filler with the edge of the air baffle, and lower the filler down until the guide pins on the bottom of the filler are seated in place; then, fasten one screw to secure the filler.
Figure 2. Replacing the riser 2 filler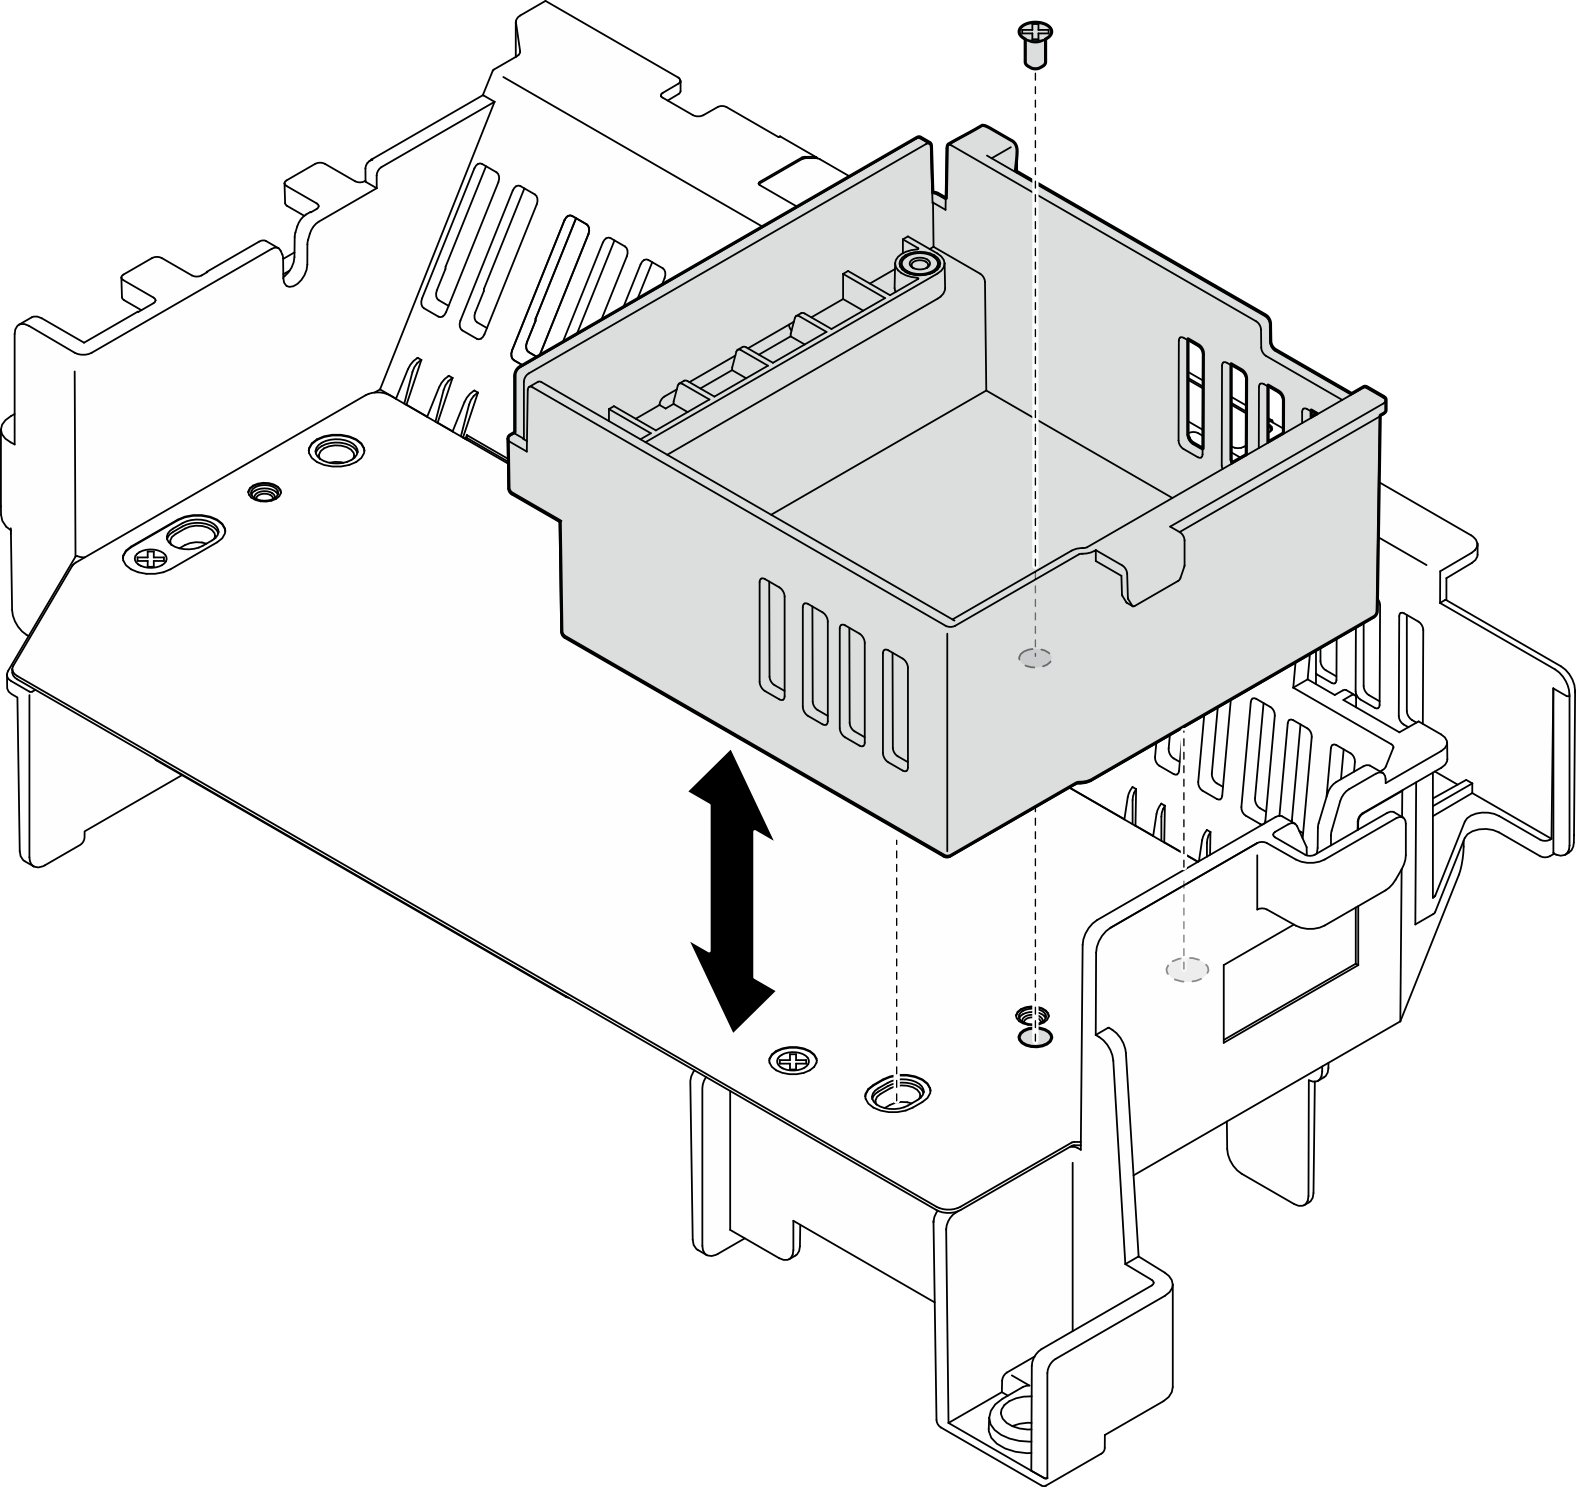
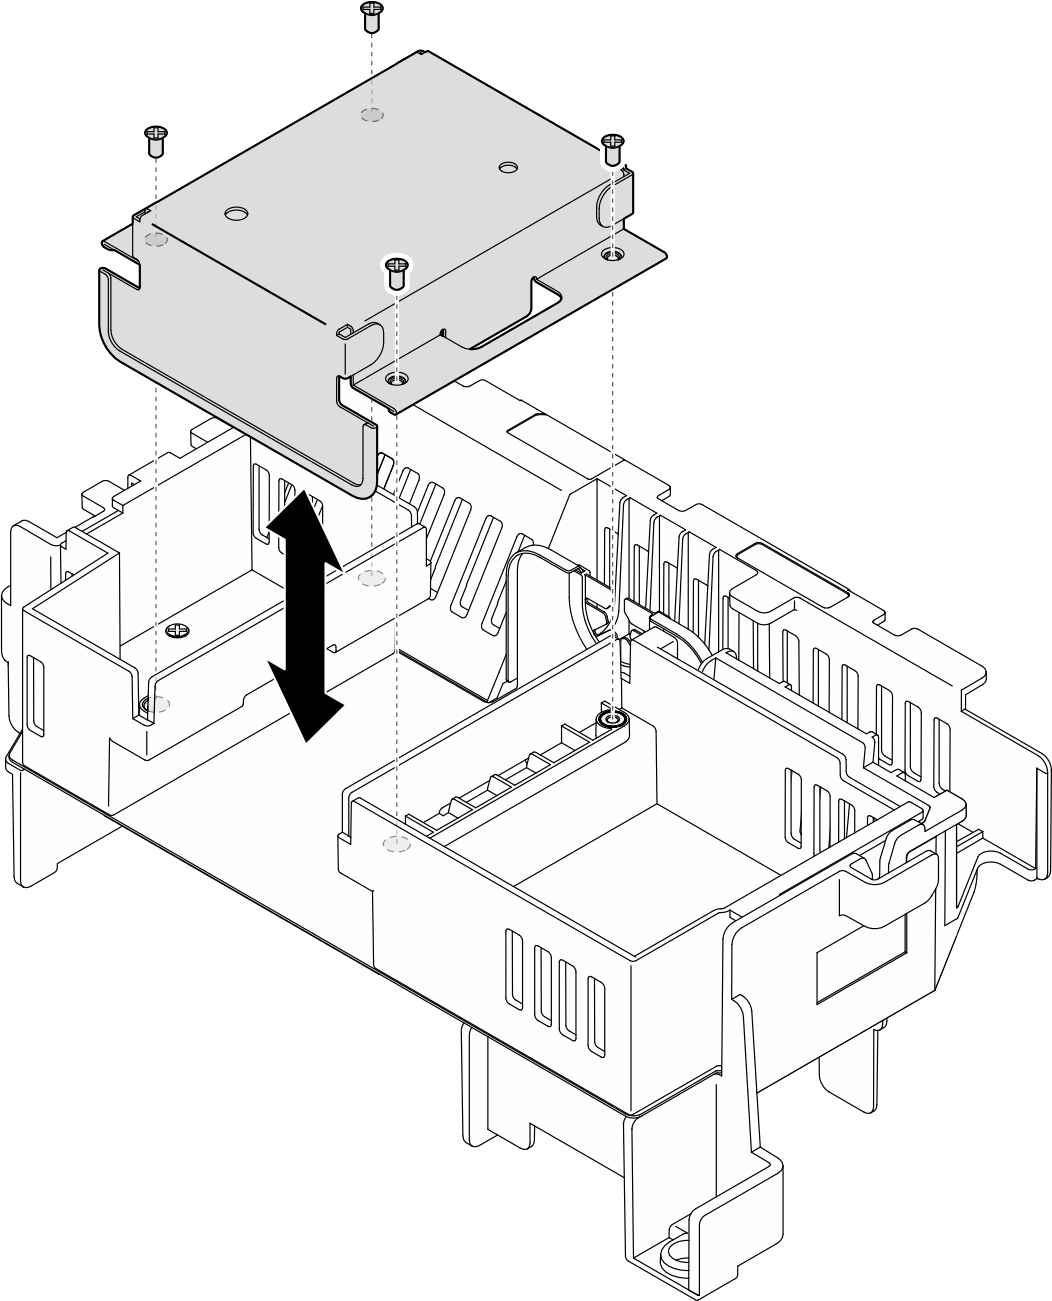
- If necessary, remove or install the middle filler.Figure 3. Replacing the middle filler
Give documentation feedback