Install the M.2 air baffle
Follow instructions in this section to install the M.2 air baffle.
About this task
Attention
Read Installation Guidelines and Safety inspection checklist to ensure that you work safely.
Power off the server and peripheral devices and disconnect the power cords and all external cables. See Power off the server.
Attention
For proper cooling and airflow, reinstall the air baffle before turning on the server. Operating the server with the air baffle removed might damage server components.
Procedure
- Make sure that the M.2 air baffle is corresponding to the selected configuration. If the configuration is without internal drive cage, combine the front half and rear half of the M.2 air baffle.
- Align the small tabs of the rear half with the notches of the front half as shown.
- Slide the rear half toward the front half until the rear half clicks into place.
Figure 1. Combining the parts of M.2 air baffle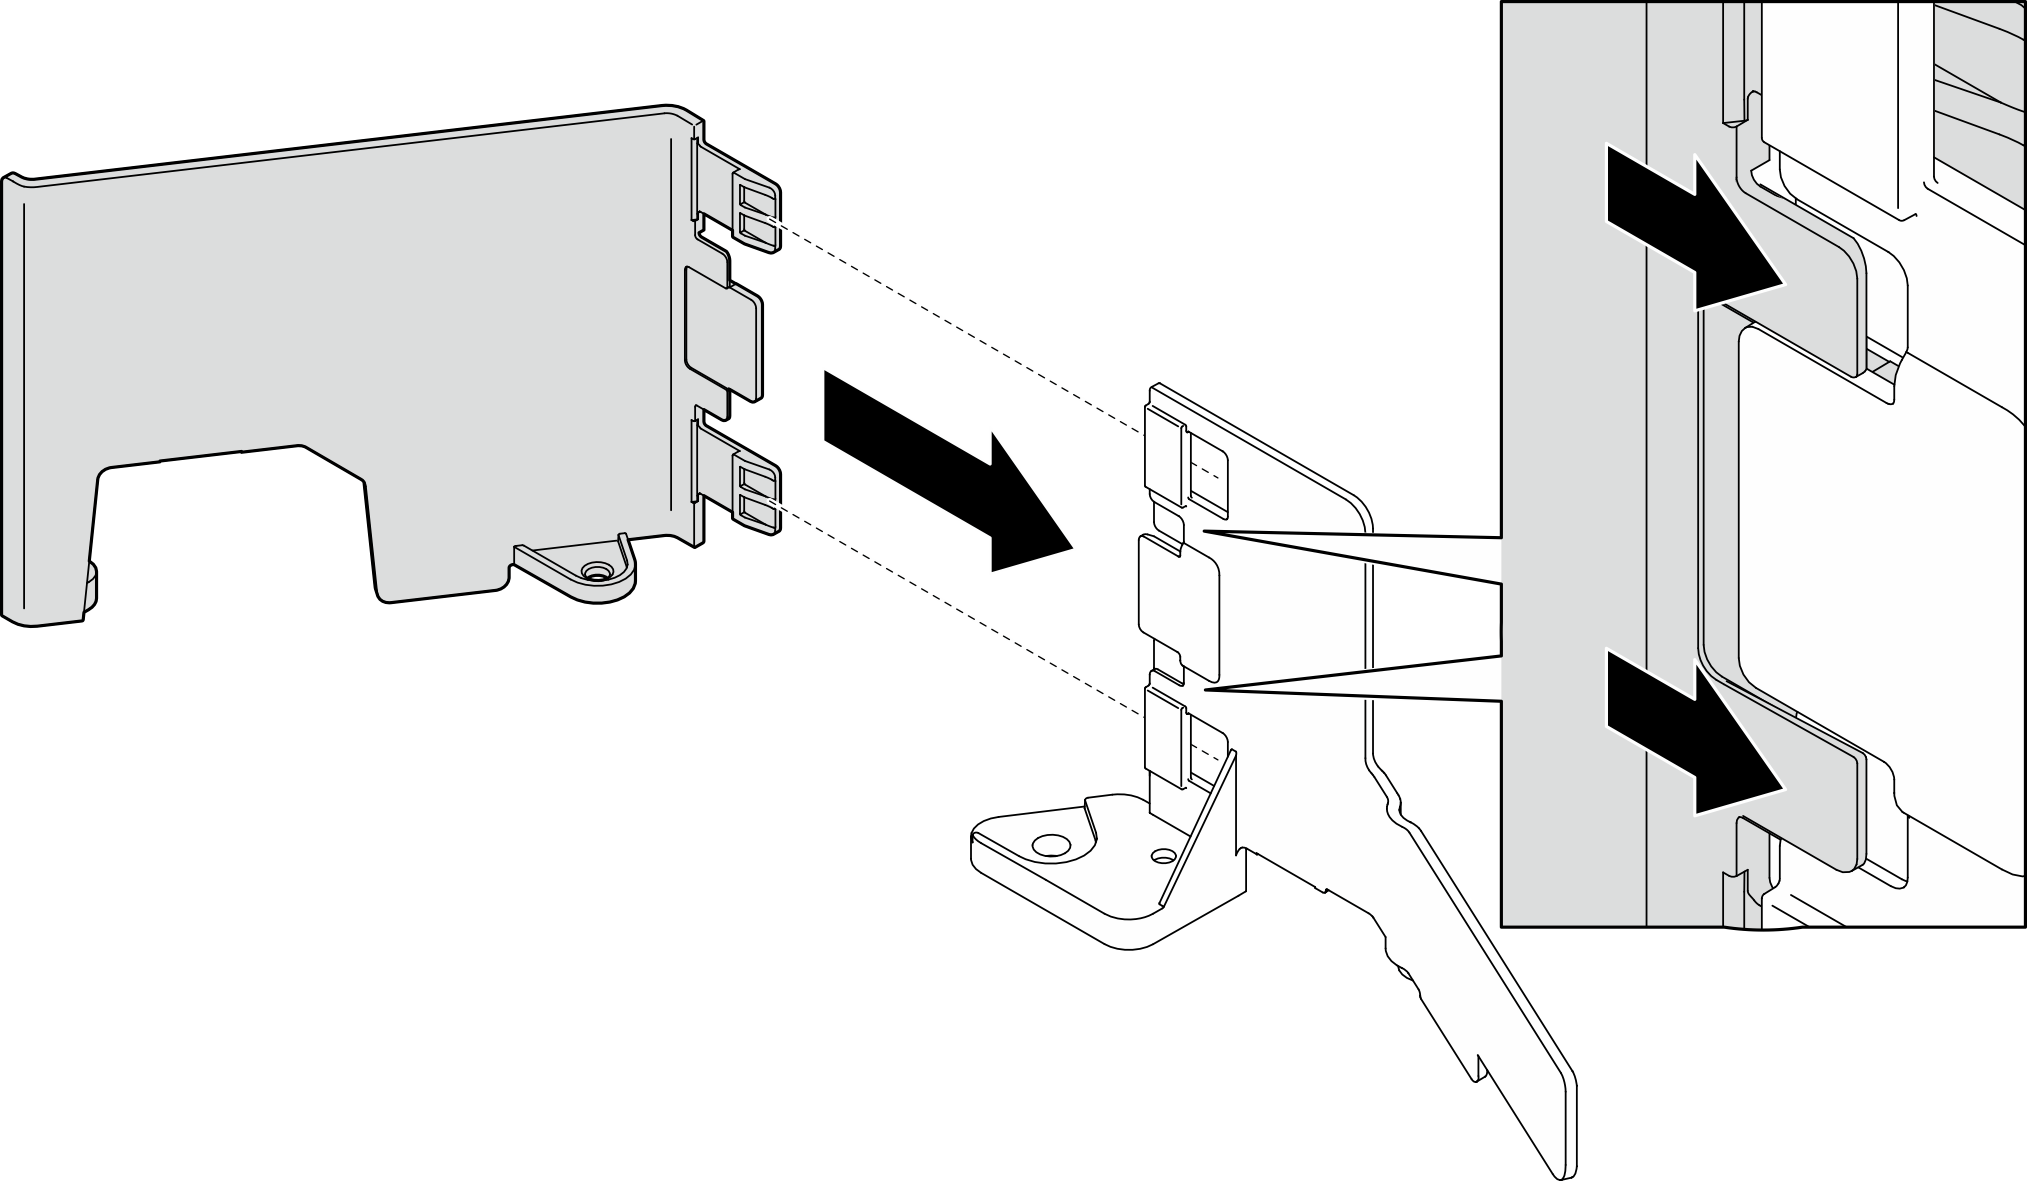
- Install the M.2 air baffle.
- Align the M.2 air baffle with the guide pins on the chassis and the screw on the power distribution board; then, lower the air baffle until it is seated in place.
- Fasten two screws to secure the air baffle.
Figure 2. Installing the M.2 air baffle for configuration with internal drive cage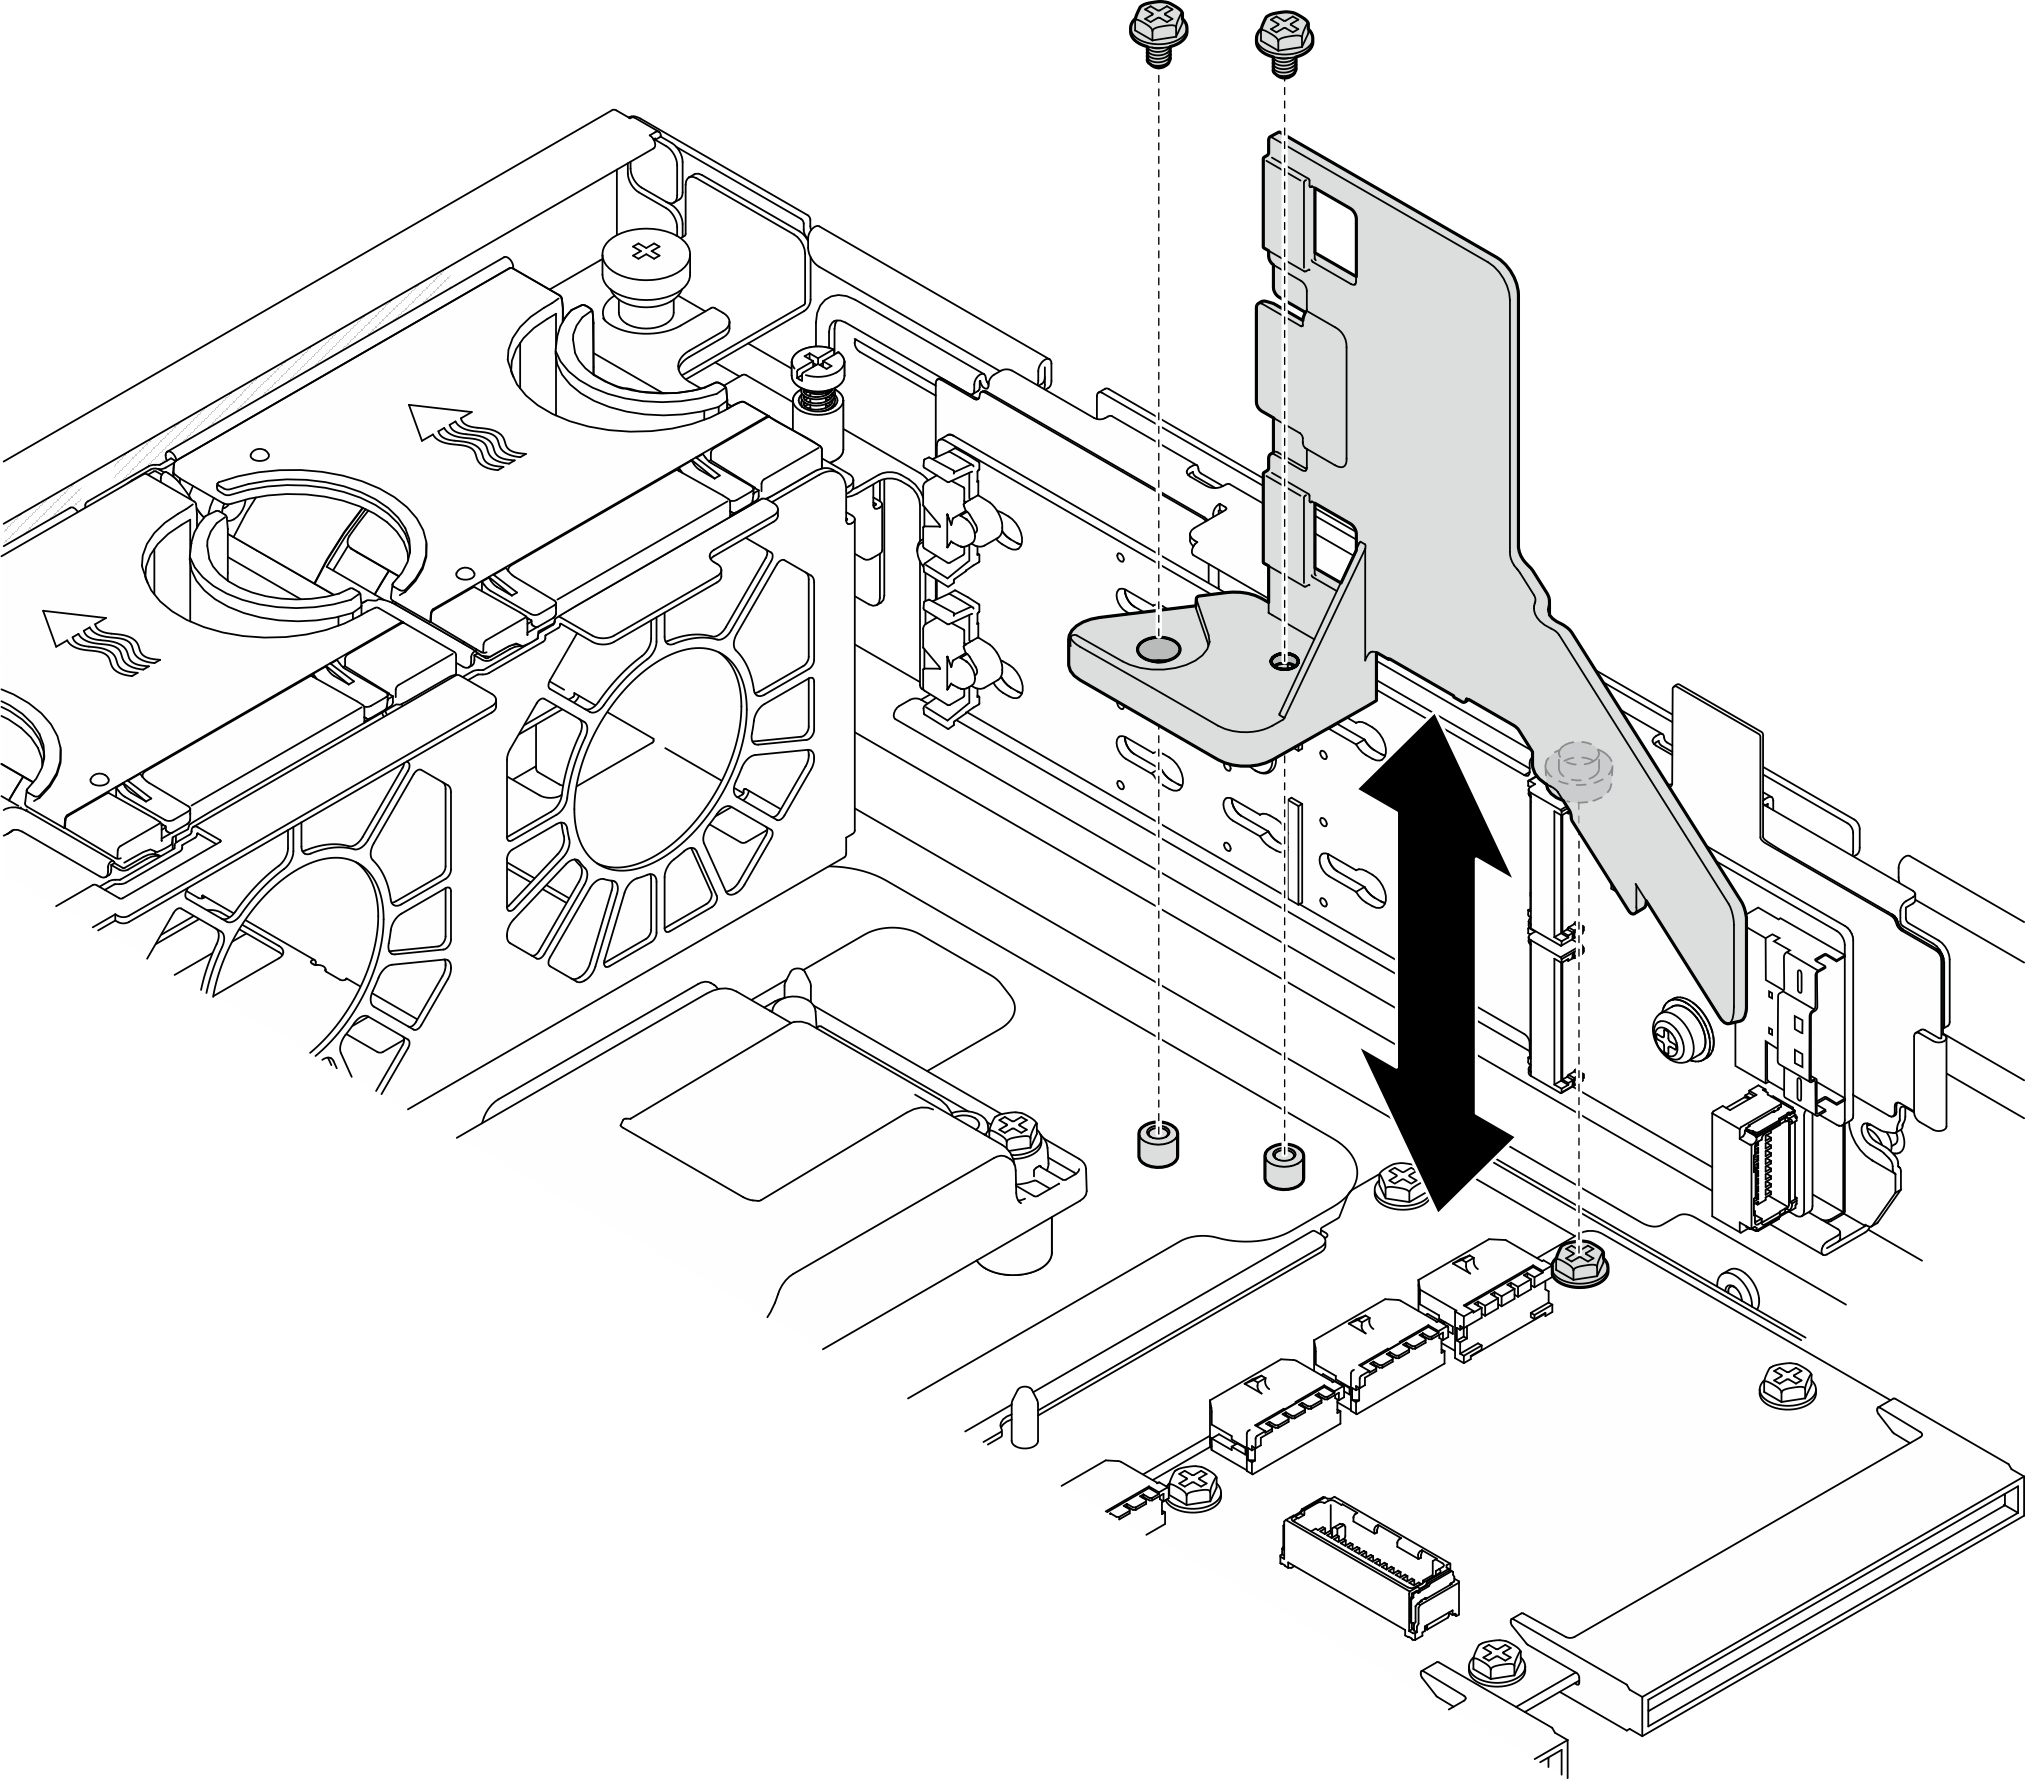 Figure 3. Installing the M.2 air baffle for configuration without internal drive cage
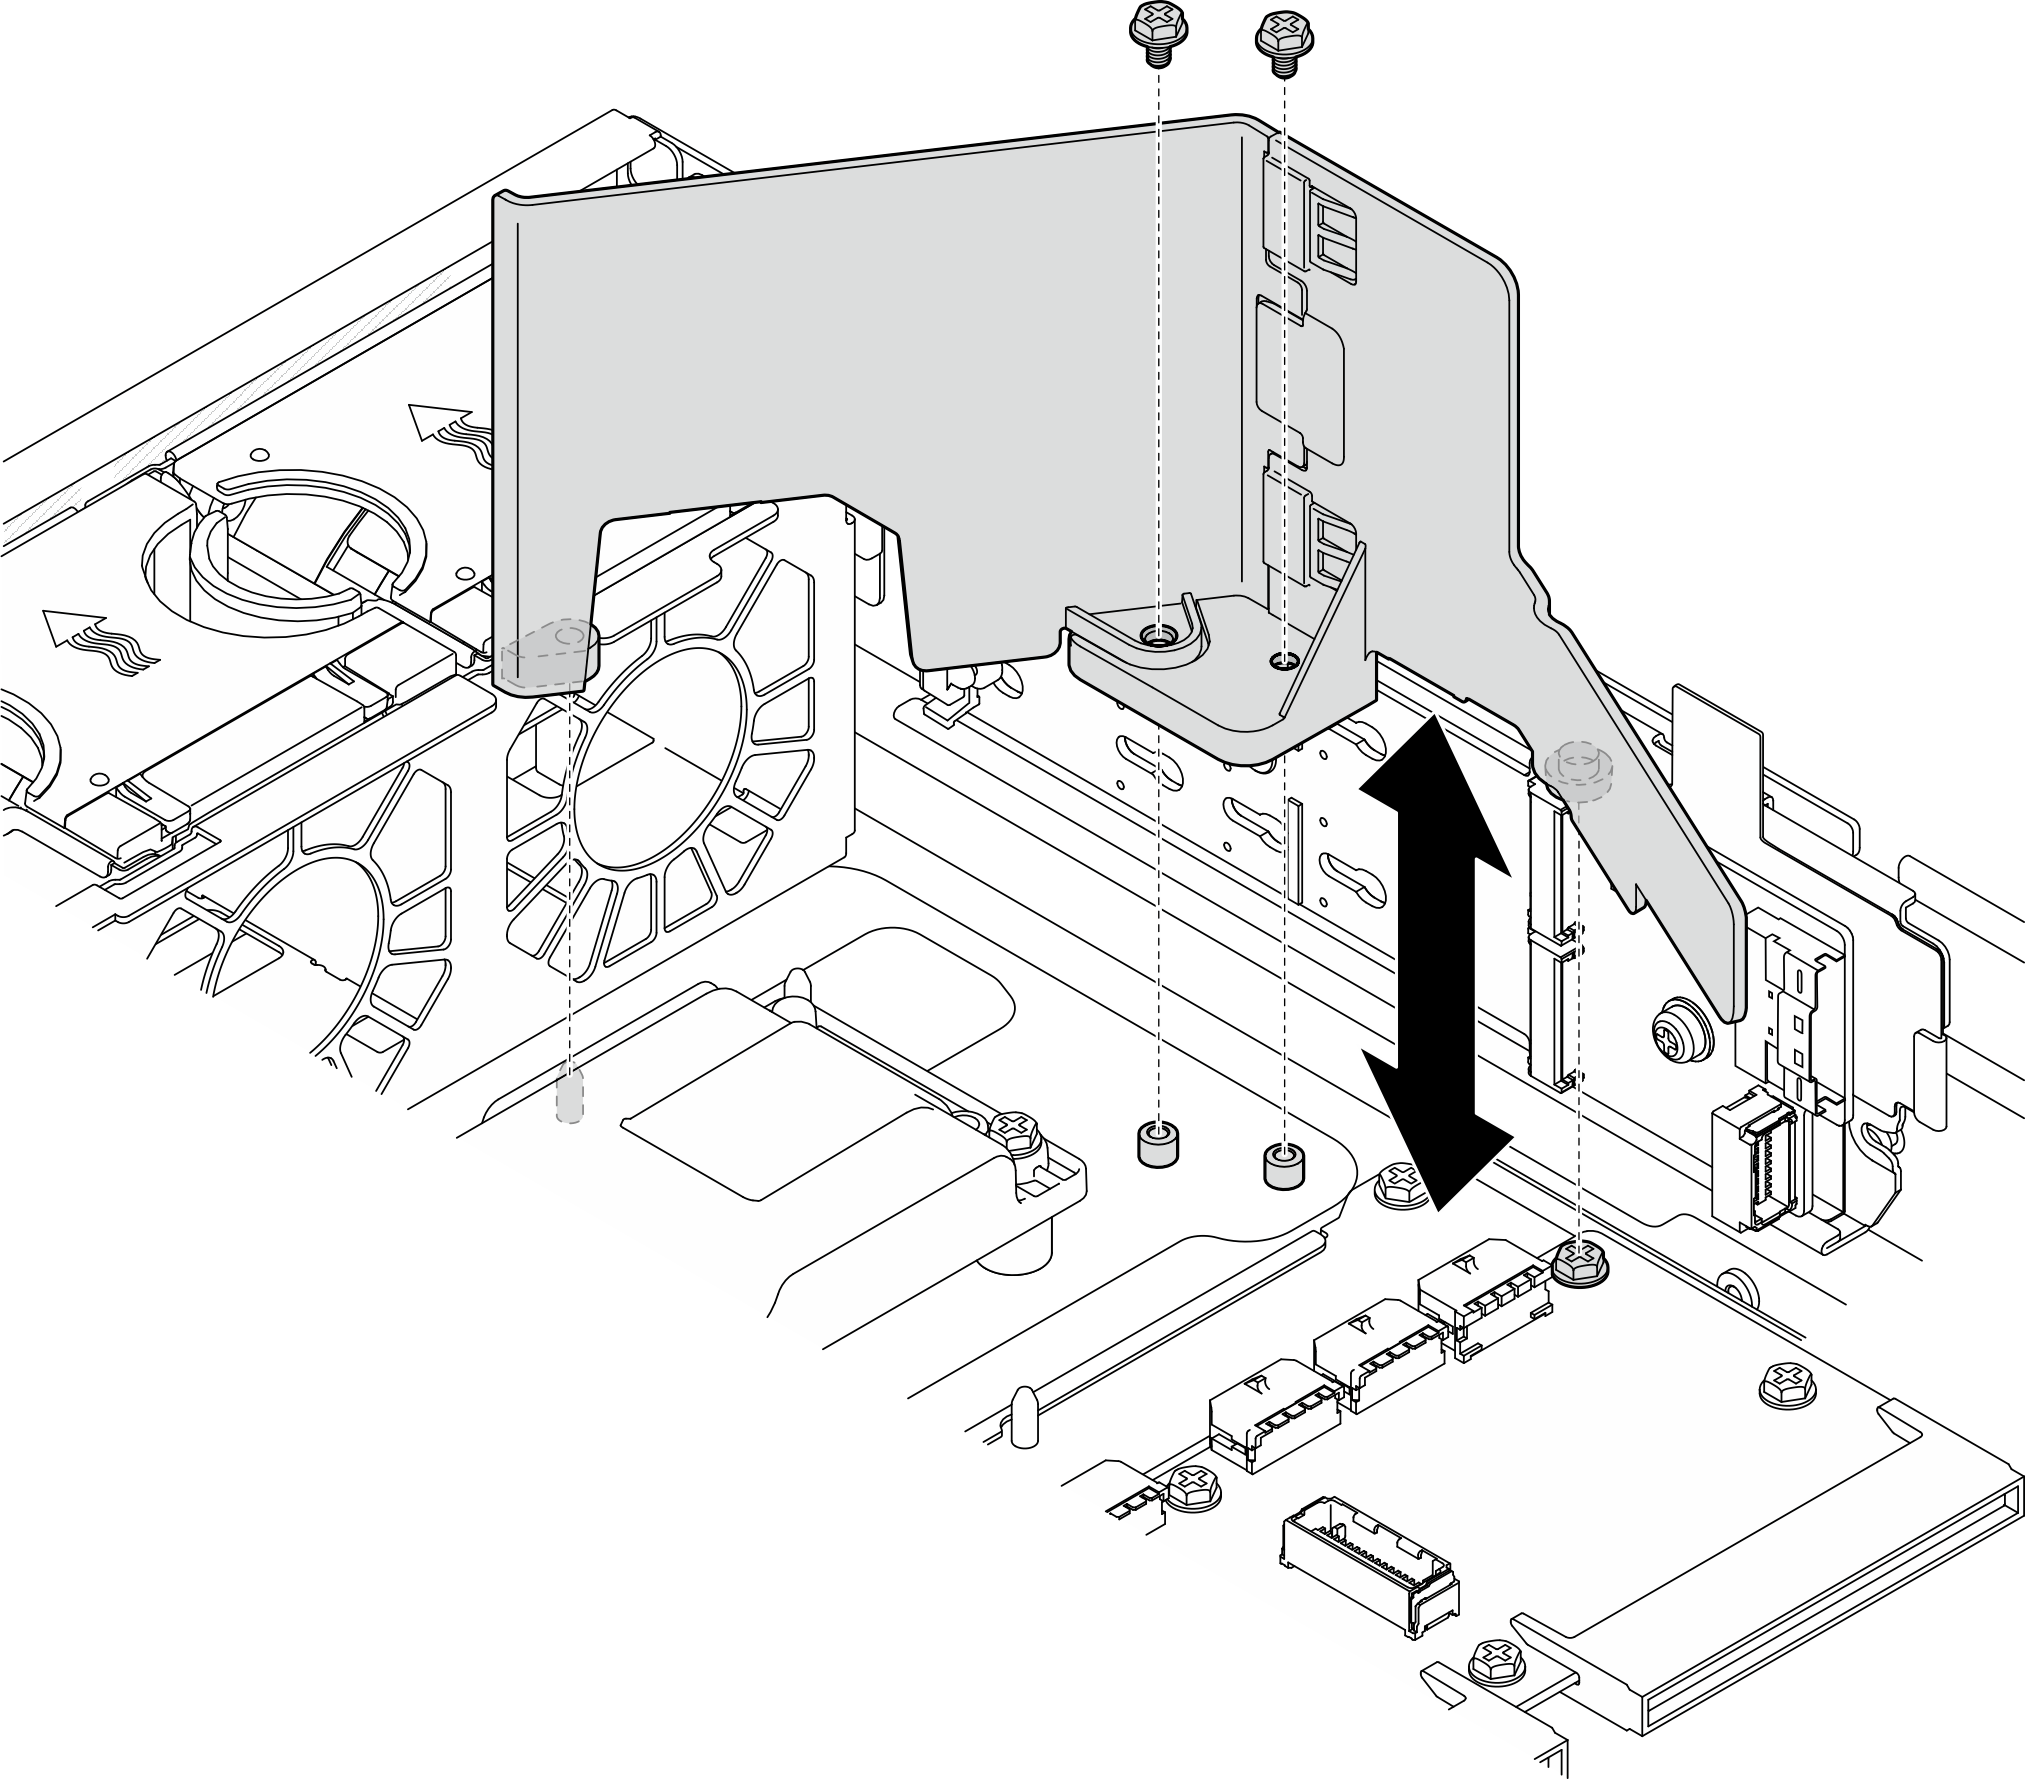
After this task is completed
Complete the parts replacement. See Complete the parts replacement.
Demo Video
Give documentation feedback