Install an internal drive
Follow instructions in this section to install an internal drive.
About this task
Read Installation Guidelines and Safety inspection checklist to ensure that you work safely.
Power off the server and peripheral devices and disconnect the power cords and all external cables. See Power off the server.
Touch the static-protective package that contains the drive to any unpainted metal surface on the solution; then, remove the drive from the package and place it on a static-protective surface.
Make sure you save the data on your drive, especially if it is part of a RAID array, before you remove it from the server.
To avoid damage to the drive connectors, make sure that the server top cover is in place and fully closed whenever you install or remove a drive.
Before you make changes to drives, drive controllers (including controllers that are integrated on the system board), drive backplanes, or drive cables, back up all important data that is stored on drives.
Before you remove any component of a RAID array (drive, RAID card, etc.), back up all RAID configuration information.
- Locate the documentation that comes with the drive and follow those instructions in addition to the instructions in this chapter.
- The drive bays are numbered to indicate the installation order. Follow the installation order when you install a drive.
Table 1. Internal drive bay numbering (viewed from the front of the internal drive cage) Bay 4 Bay 6 Bay 5 Bay 7
Go to Drivers and Software download website for ThinkEdge SE455 V3 to see the latest firmware and driver updates for your server.
Go to Update the firmware for more information on firmware updating tools.
Procedure
- If applicable, pinch and lift the handles to pivot the internal drive cage up.Figure 1. Pivoting the internal drive cage

- Install the drive.
 Slide the drive into the drive bay, and push it until it stops.
 Rotate the handle back to the locked position.
Figure 2. Installing an internal drive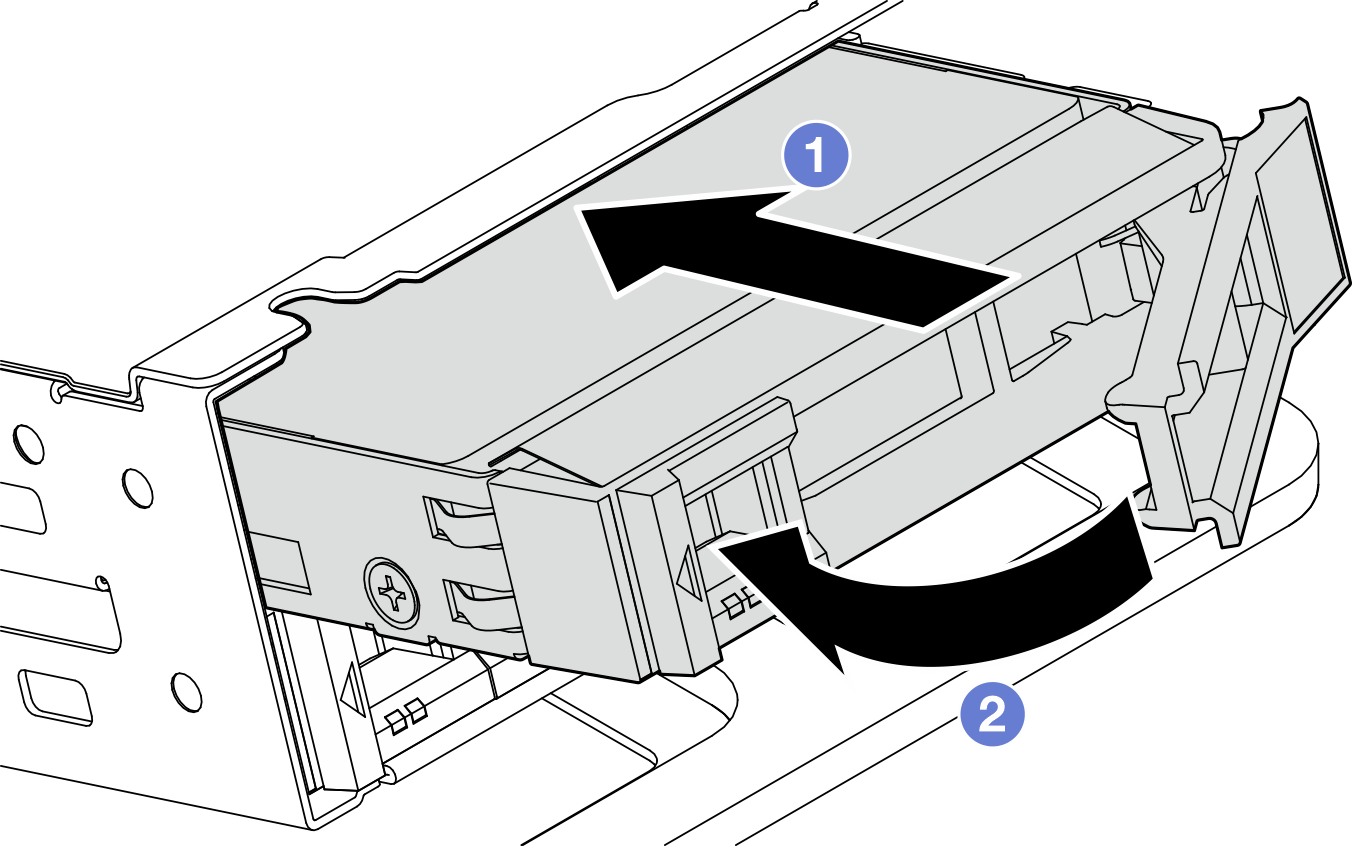 NoteIf necessary, repeat this procedure to other internal drives to be installed.
 - Pinch the handles and press the internal drive cage down.Figure 3. Pivoting the internal drive cage
After this task is completed
Complete the parts replacement. See Complete the parts replacement.
If the server is configured for RAID operation through a RAID adapter, you might have to reconfigure your disk arrays after you install drives. See RAID configuration for more information.
Demo Video