Install a PCIe adapter
Follow the instructions in this section to install a PCIe adapter.
About this task
Read Installation Guidelines and Safety inspection checklist to ensure that you work safely.
Power off the server and peripheral devices and disconnect the power cords and all external cables. See Power off the server.
Touch the static-protective package that contains the component to any unpainted metal surface on the server; then, remove it from the package and place it on a static-protective surface.
Make sure to follow the PCIe adapter installation rules and order. See PCIe adapter installation rules and order.
Go to Drivers and Software download website for ThinkEdge SE455 V3 to see the latest firmware and driver updates for your server.
Go to Update the firmware for more information on firmware updating tools.
| Low-profile PCIe adapter | Full-length PCIe adapter | |
| Side support bracket (for all configurations) | √ | √ |
| Low-profile filler | √ (one for each slot) | |
| Extender | √ |
Procedure
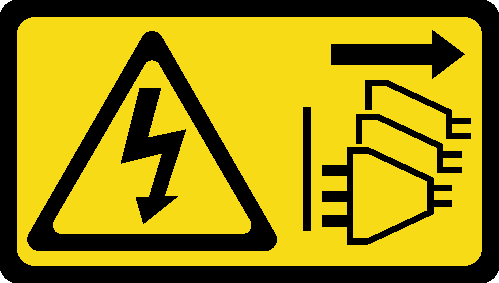
- If any full-length adapter is to be installed in the riser assembly, install the extender.
 Align the extender with the slots on the riser cage; then, insert and push the extender until it is seated in place.
 Fasten two screws to secure the extender.
Figure 1. Installing the extender to PCIe riser 1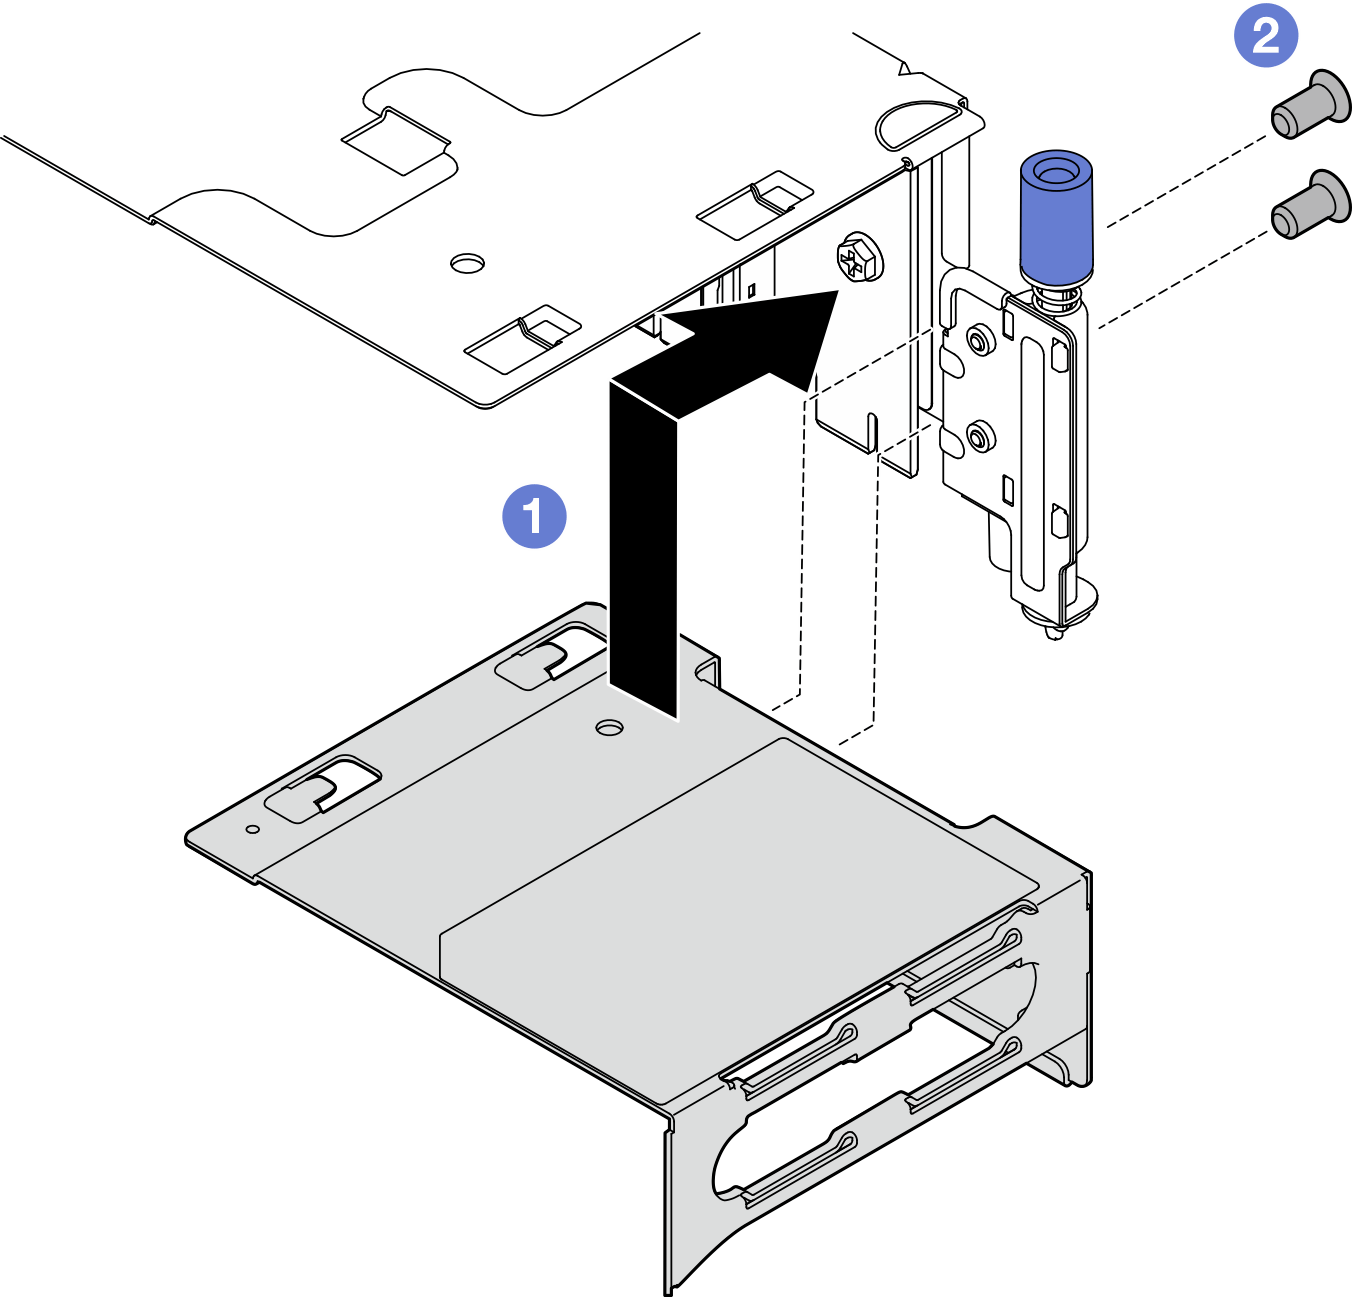 Figure 2. Installing the extender to PCIe riser 2
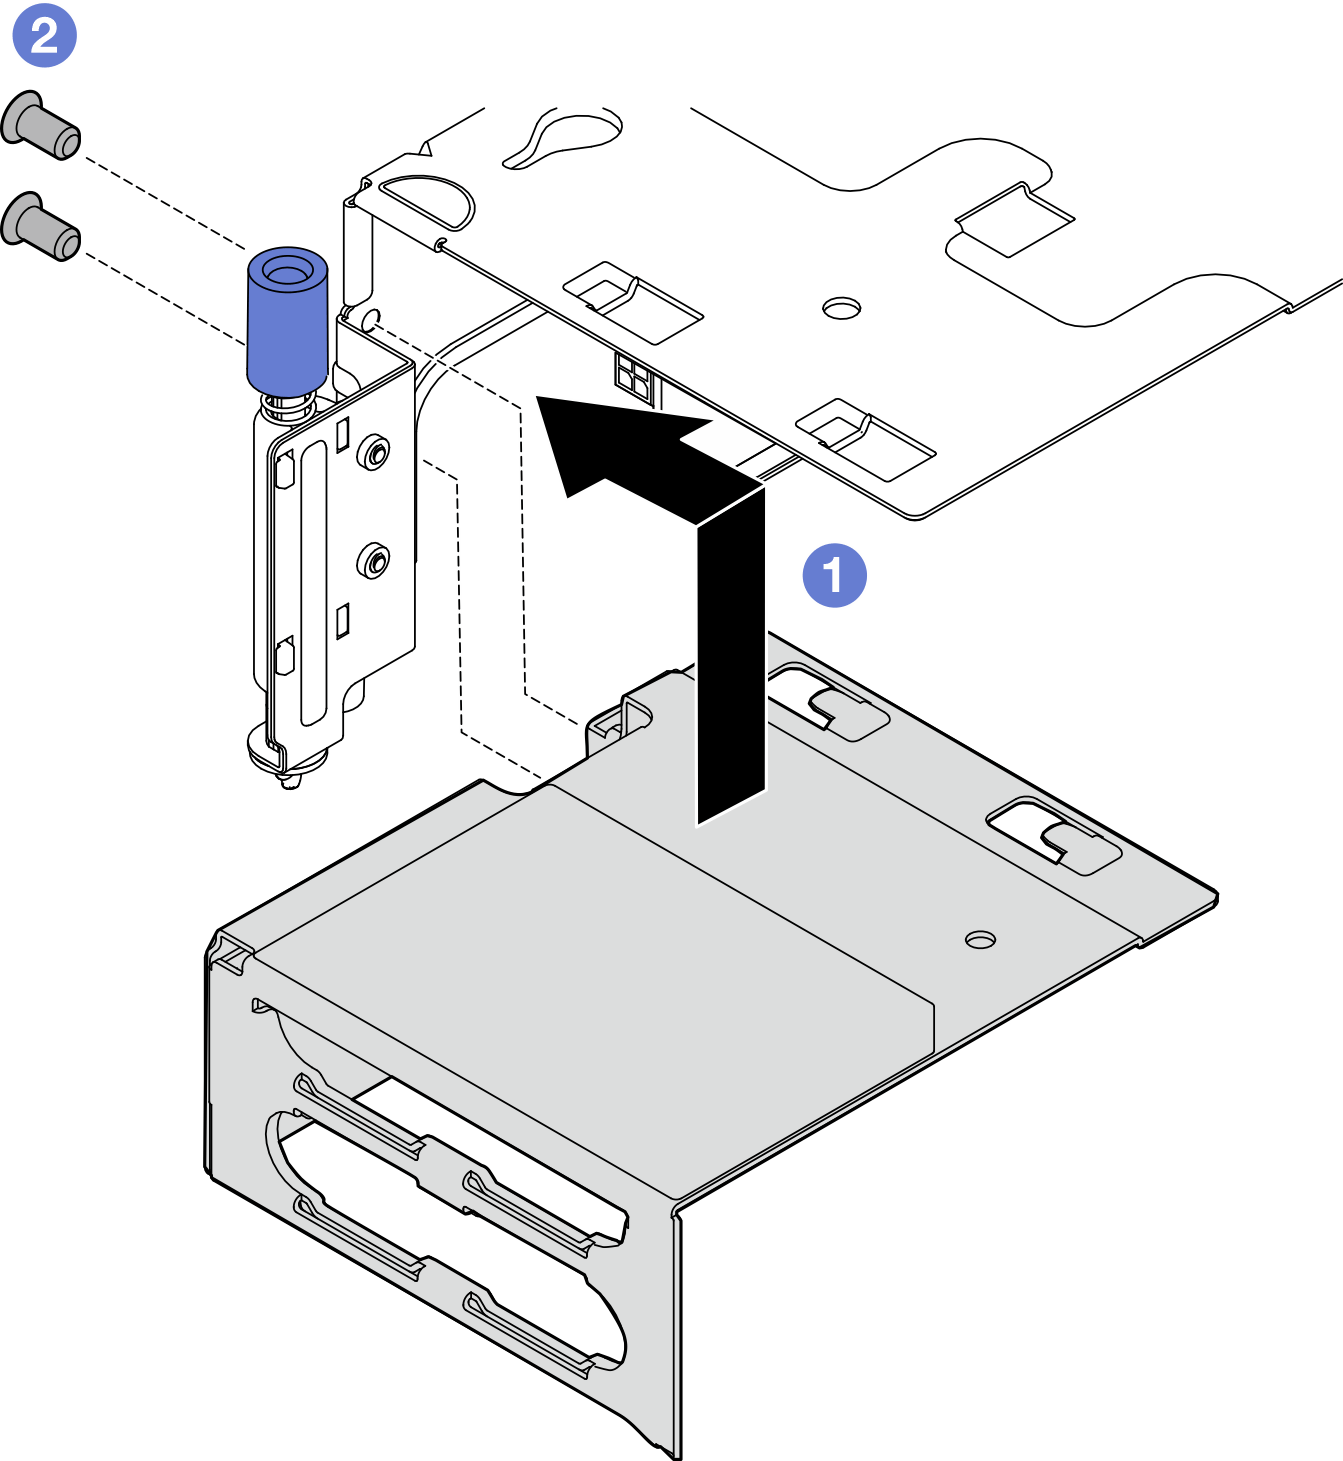
- Install the PCIe adapter to the riser assembly.Important
Make sure to follow the PCIe adapter installation rules and order. See PCIe adapter installation rules and order.
- If a slot filler is installed, remove the filler.
- Align the adapter with the slot; then, carefully slide the adapter into the slot until it is firmly seated.
Figure 3. Installing a PCIe adapter to PCIe riser 1 Figure 4. Installing a PCIe adapter to PCIe riser 2
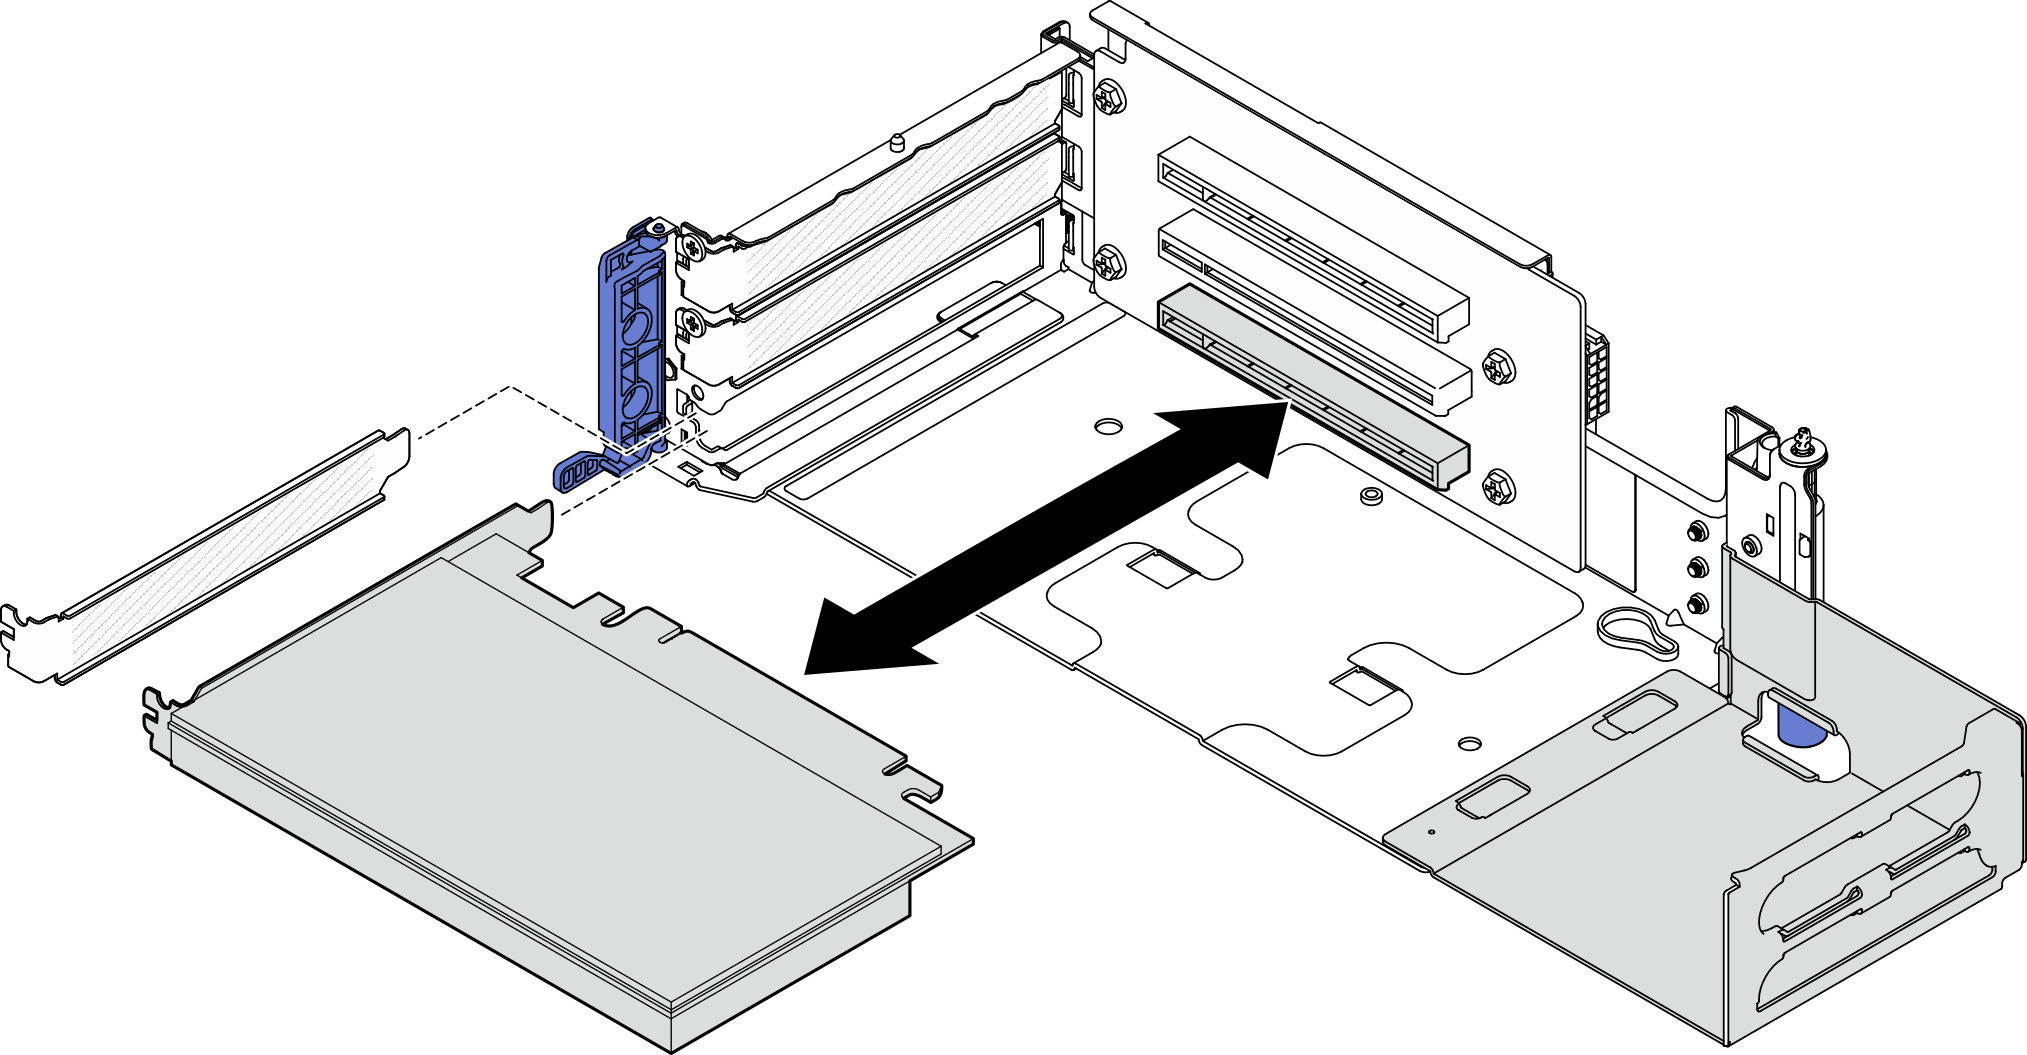
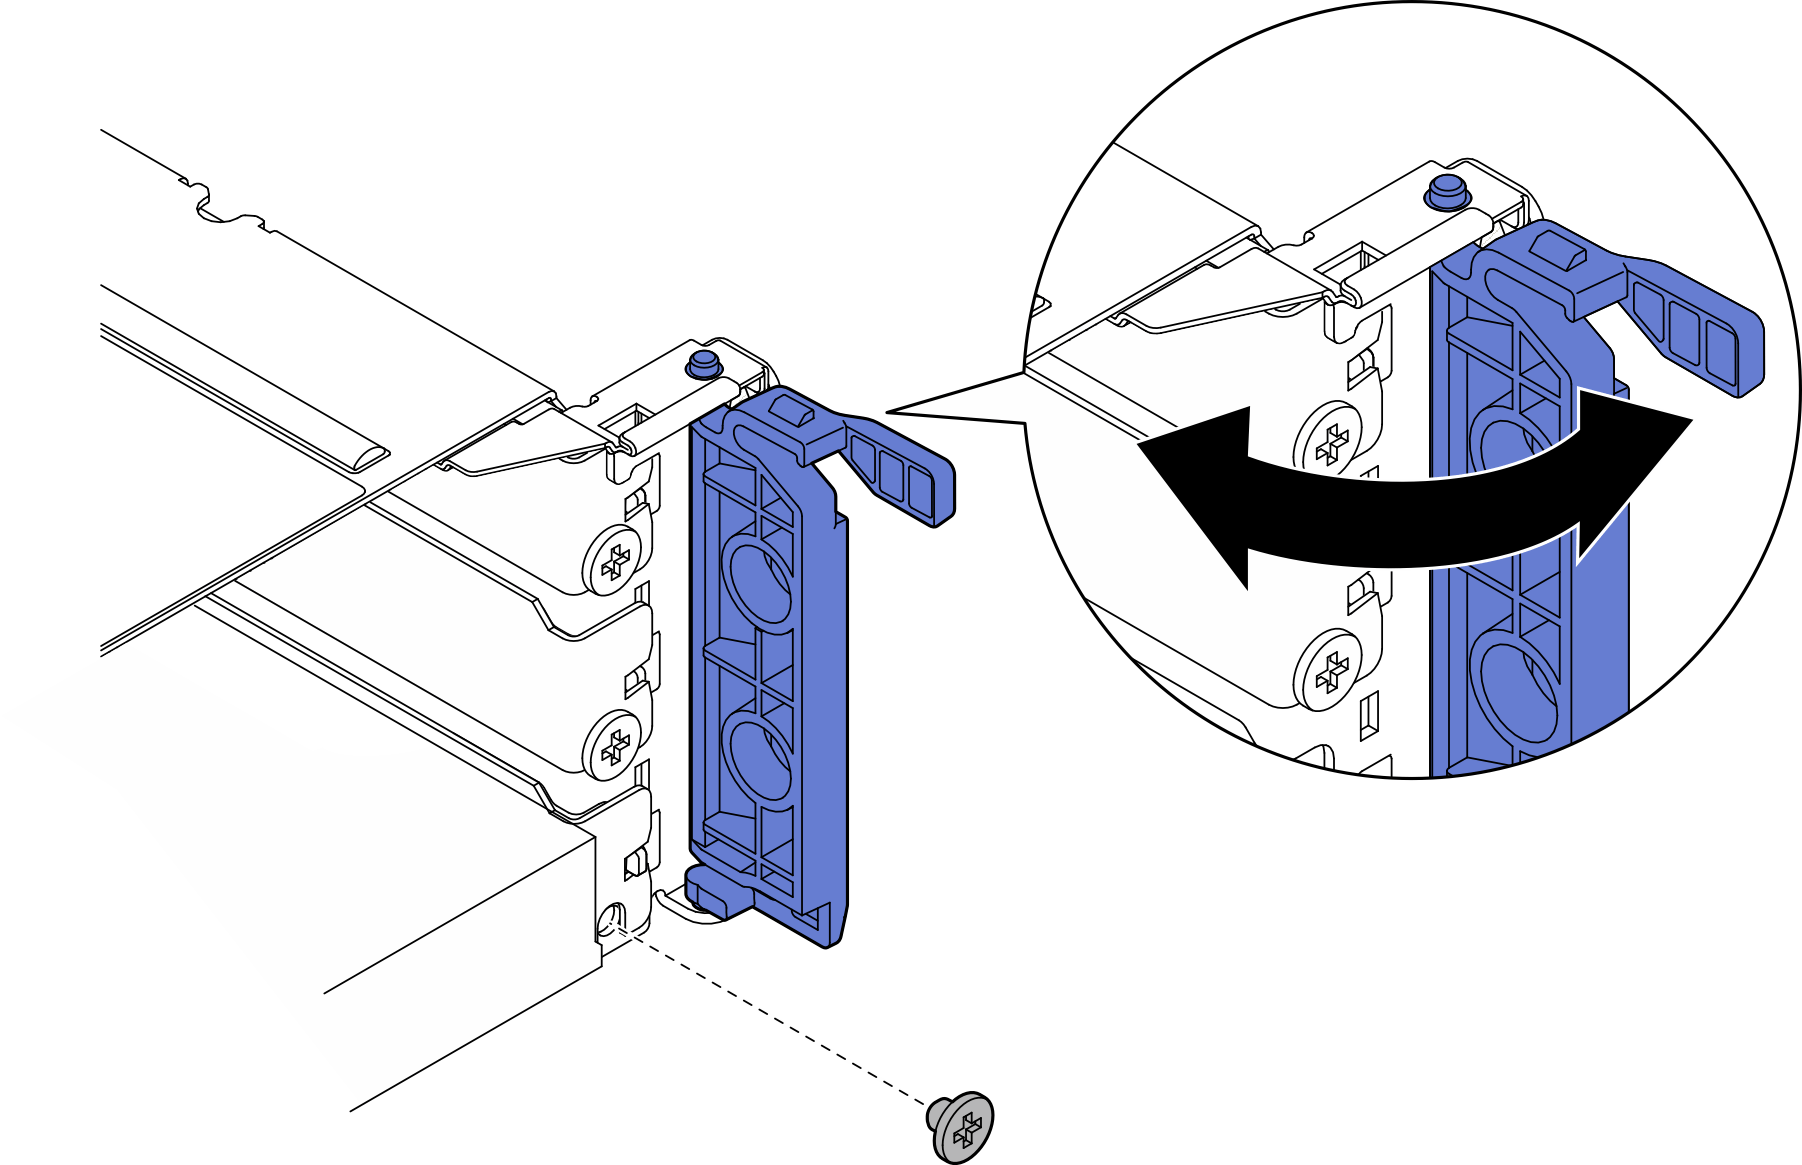
- Fasten one screw to secure the adapter; then, close the retainer.Figure 5. Installing the retaining screws
 NoteDepending on the configuration, spared screws might be available on the side of the riser assembly. Use the spared screw to secure the adapter if necessary.Figure 6. Spared screws on PCIe riser 1
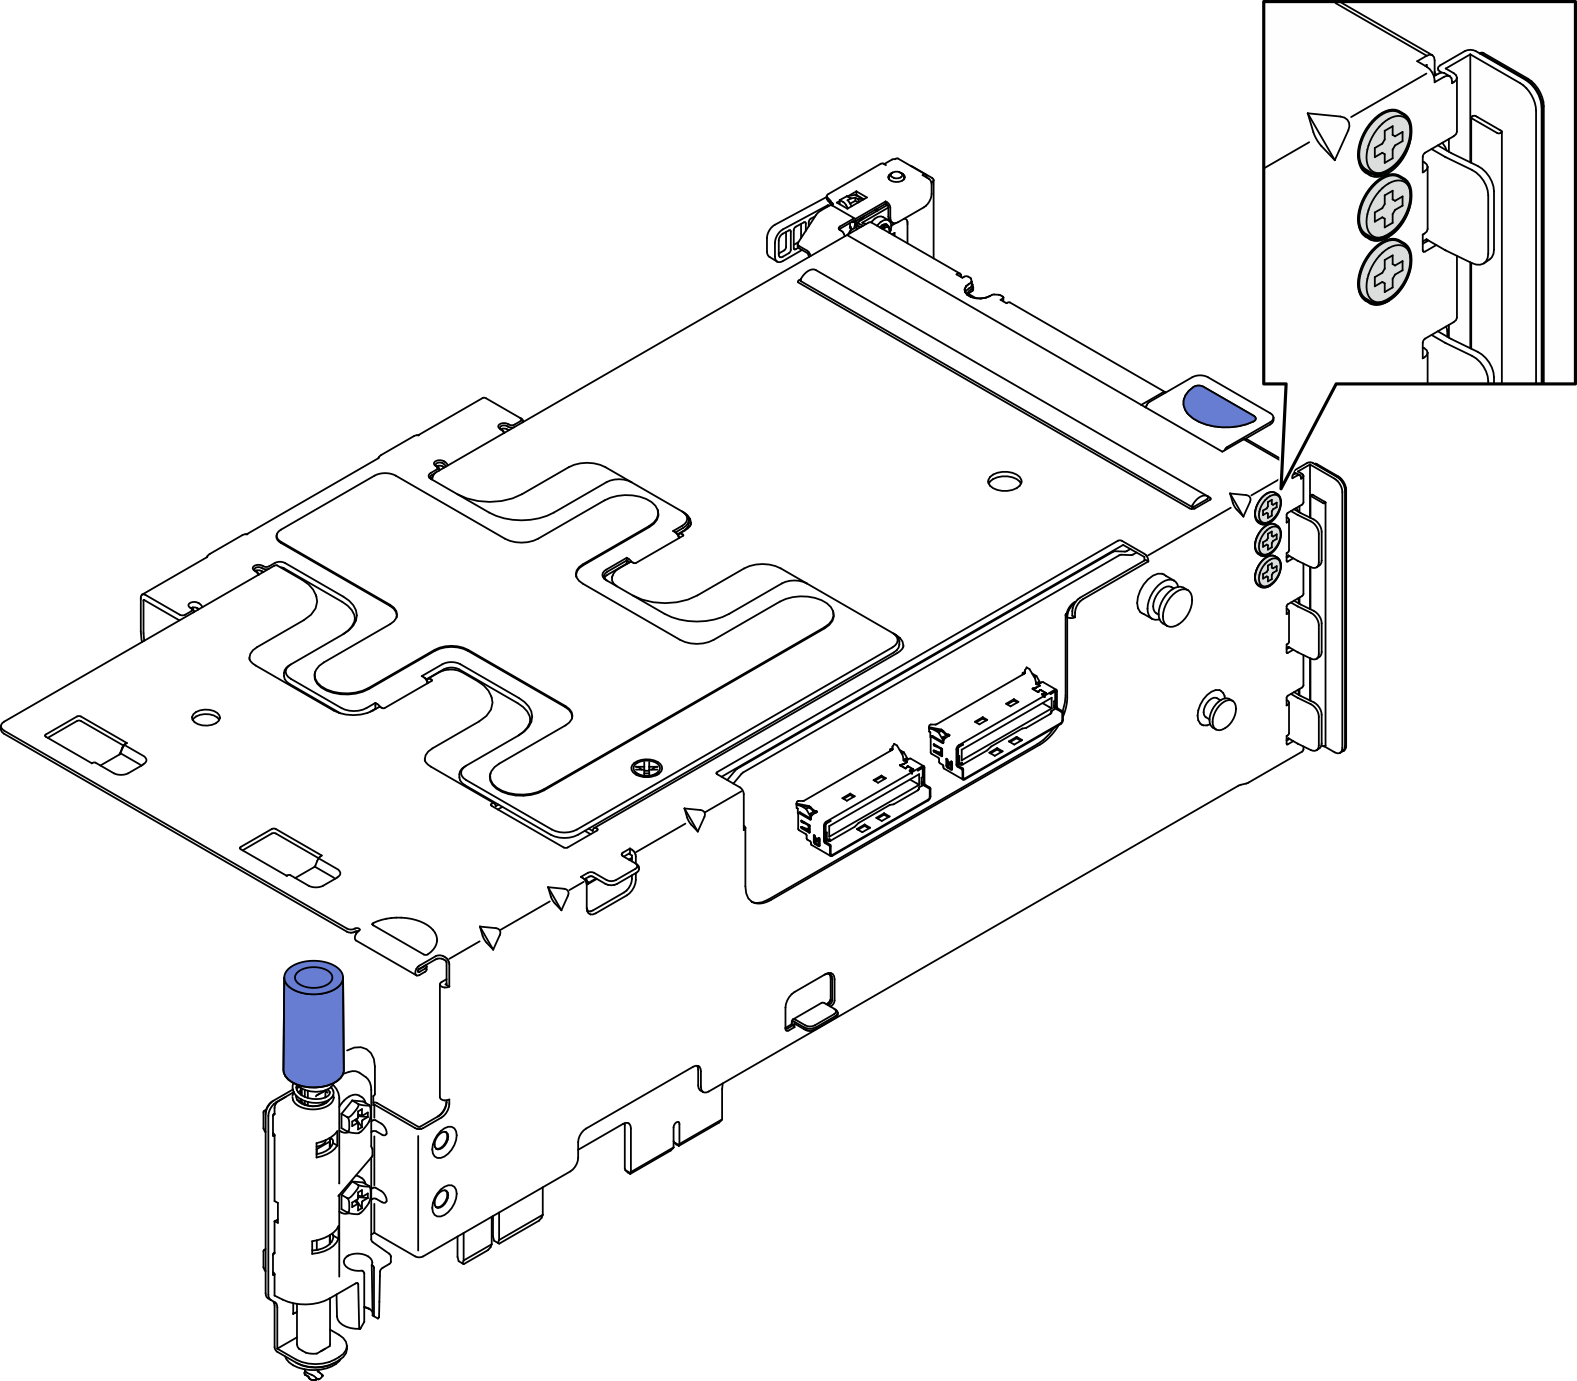 Figure 7. Spared screws on PCIe riser 2
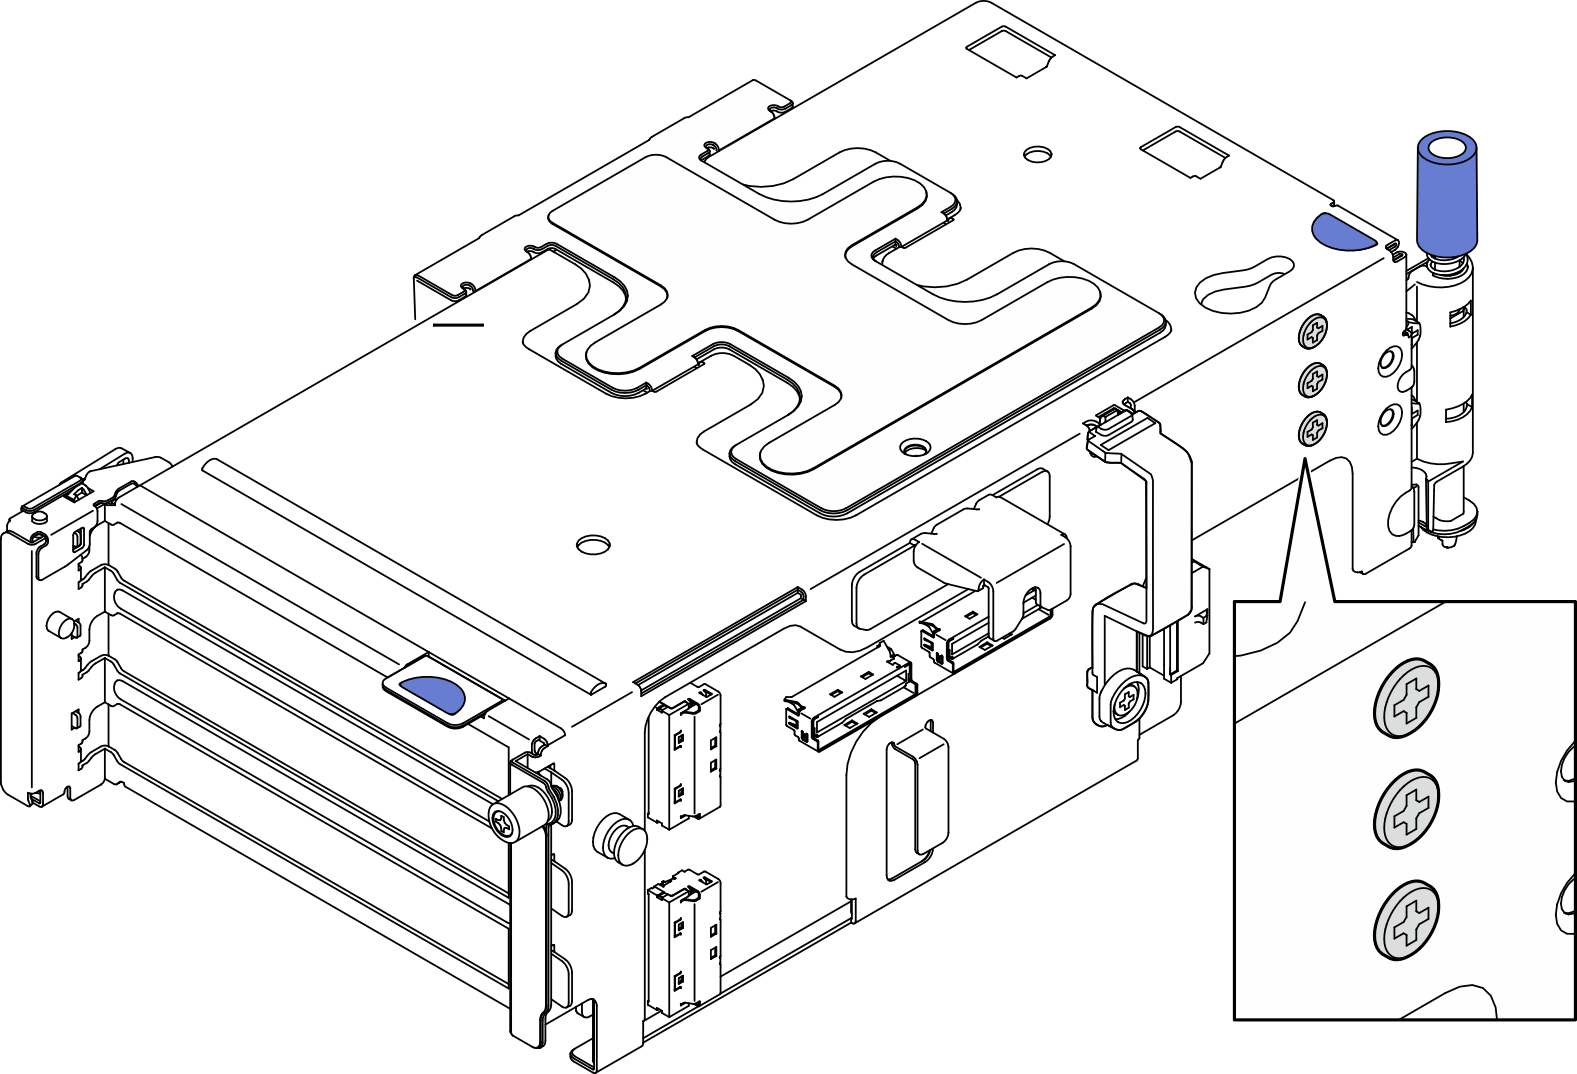
- For low-profile adapters, install the low-profile fillers.
- Push the filler toward the side support bracket.
- Slide the filler as shown until it is seated in place.
Figure 8. Installing a low-profile filler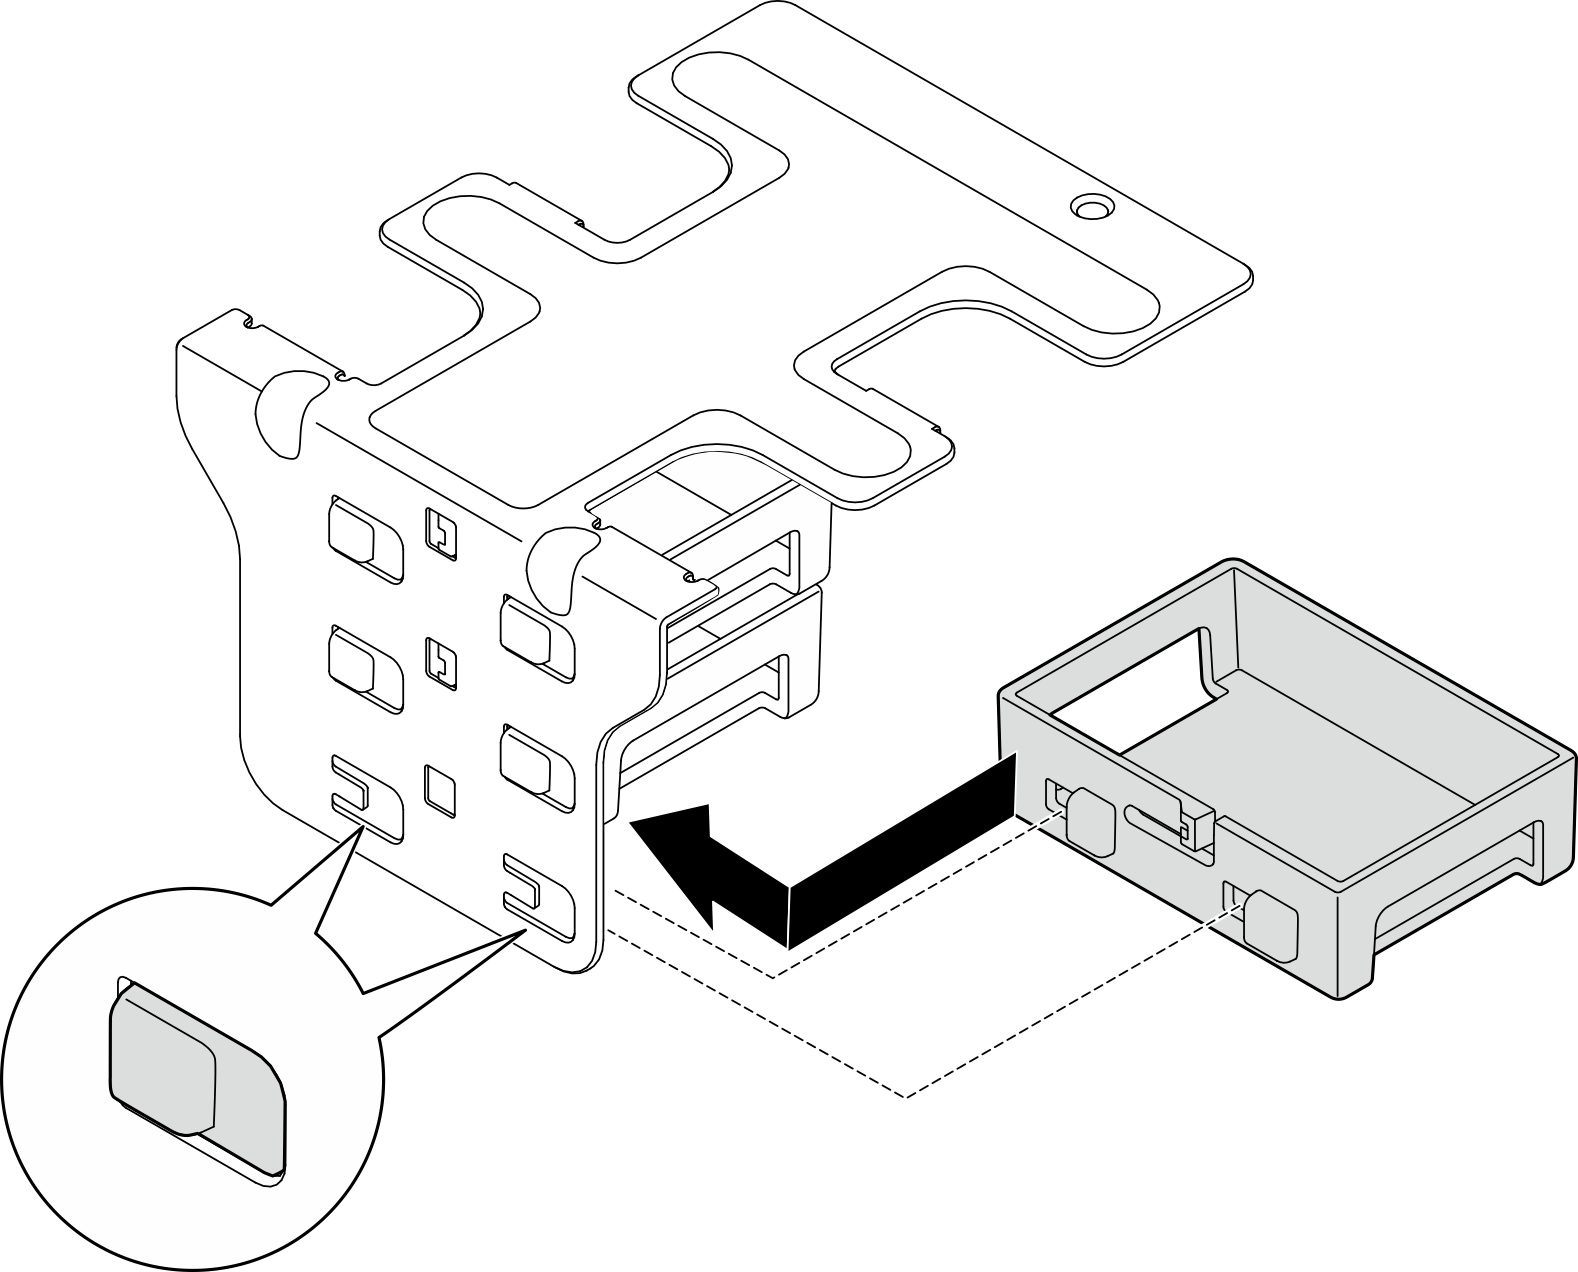
- Install the side support bracket.
- Lower the bracket down to the riser assembly; then, push the bracket toward the riser assembly until it is seated in place.
- Fasten one screw to secure the bracket.NoteMake sure that the two tabs on the side of side support bracket are seated under the edge of riser cage.
Figure 9. Installing the side support bracket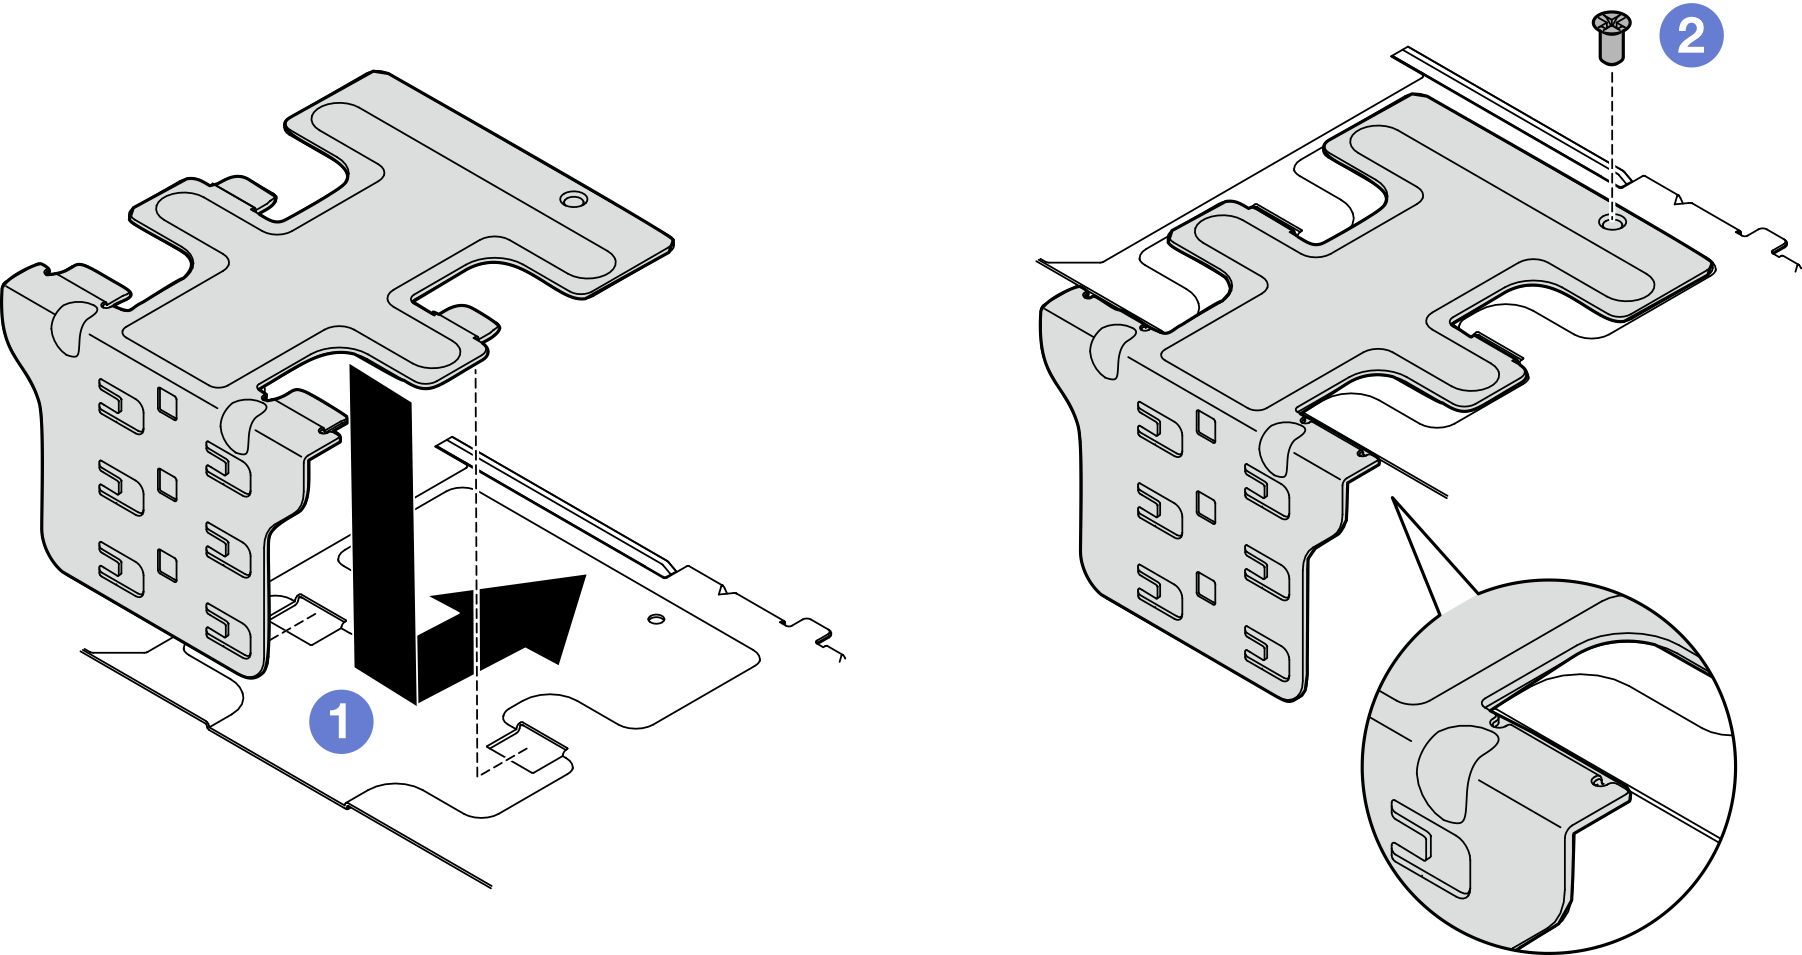
After this task is completed
Complete the parts replacement. See Complete the parts replacement.
Demo Video