Remove the PCIe riser assembly
Follow the instructions in this section to remove the PCIe riser assemblies.
About this task
Read Installation Guidelines and Safety inspection checklist to ensure that you work safely.
If applicable, remove the security bezel. See Remove the security bezel.
Power off the server and peripheral devices and disconnect the power cords and all external cables. See Power off the server.
If the server is installed in a rack, remove the server from the rack. See Remove the server from the rack.
Procedure
Remove PCIe riser 1
Procedure
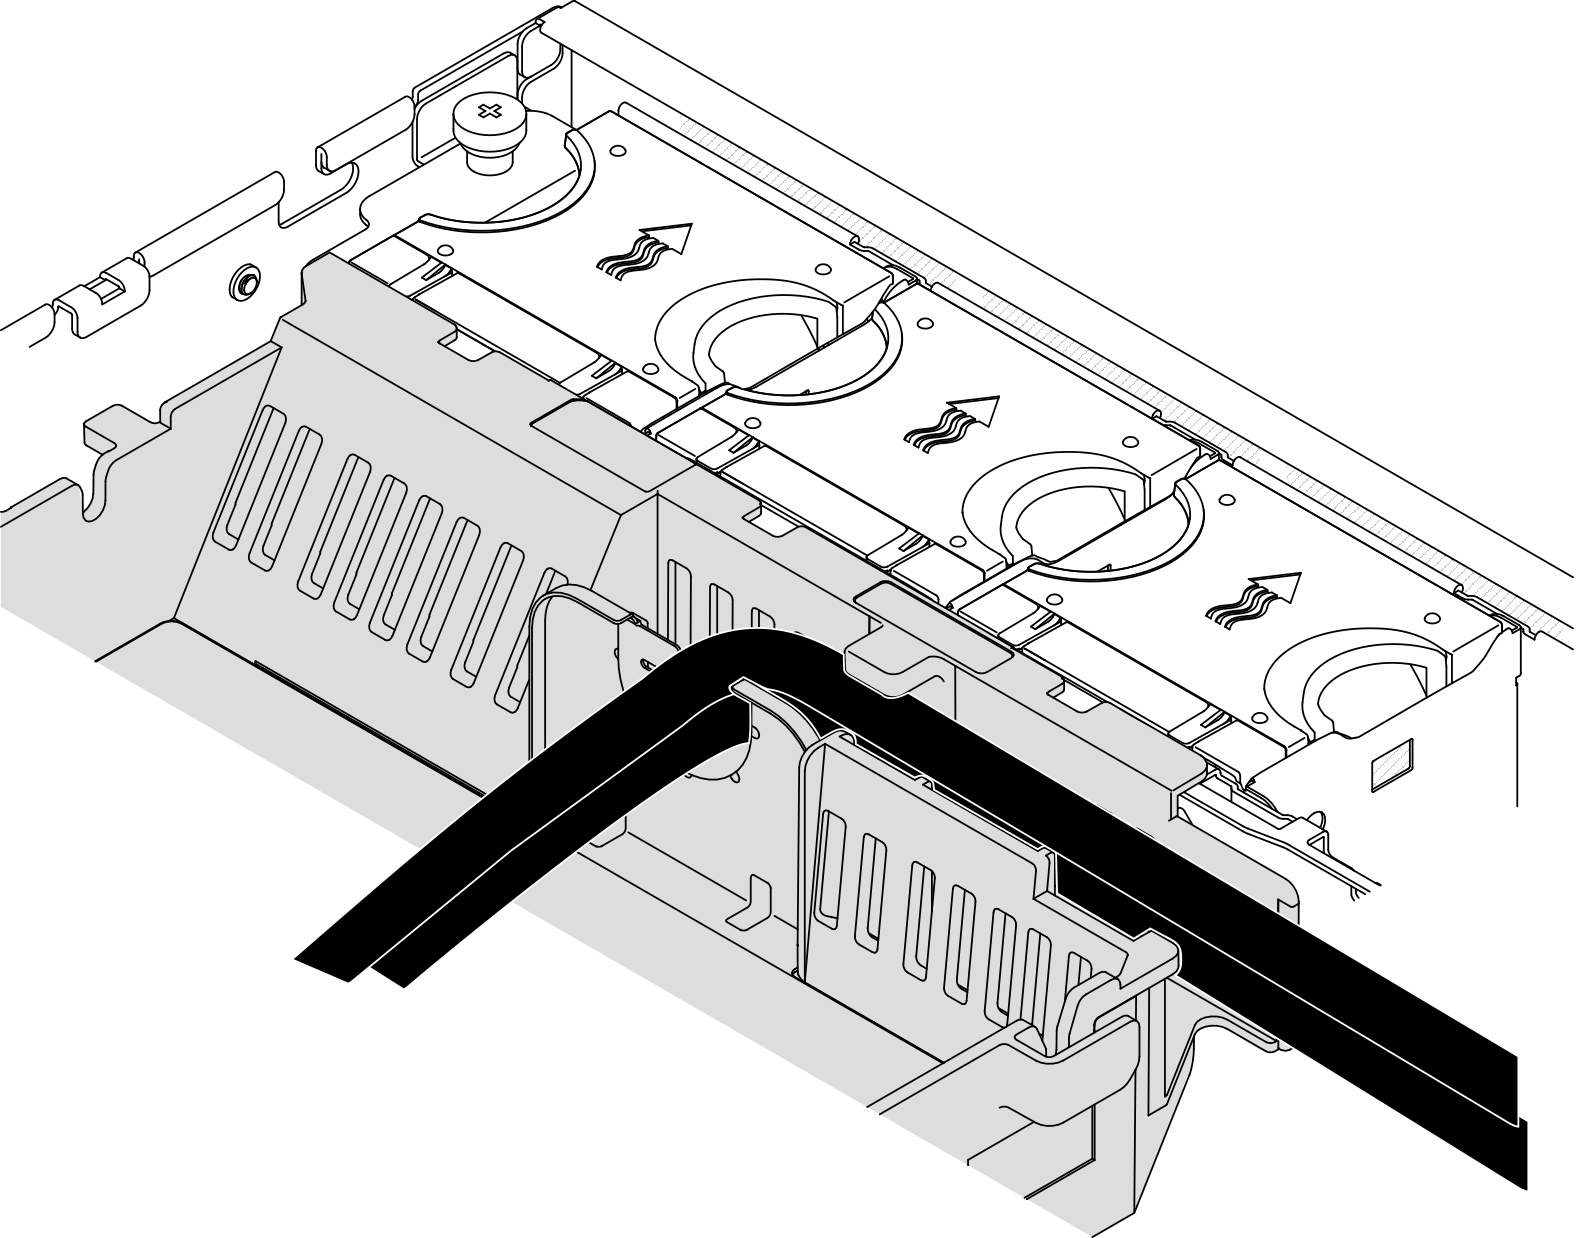
- If applicable, disengage all the GPU power cables from the cable guide of the processor air baffle.Figure 1. GPU power cables on processor air baffle
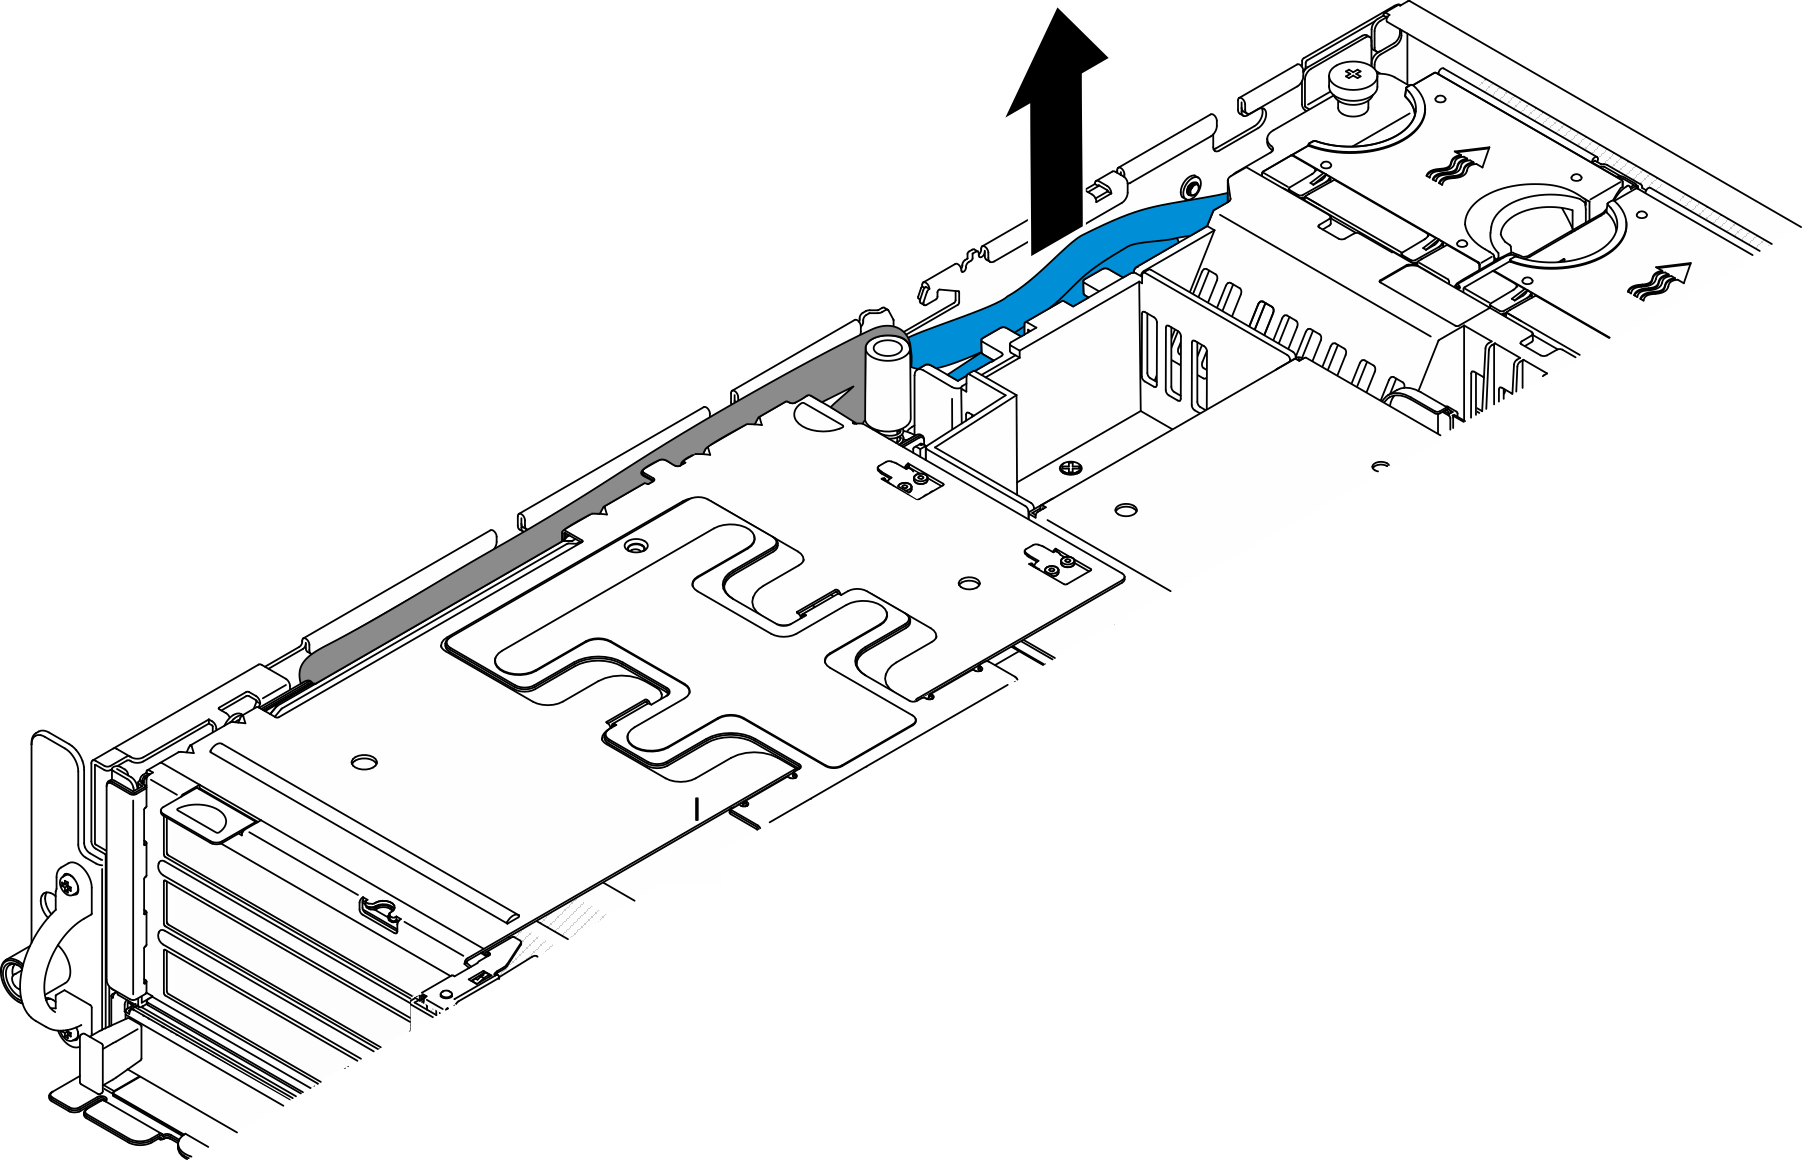
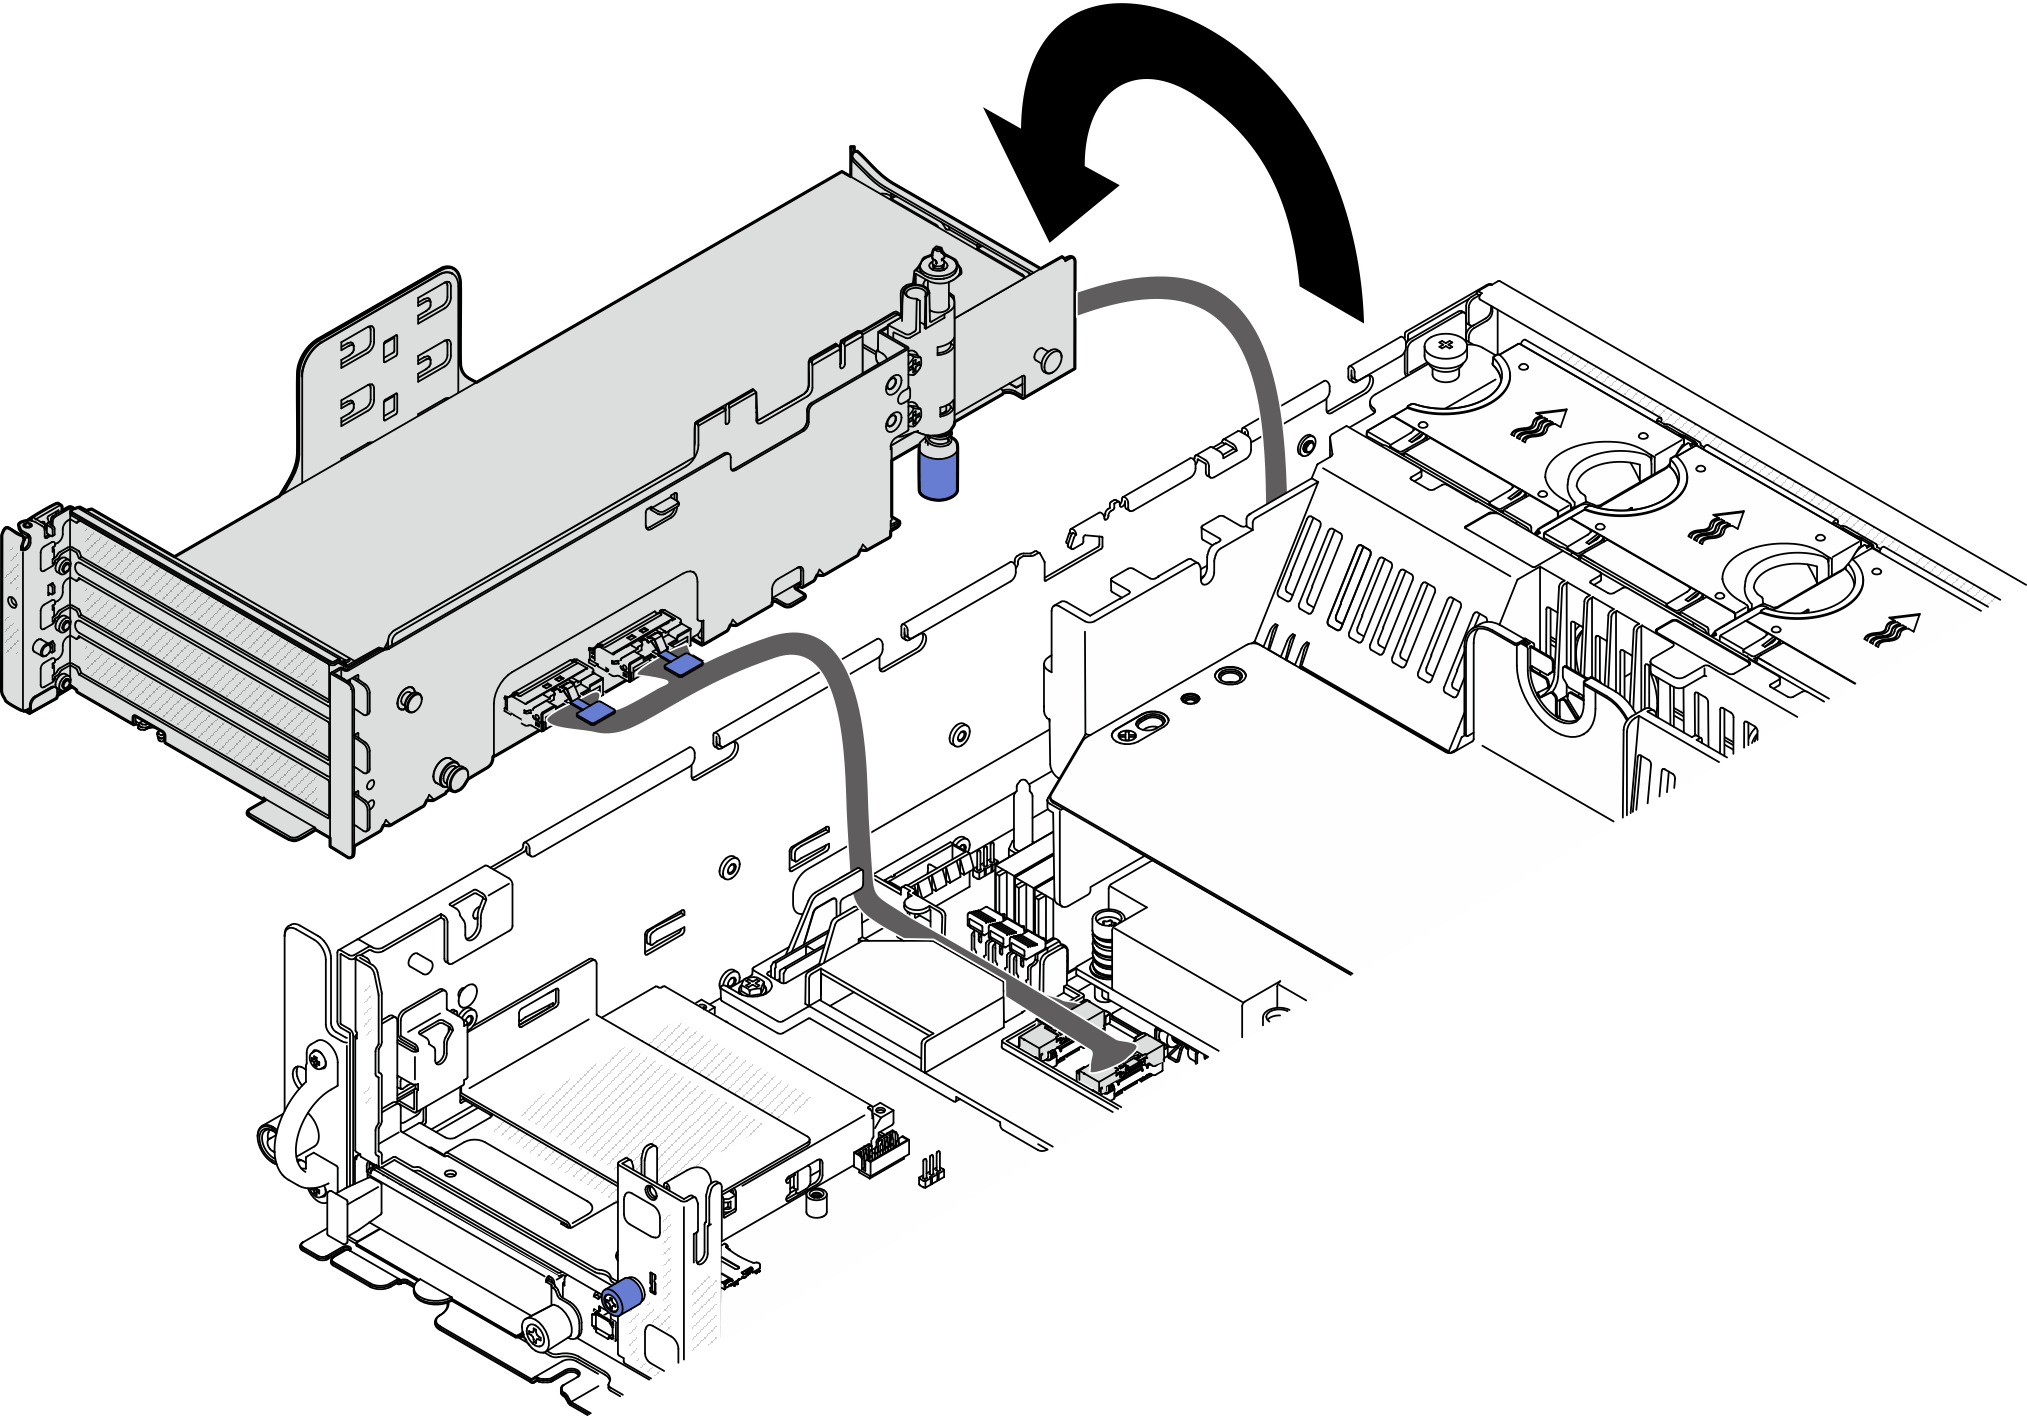
- Disengage the signal cable from the space between the processor air baffle and the chassis.Figure 2. Disengaging PCIe riser 1 signal cable
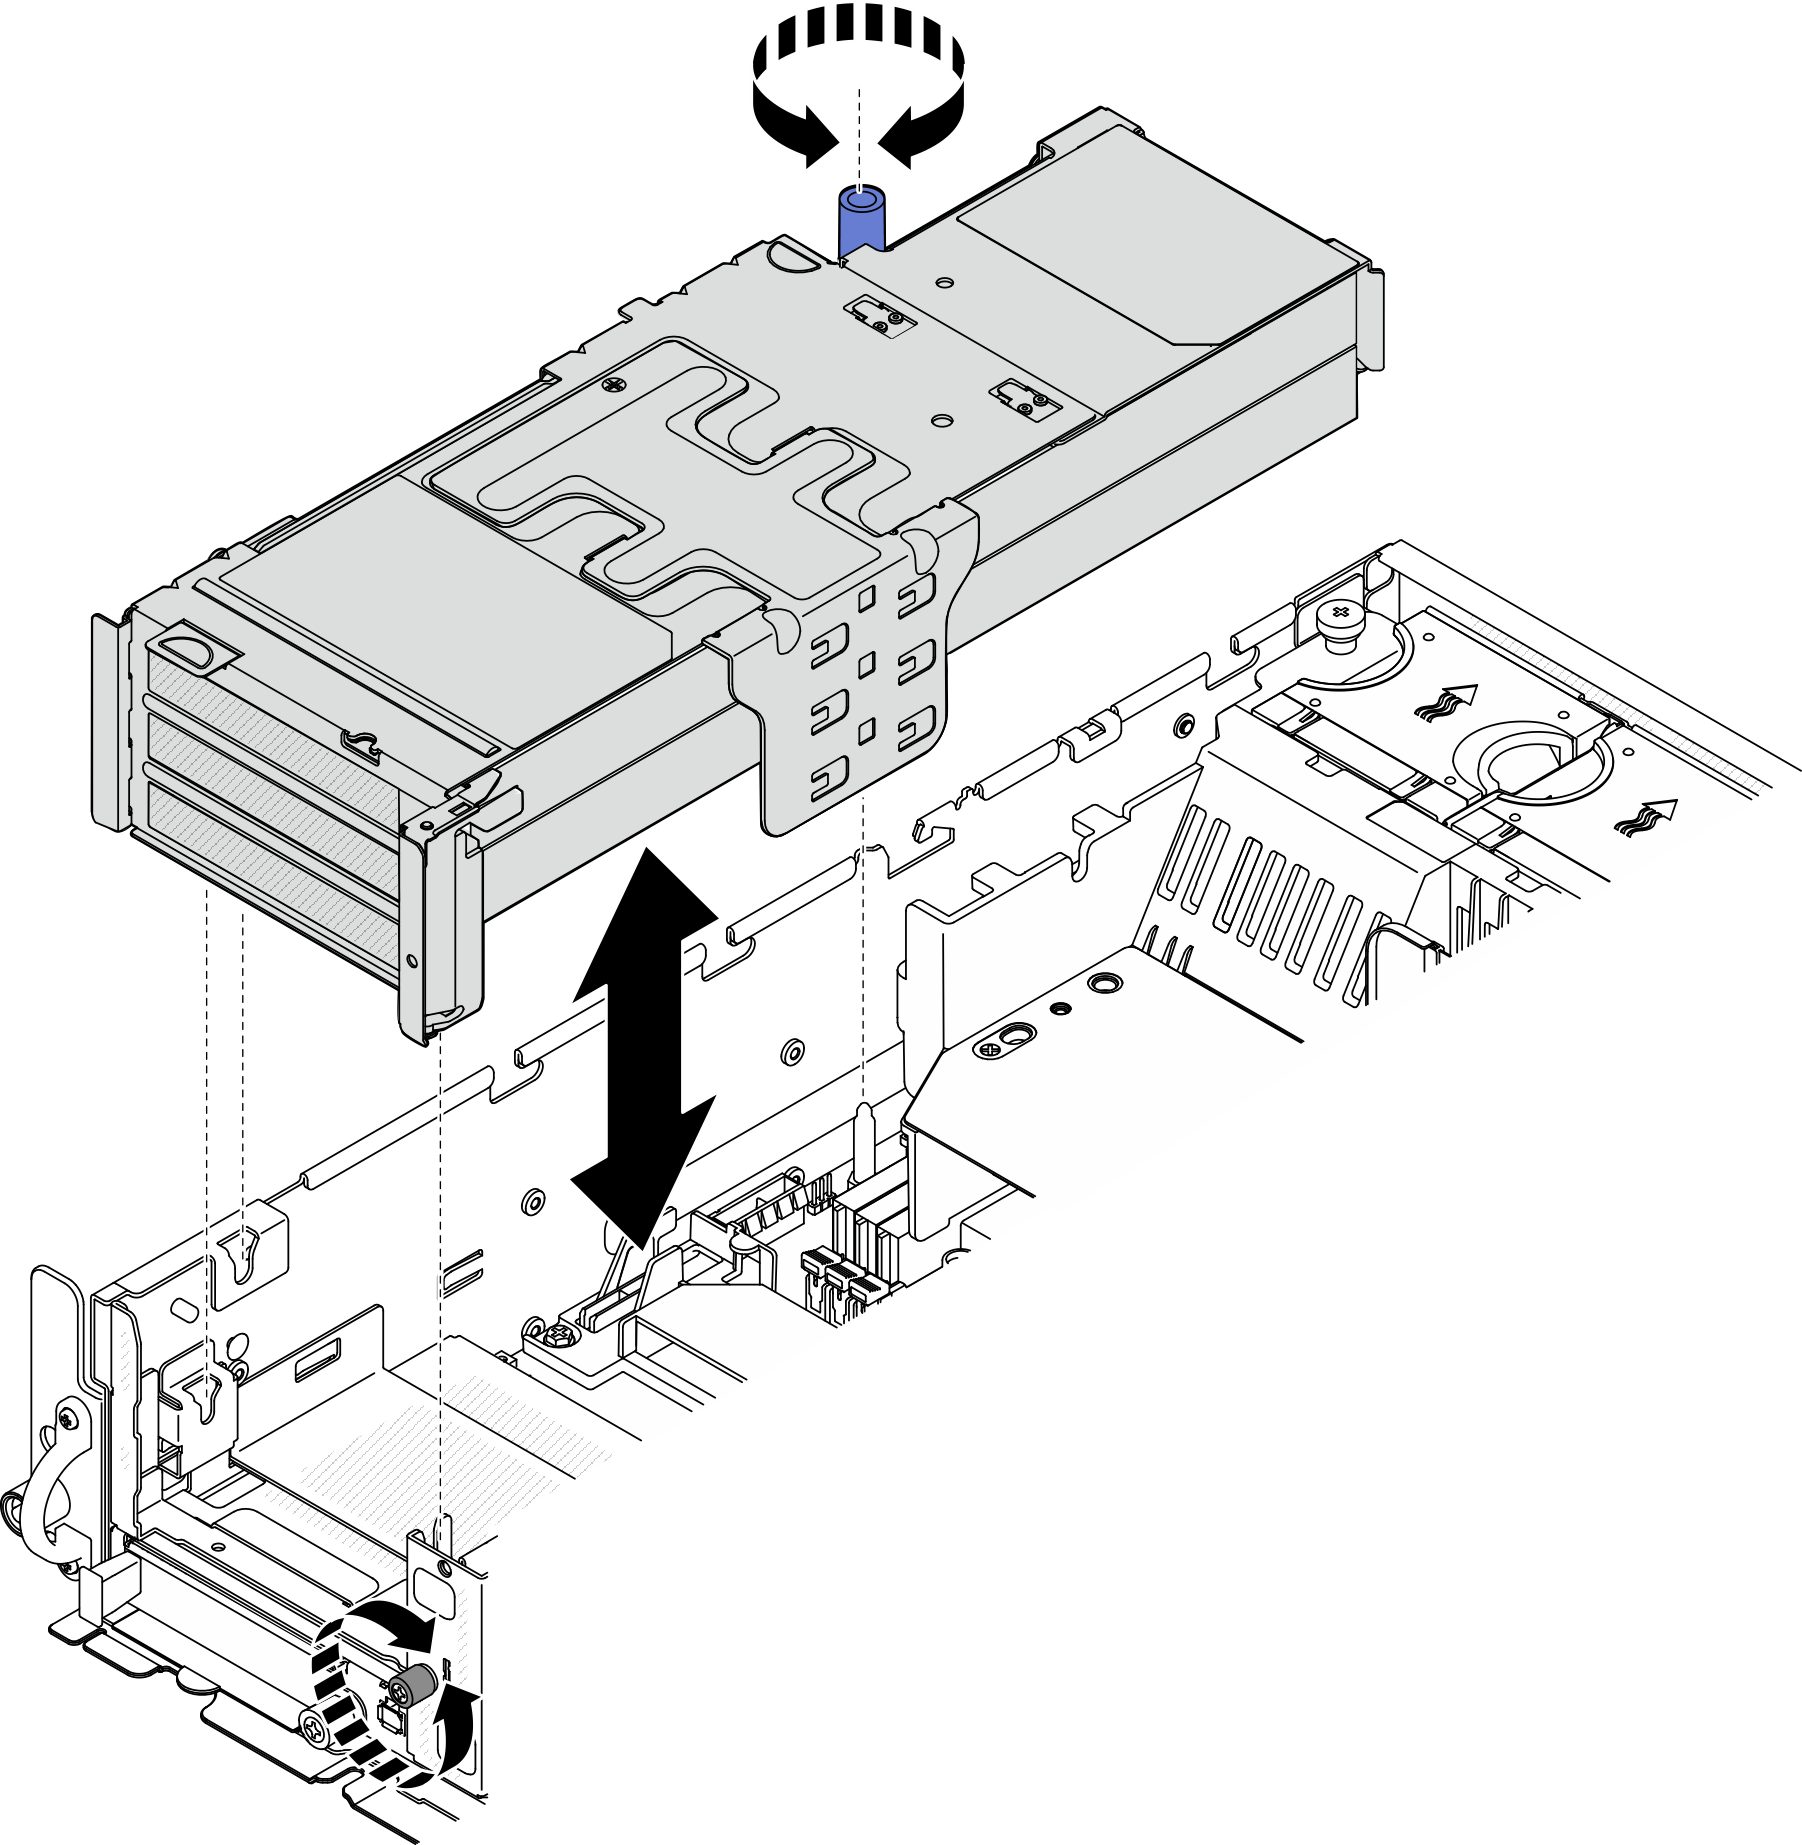
- Loosen the two captive screws; then, lift the riser assembly from the chassis.Figure 3. Lifting PCIe riser 1
- Disconnect all the cables from the PCIe adapters; if the serial port module is installed, disconnect the serial port cable from the system board. Then, place PCIe riser 1 aside the chassis.NoteDo not disconnect the cables from the riser card.Figure 4. Placing PCIe riser 1 aside the chassis
Remove PCIe riser 2
Procedure
- If applicable, lift the internal drive backplane from the chassis.
- If applicable, disengage the following cables from the cable clip of the processor air baffle.
- The blue signal cable of PCIe riser 2
- Power cable of internal drive backplane
- Signal cable of internal drive backplane
Figure 5. Cables secured by the cable clip of processor air baffle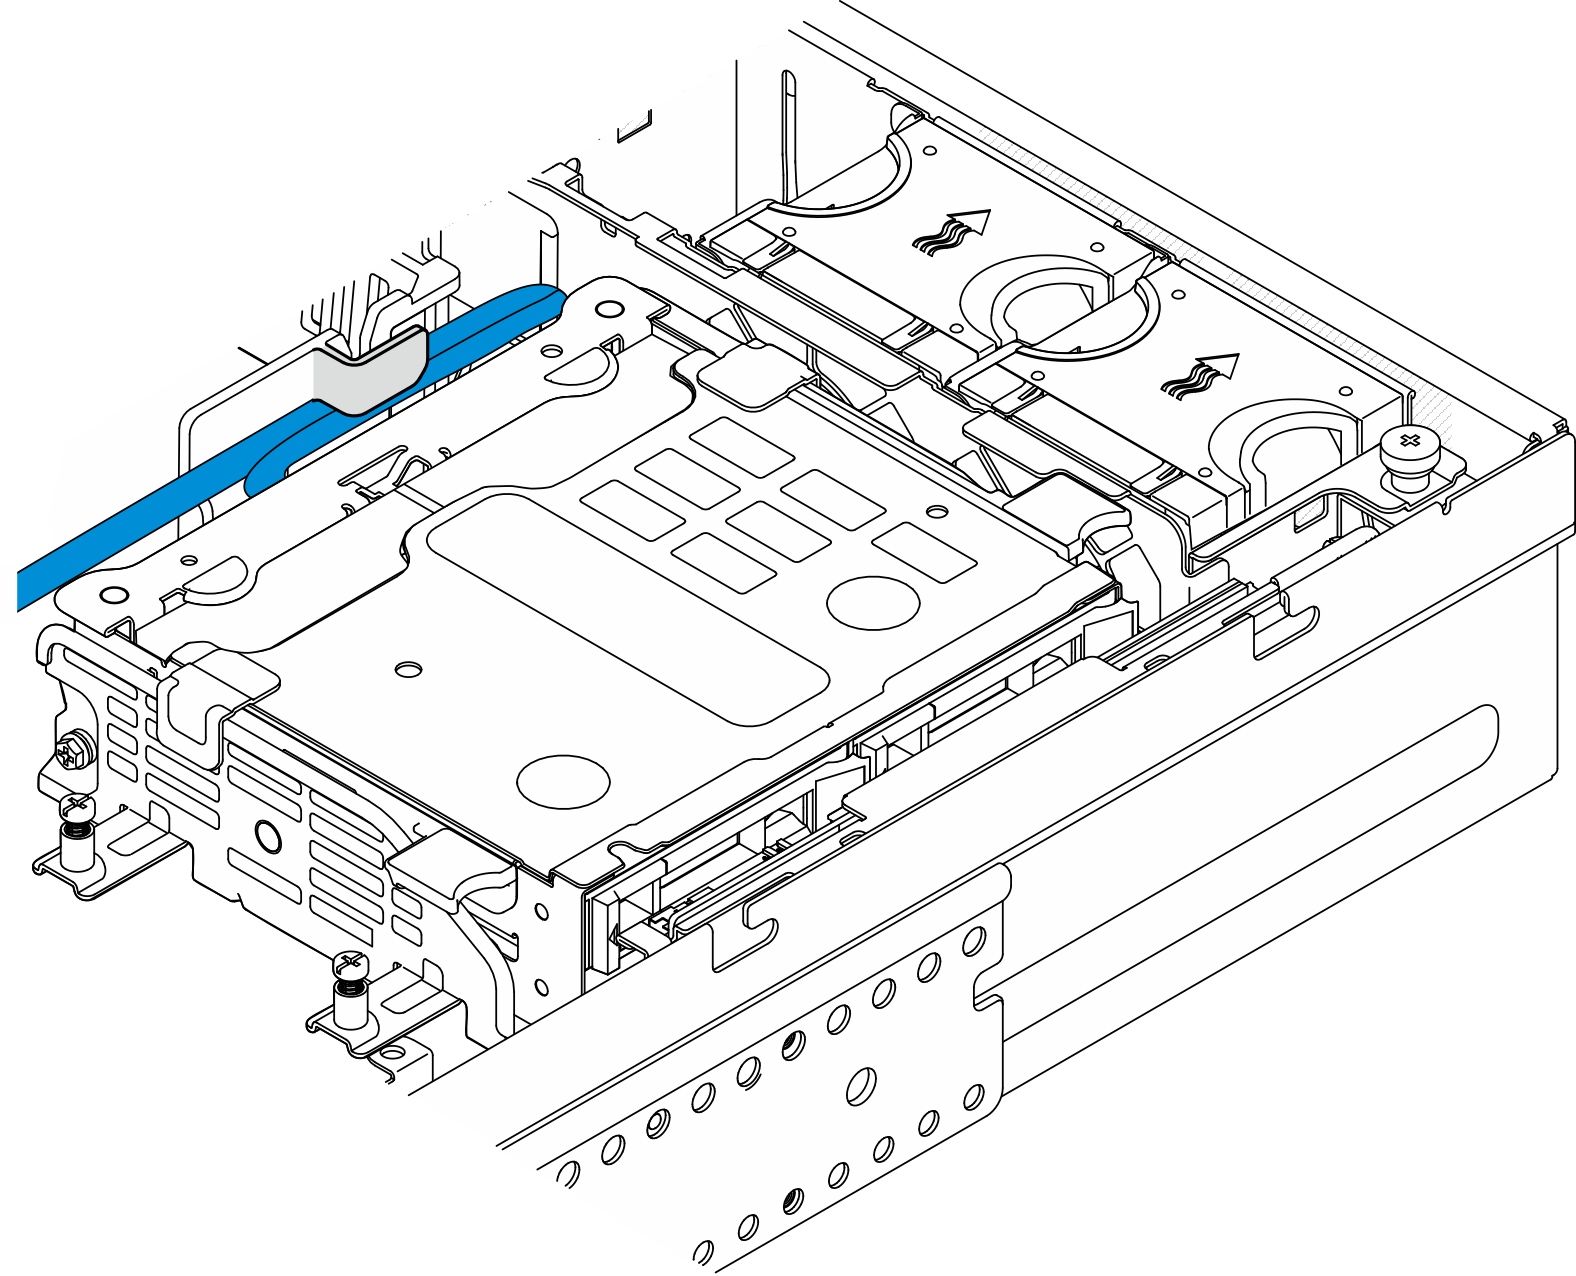
Figure 6. Removing the internal drive backplane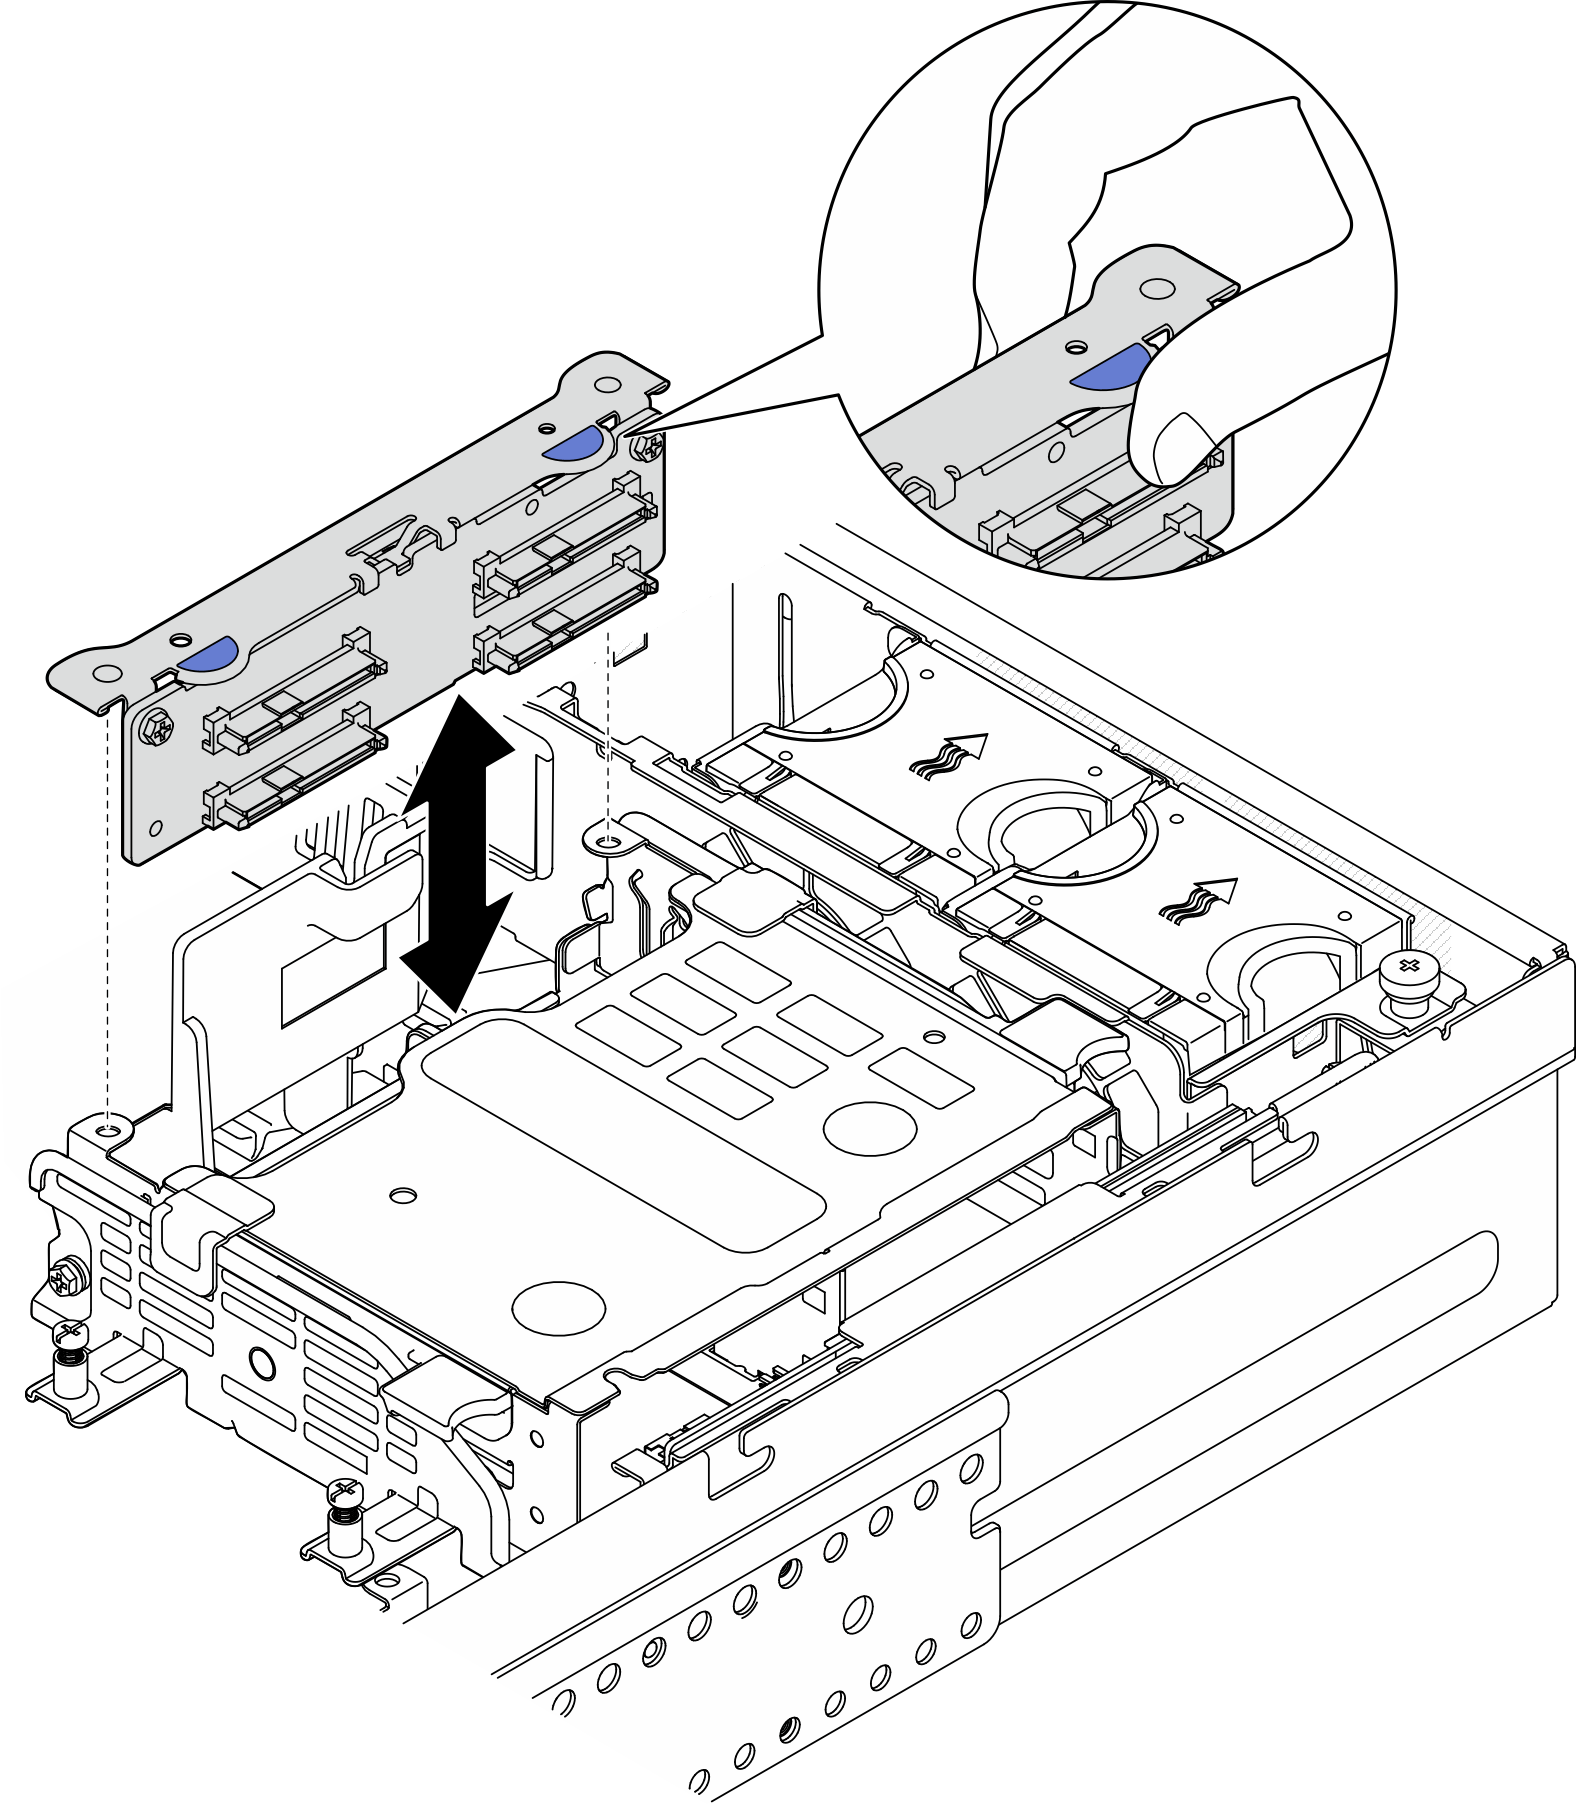
- If applicable, disengage the following cables from the cable clip of the processor air baffle.
- If applicable, disengage all the GPU power cables from the cable guide of the processor air baffle.Figure 7. GPU power cables on processor air baffle
- Loosen the two captive screws; then, lift the riser assembly from the chassis.Figure 8. Lifting PCIe riser 2

- Disconnect all the cables from the PCIe adapters; then, place PCIe riser 2 on the front drive cage.NoteDo not disconnect the cables from the riser card.Figure 9. Placing PCIe riser 2 aside the chassis

After this task is completed
If necessary, proceed to remove the PCIe adapter. See Remove a PCIe adapter.
If you are instructed to return the component or optional device, follow all packaging instructions, and use any packaging materials for shipping that are supplied to you.
Demo Video