Install a storage cage
Use this information to install a storage cage.
Before you install a storage cage, complete the following steps:
Read Installation Guidelines to ensure that you work safely.
- If the compute node is installed in a chassis, remove it (see Remove a compute node for instructions).
- Carefully lay the compute node on a flat, static-protective surface, orienting the compute node with the bezel pointing toward you.
Remove the compute node cover (see Remove the compute node cover for instructions).
To install a storage cage, complete the following steps:
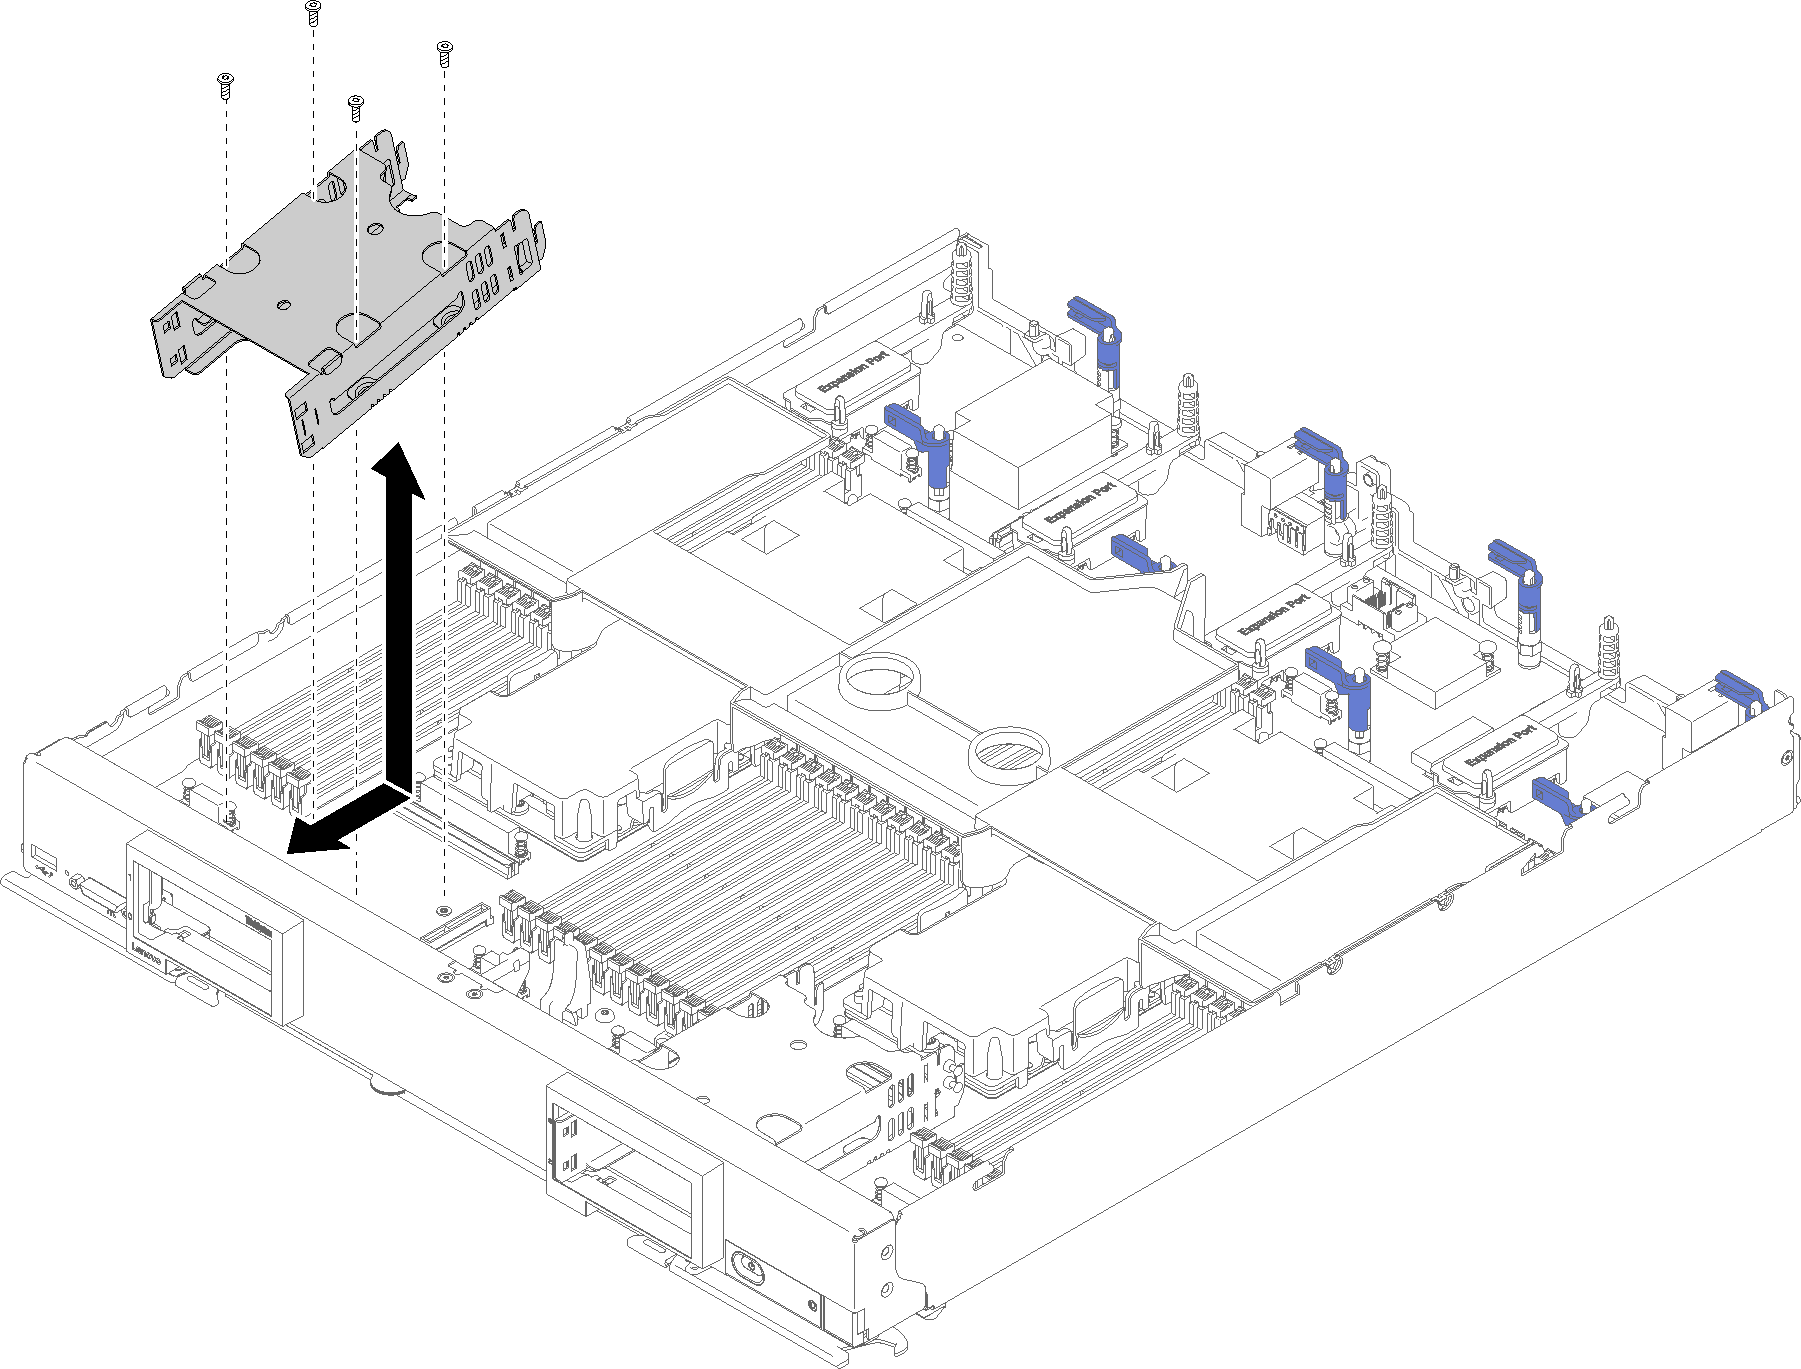
Figure 1. Storage cage installation
Note
There are two types of storage cage for compute node, make sure you install the right type. The storage cage with cable retaining clip on its side can only be installed behind the right bezel. The storage cage without cable retaining clip on its side can only be installed behind the left bezel (see Parts list for bezel location).
Figure 2. Two types of storage cage
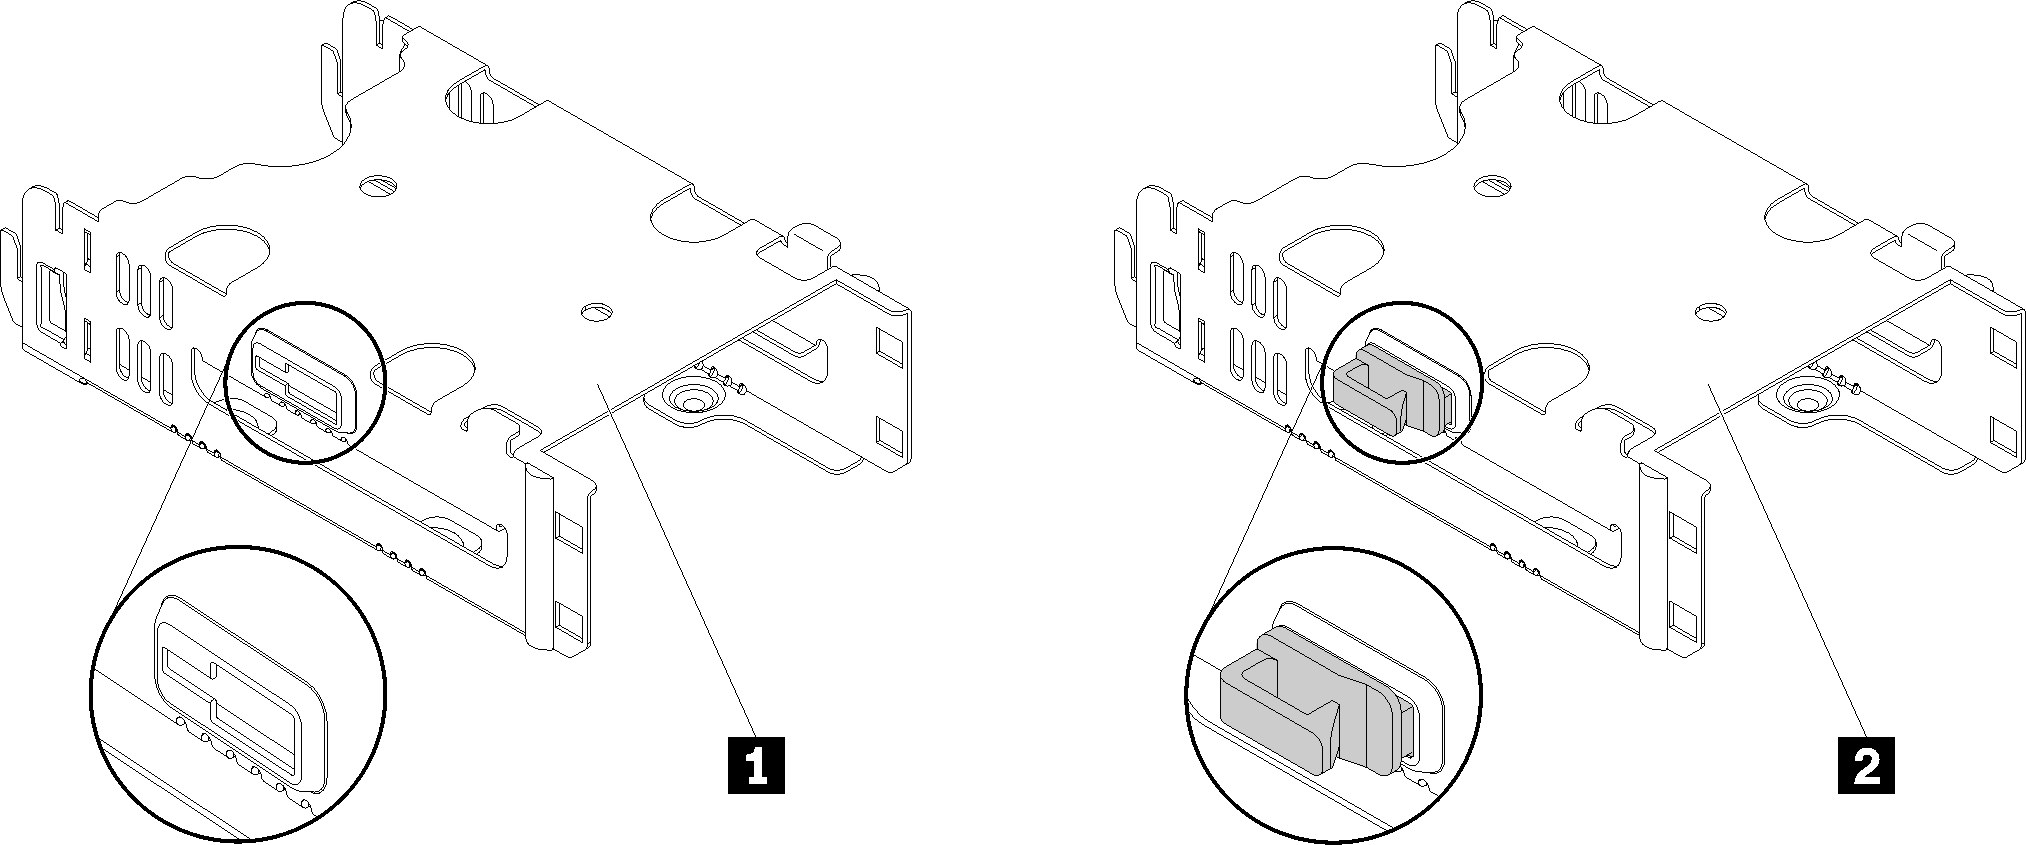
| 1 Storage cage without retaining clip | 2 Storage cage with retaining clip |
- Position the cage in the compute node front panel at an angle and rotate the cage into position on the system board.
- Align the cage with the screw holes in the system board.
- Using a T10 Torx screwdriver, insert the four screws and secure the cage in the compute node.
- Install the drive backplane (see Install a 2.5-inch drive backplane for instructions).
- Install any removed drives, optional drive components, and drive bay fillers (see Install a 2.5-inch hot-swap drive for instructions).
Demo video
Give documentation feedback