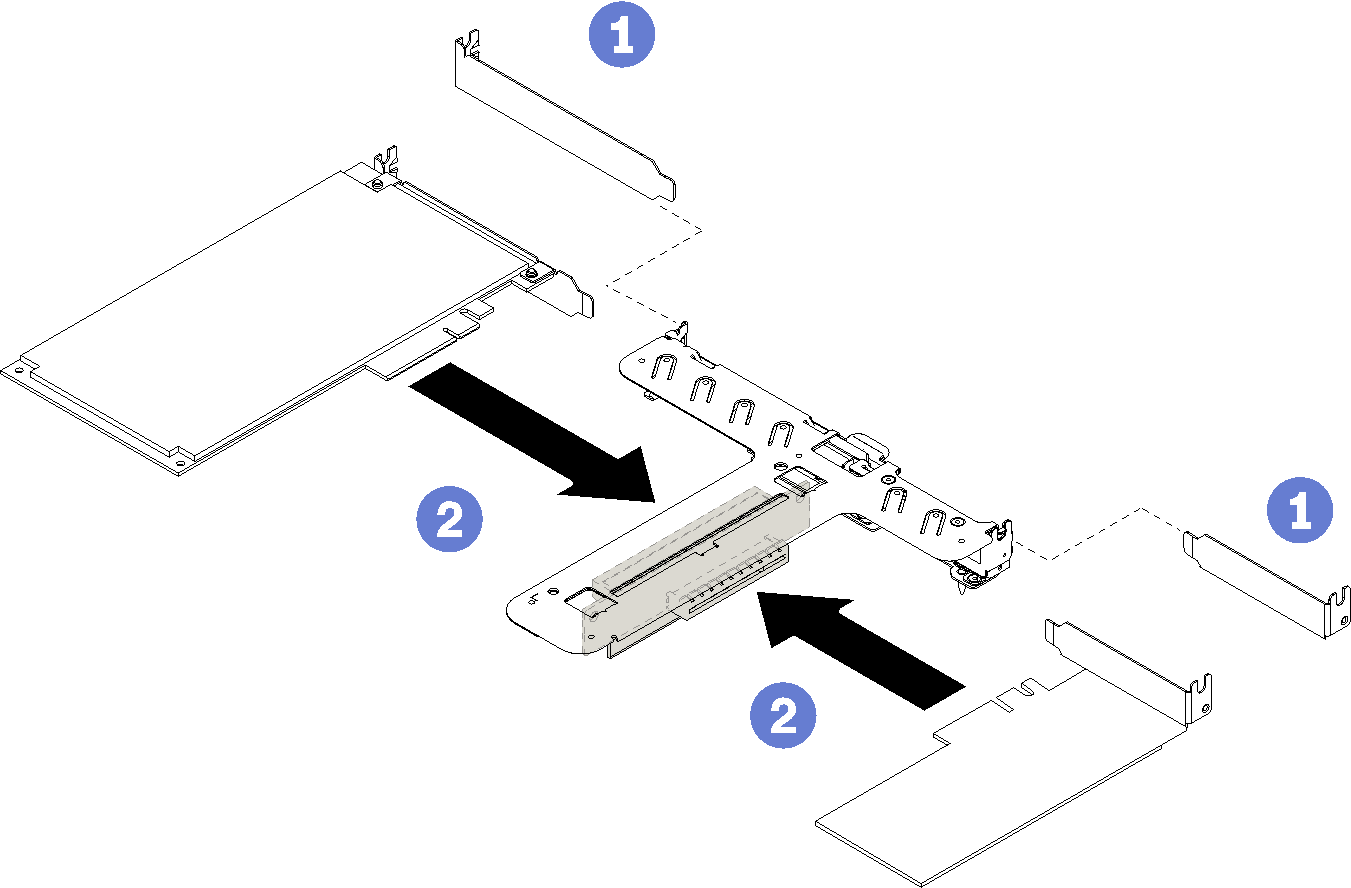
Install an adapter
Use this information to install an adapter.
- Read the following section(s) to ensure that you work safely.
Touch the static-protective package that contains the component to any unpainted metal surface on the server; then, remove it from the package and place it on a static-protective surface.
PCIe slot 1 and slot 2 do not support ARI and SR-IOV.
PCIe slot 3 supports ARI and SR-IOV.
QLogic QL41262 PCIe 25Gb 2-Port SFP28 Ethernet Adapter does not support shared storage V3700 V2/XP and V5030 V2 configurations.
To install an adapter, complete the following steps:

Reconnect the cables.
Reinstall the PCIe riser assembly (see Install the PCIe riser assembly).
Install the top cover onto the server (see Install the top cover).
Install the server into the rack if necessary.
Reconnect power cords and all external cables.
- If necessary, configure the RAID array using the Setup utility configuration.
Demo video