Install the RAID adapter
Use this information to install the RAID adapter.
Before you install the RAID adapter, complete the following steps:
- Read the following section(s) to ensure that you work safely.
Touch the static-protective package that contains the component to any unpainted metal surface on the server; then, remove it from the package and place it on a static-protective surface.
Locate the RAID adapter connector (see System-board connectors).
Note
The on-board RAID slot is dedicated to the RAID adapter. You can also have a RAID adapter in the PCIe riser assembly depending on your configuration.
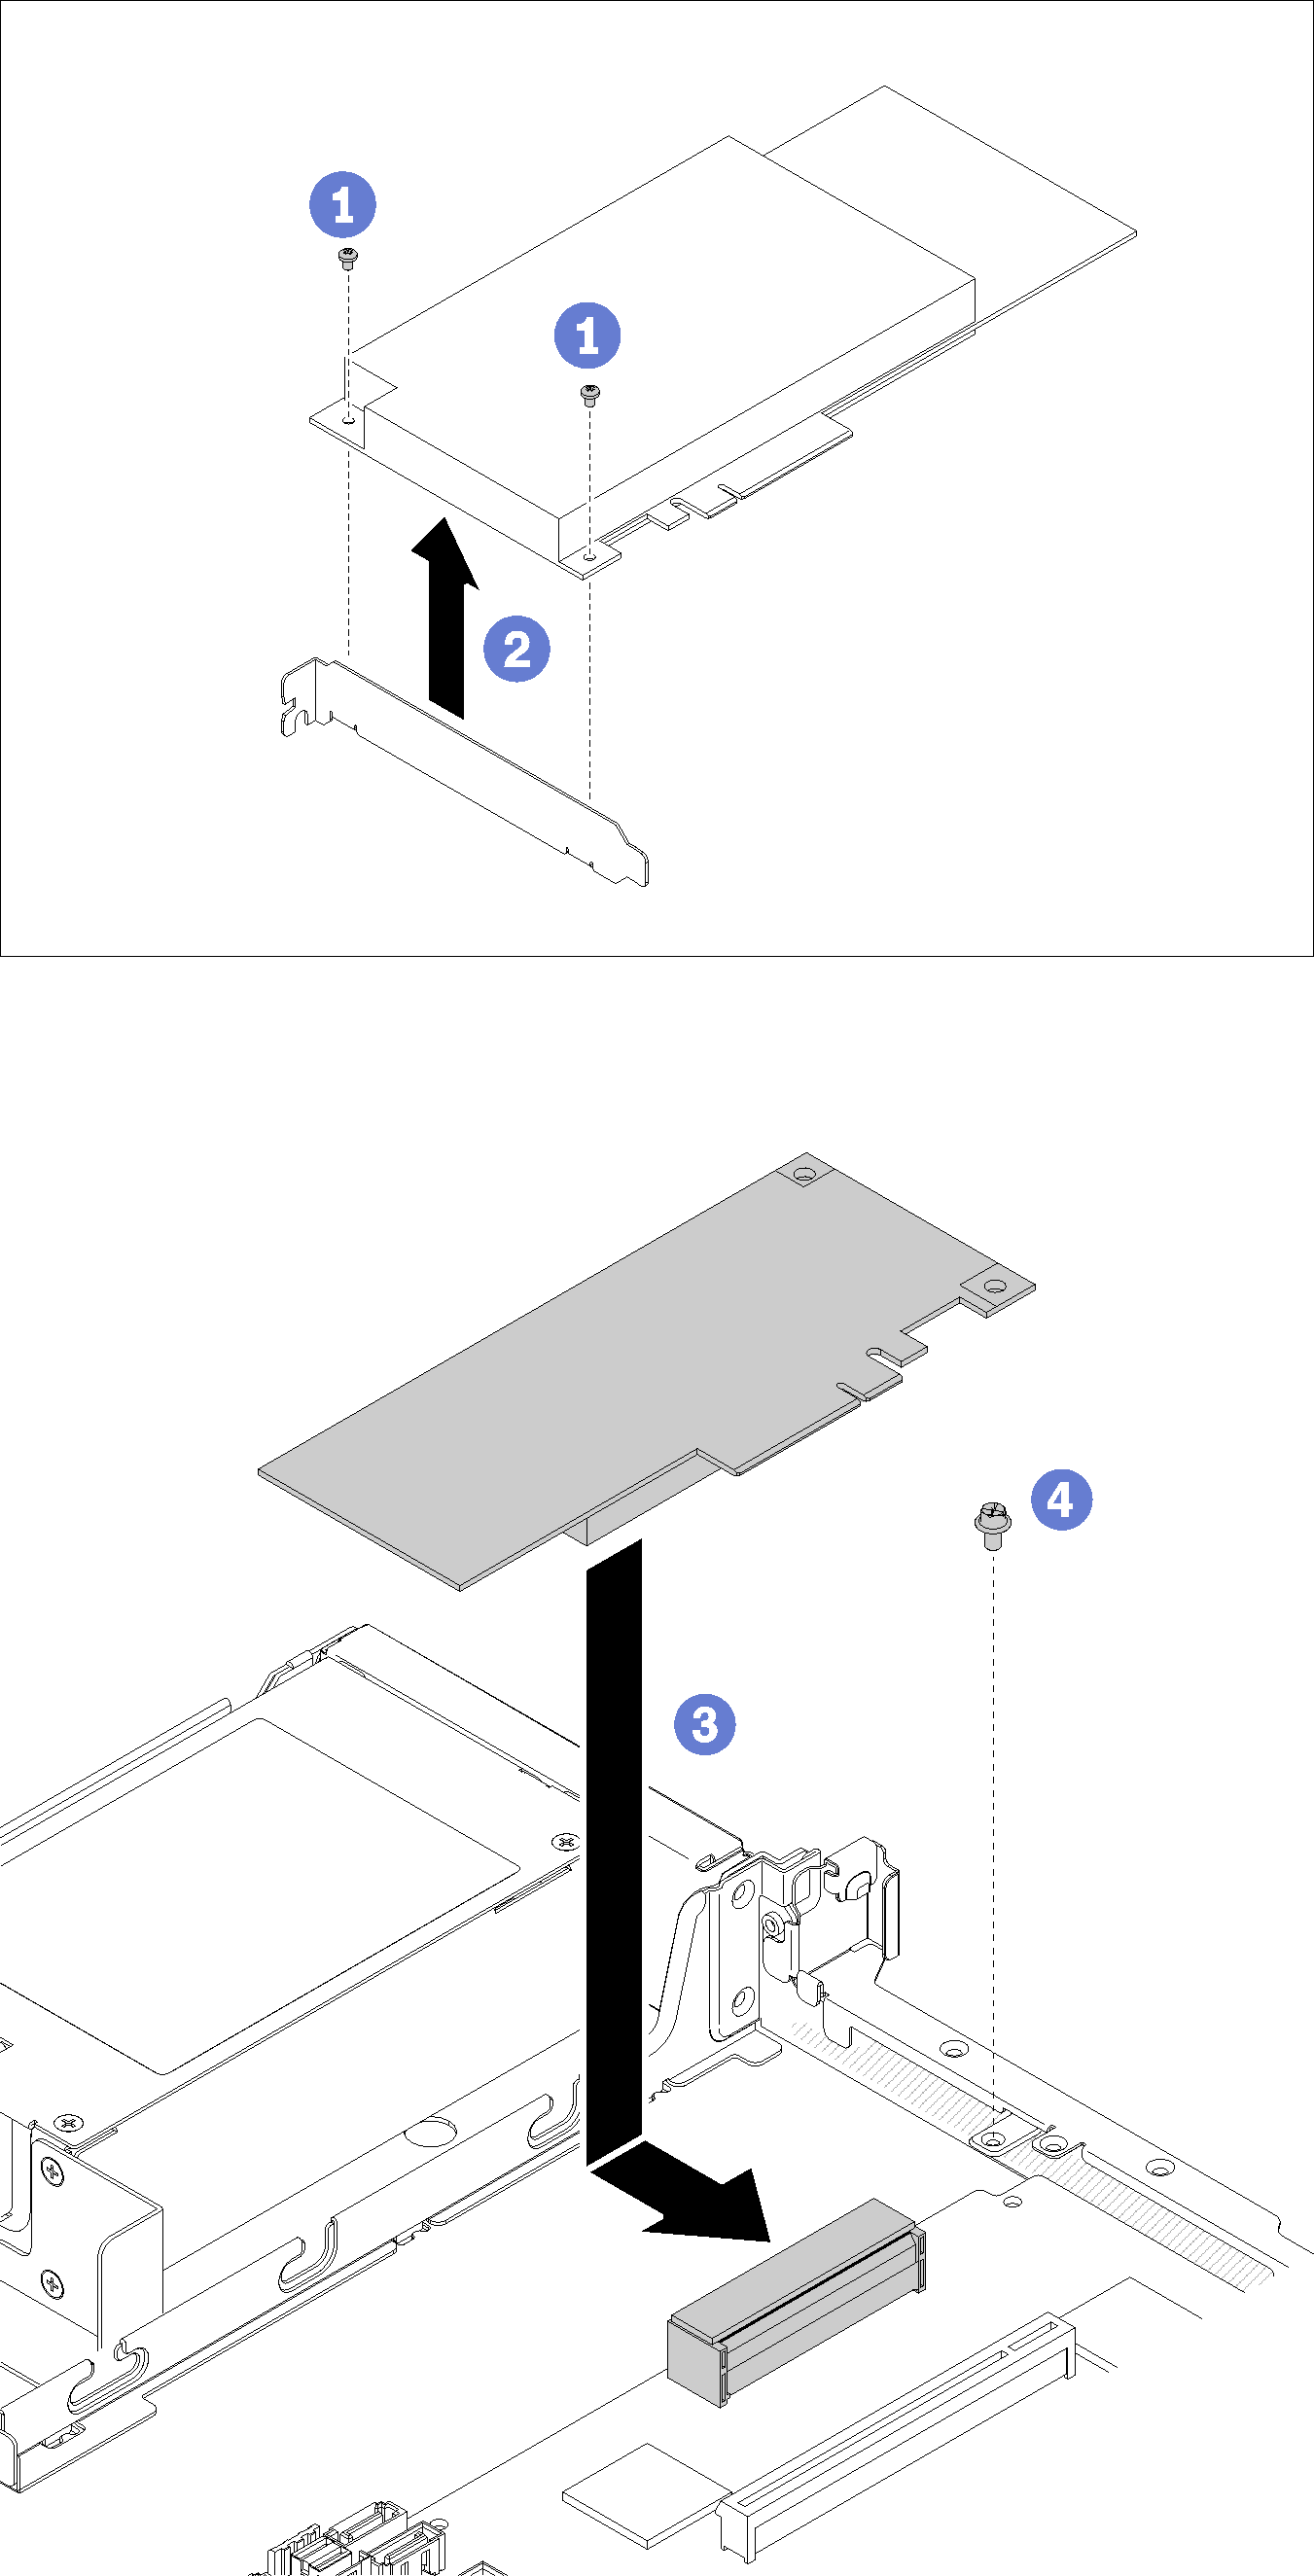
To install the RAID adapter, complete the following steps:
Figure 1. RAID adapter installation
After you install the RAID adapter, complete the following steps:
Install the top cover onto the server (see Install the top cover).
Reinstall the power supply 1 if the redundant power supply model is used (see Install a hot-swap power supply unit).
Install the server into the rack if necessary.
Reconnect power cords and all external cables.
- Configure the RAID array using the Setup utility configuration.
Demo video
Give documentation feedback