Install the backplate
Use this information to install the backplate.
Before you install the simple-swap drive backplate, complete the following steps:
- Read the following section(s) to ensure that you work safely.
Note
Depending on the configuration, the following illustration might differ slightly from your backplate.
To install the simple-swap drive backplate, complete the following steps:
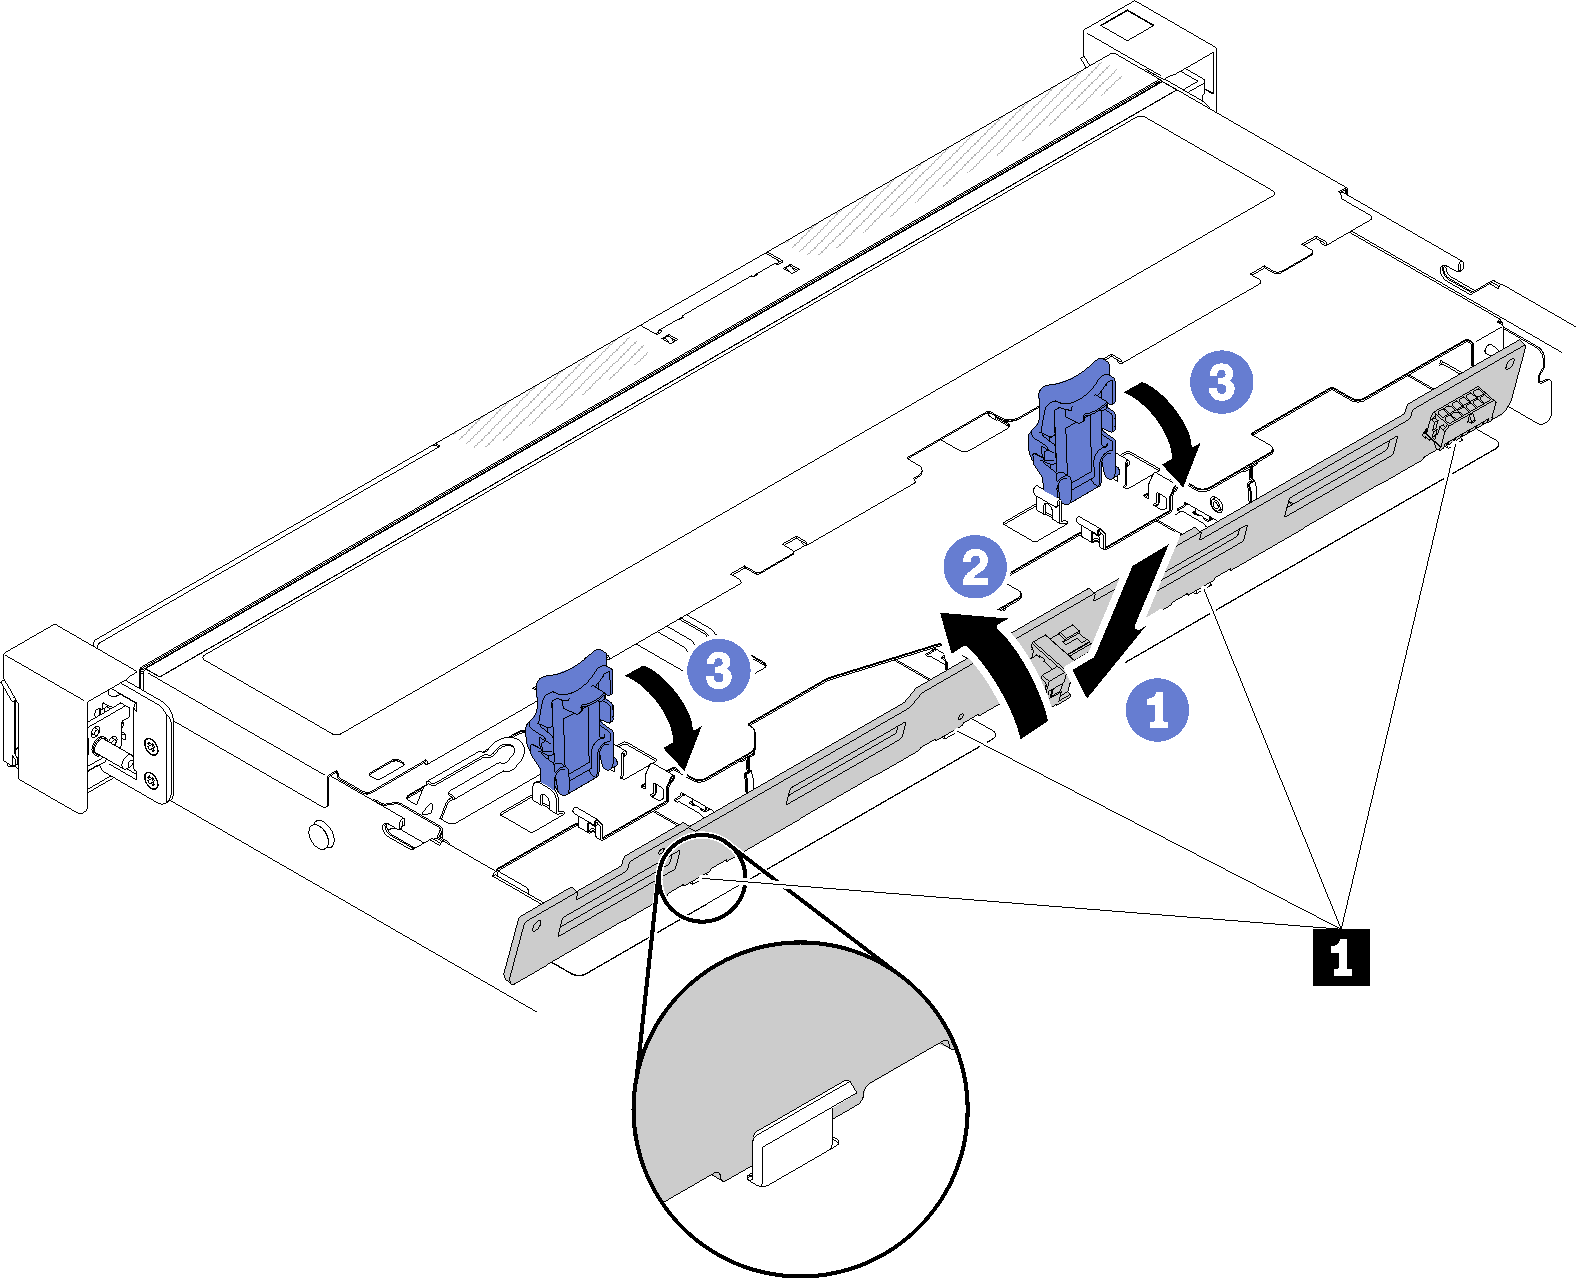
Figure 1. Backplate installation


| 1 Pin |
- Insert the backplate into the chassis with an angle. Make sure the pins are against the backplate on the backside.
- Rotate the backplate up towards the front of the server.
- Close the retaining clips to secure the backplate in place.
After you install the simple-swap drive backplate, complete the following steps:
Connect the backplate cables to the system board and the RAID adapter (if installed). See Internal cable routing for more information.
Reinstall all the drives and drive fillers into the drive bays (see Install a simple-swap drive).
Install the top cover onto the server (see Install the top cover).
Install the server into the rack if necessary.
Reconnect power cords and all external cables.
Demo video
Give documentation feedback