Install the M.2 drive
Use this information to install the M.2 drive in the M.2 drive.
Before you install the M.2 drive, complete the following steps:
- Read the following section(s) to ensure that you work safely.
Require a #1 Phillips and Hex 4.5 mm screwdriver.
Note
When the eighth SATA drive is installed, the M.2 drive is disabled.
Note
There are two dimensions of M.2 drive supported by the server: 42 mm and 80mm. Both are removed and installed in a similar method.
Figure 1. M.2 drive location
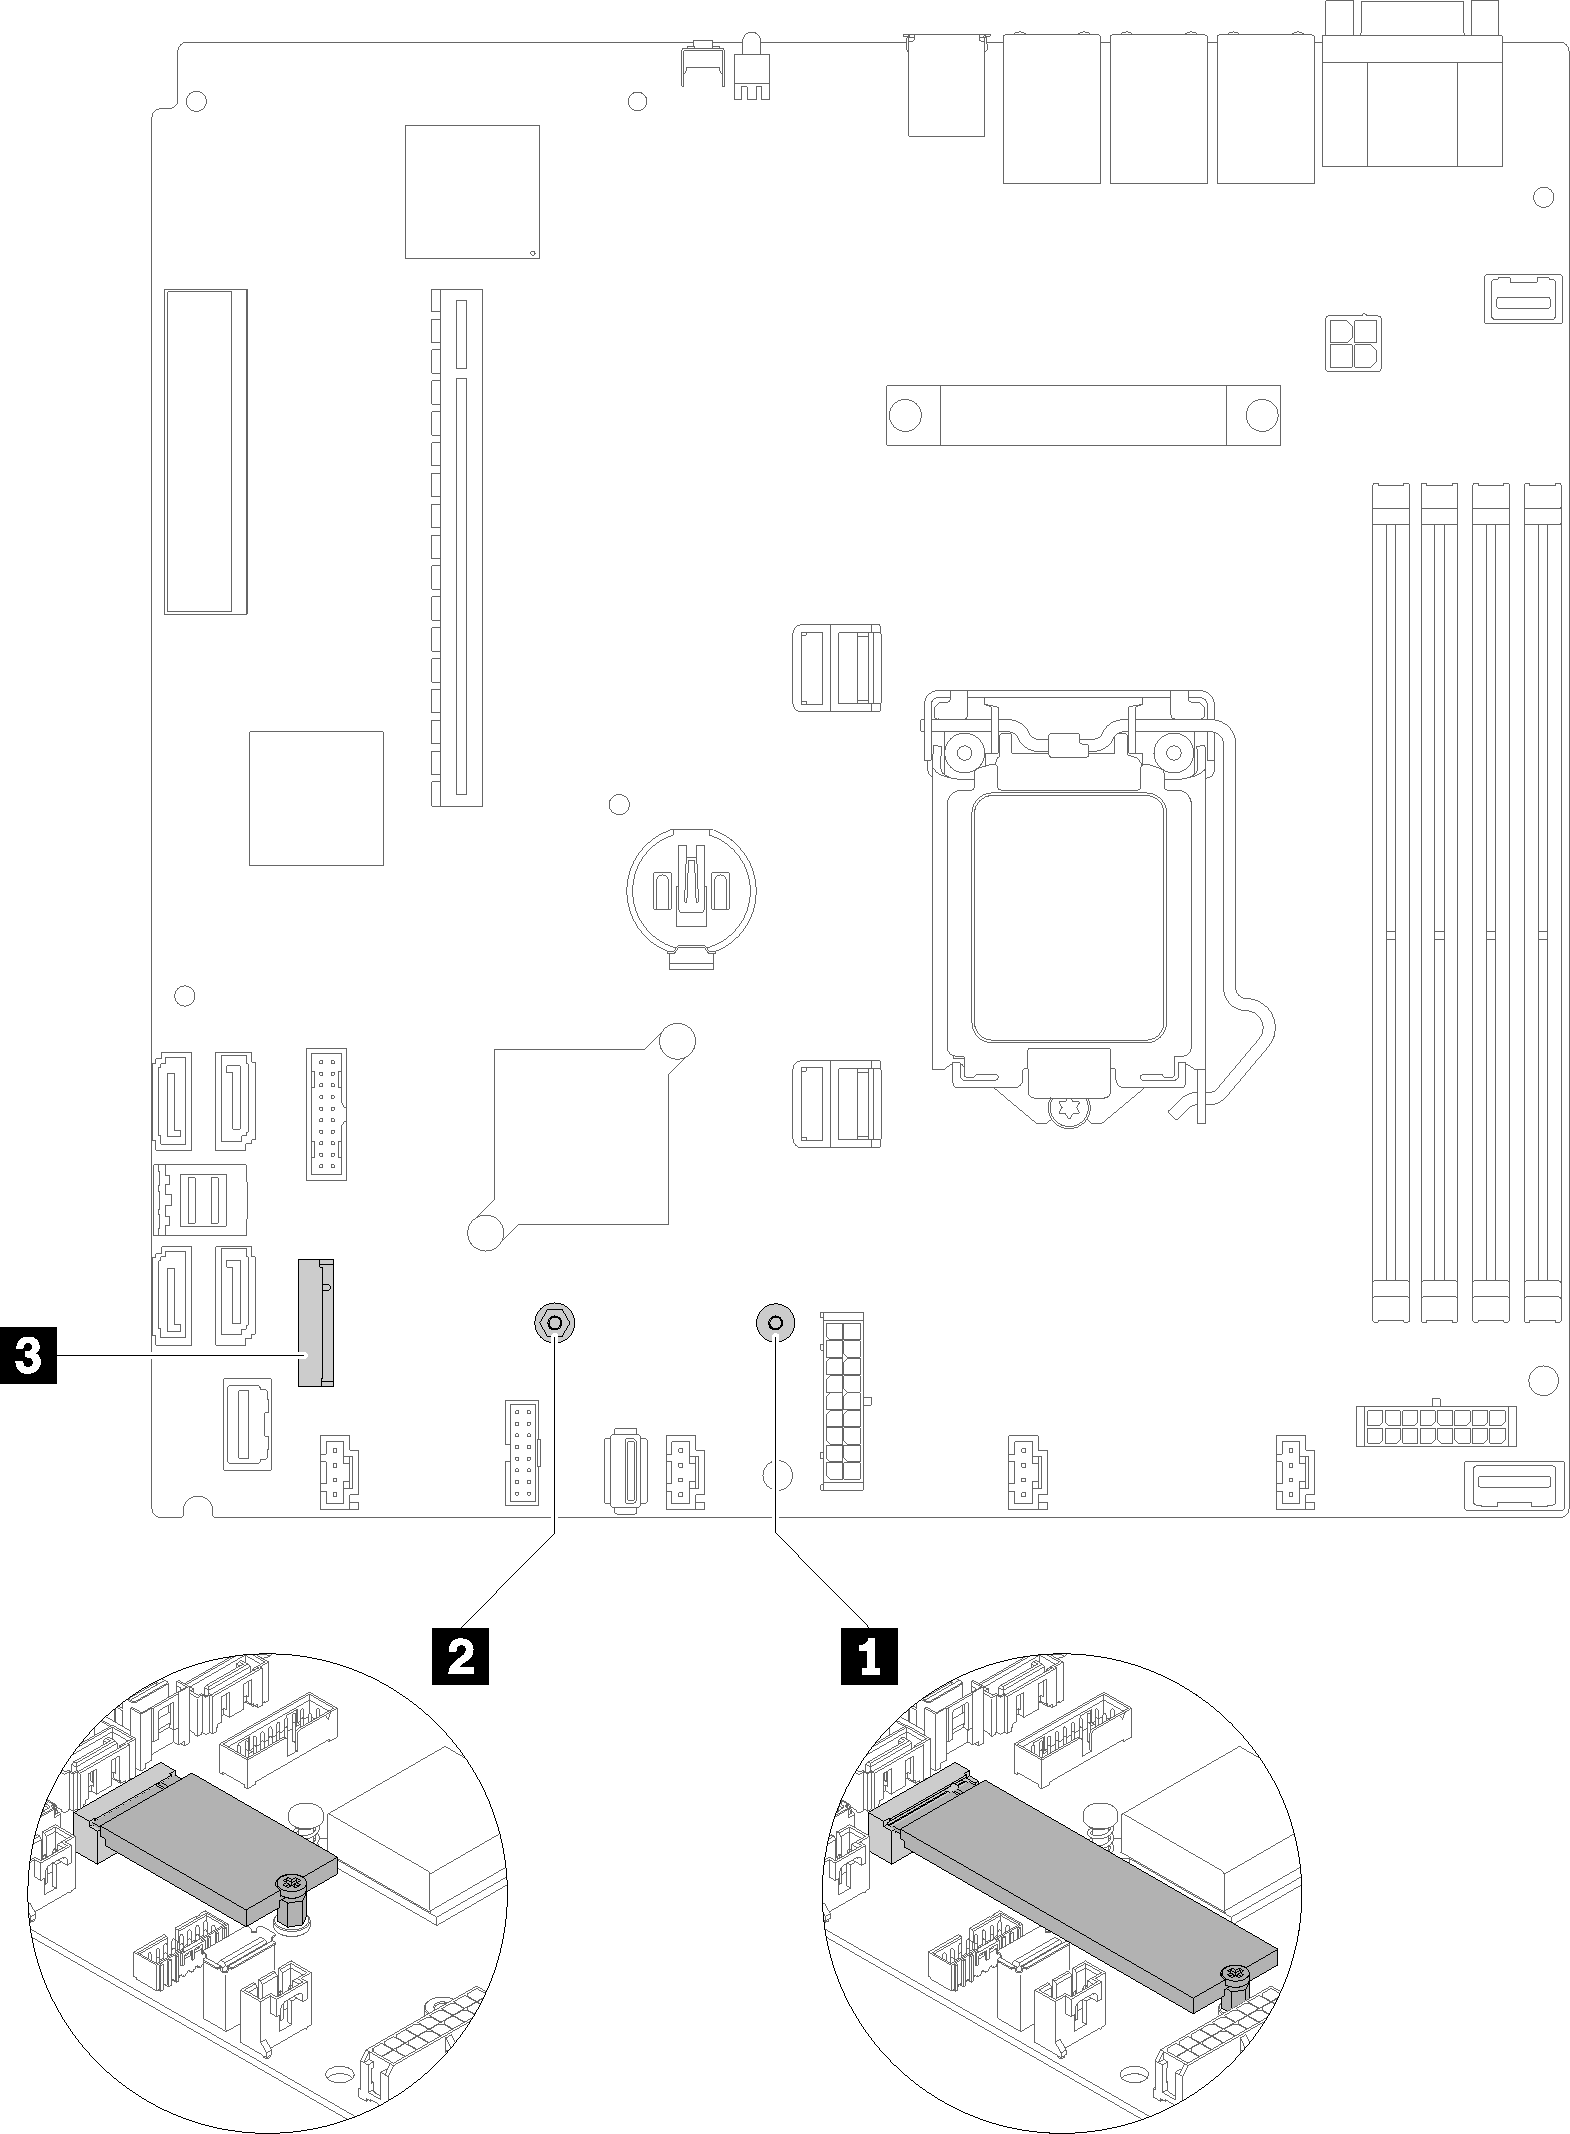
| 1 Screw for 80 mm M.2 drive (requires a#1 Phillips and Hex 4.5 mm screwdriver) | 3 M.2 connector |
| 2 Screw for 42 mm M.2 drive (requires a #1 Phillips and Hex 4.5 mm screwdriver) |
Note
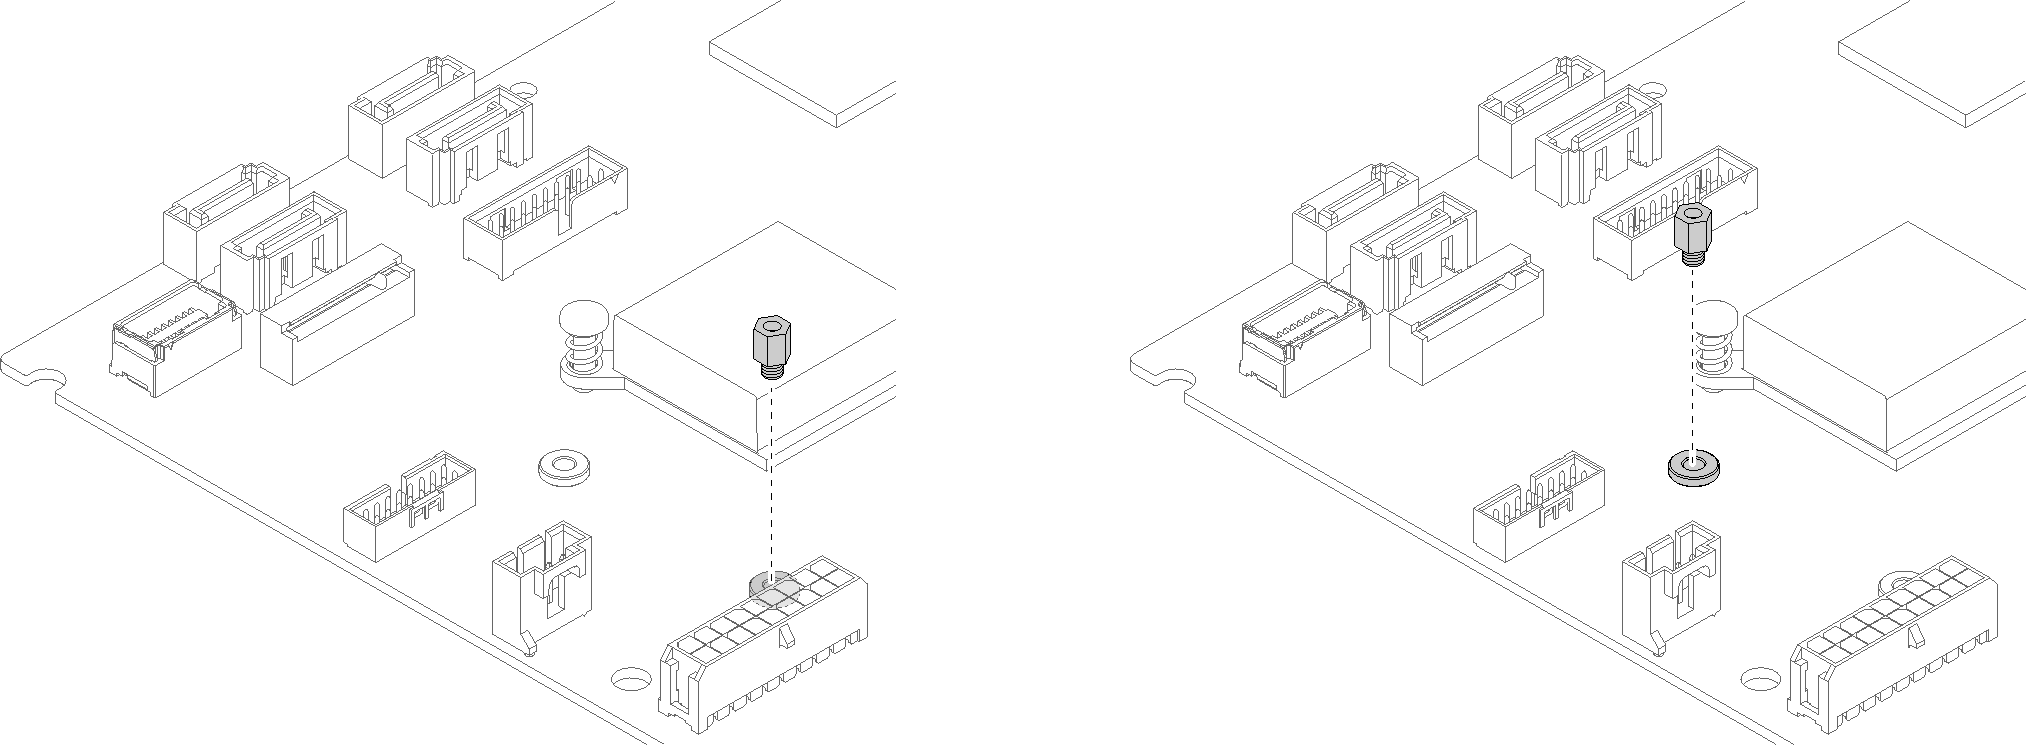
When you install the 80 mm or the 42 mm M.2 drive, you need to change the hex screw location accordingly as the following illustration.
Figure 2. Hex screw location for 80 mm/42 mm M.2 drive
To install the M.2 drive, complete the following steps:
Figure 3. M.2 drive installation
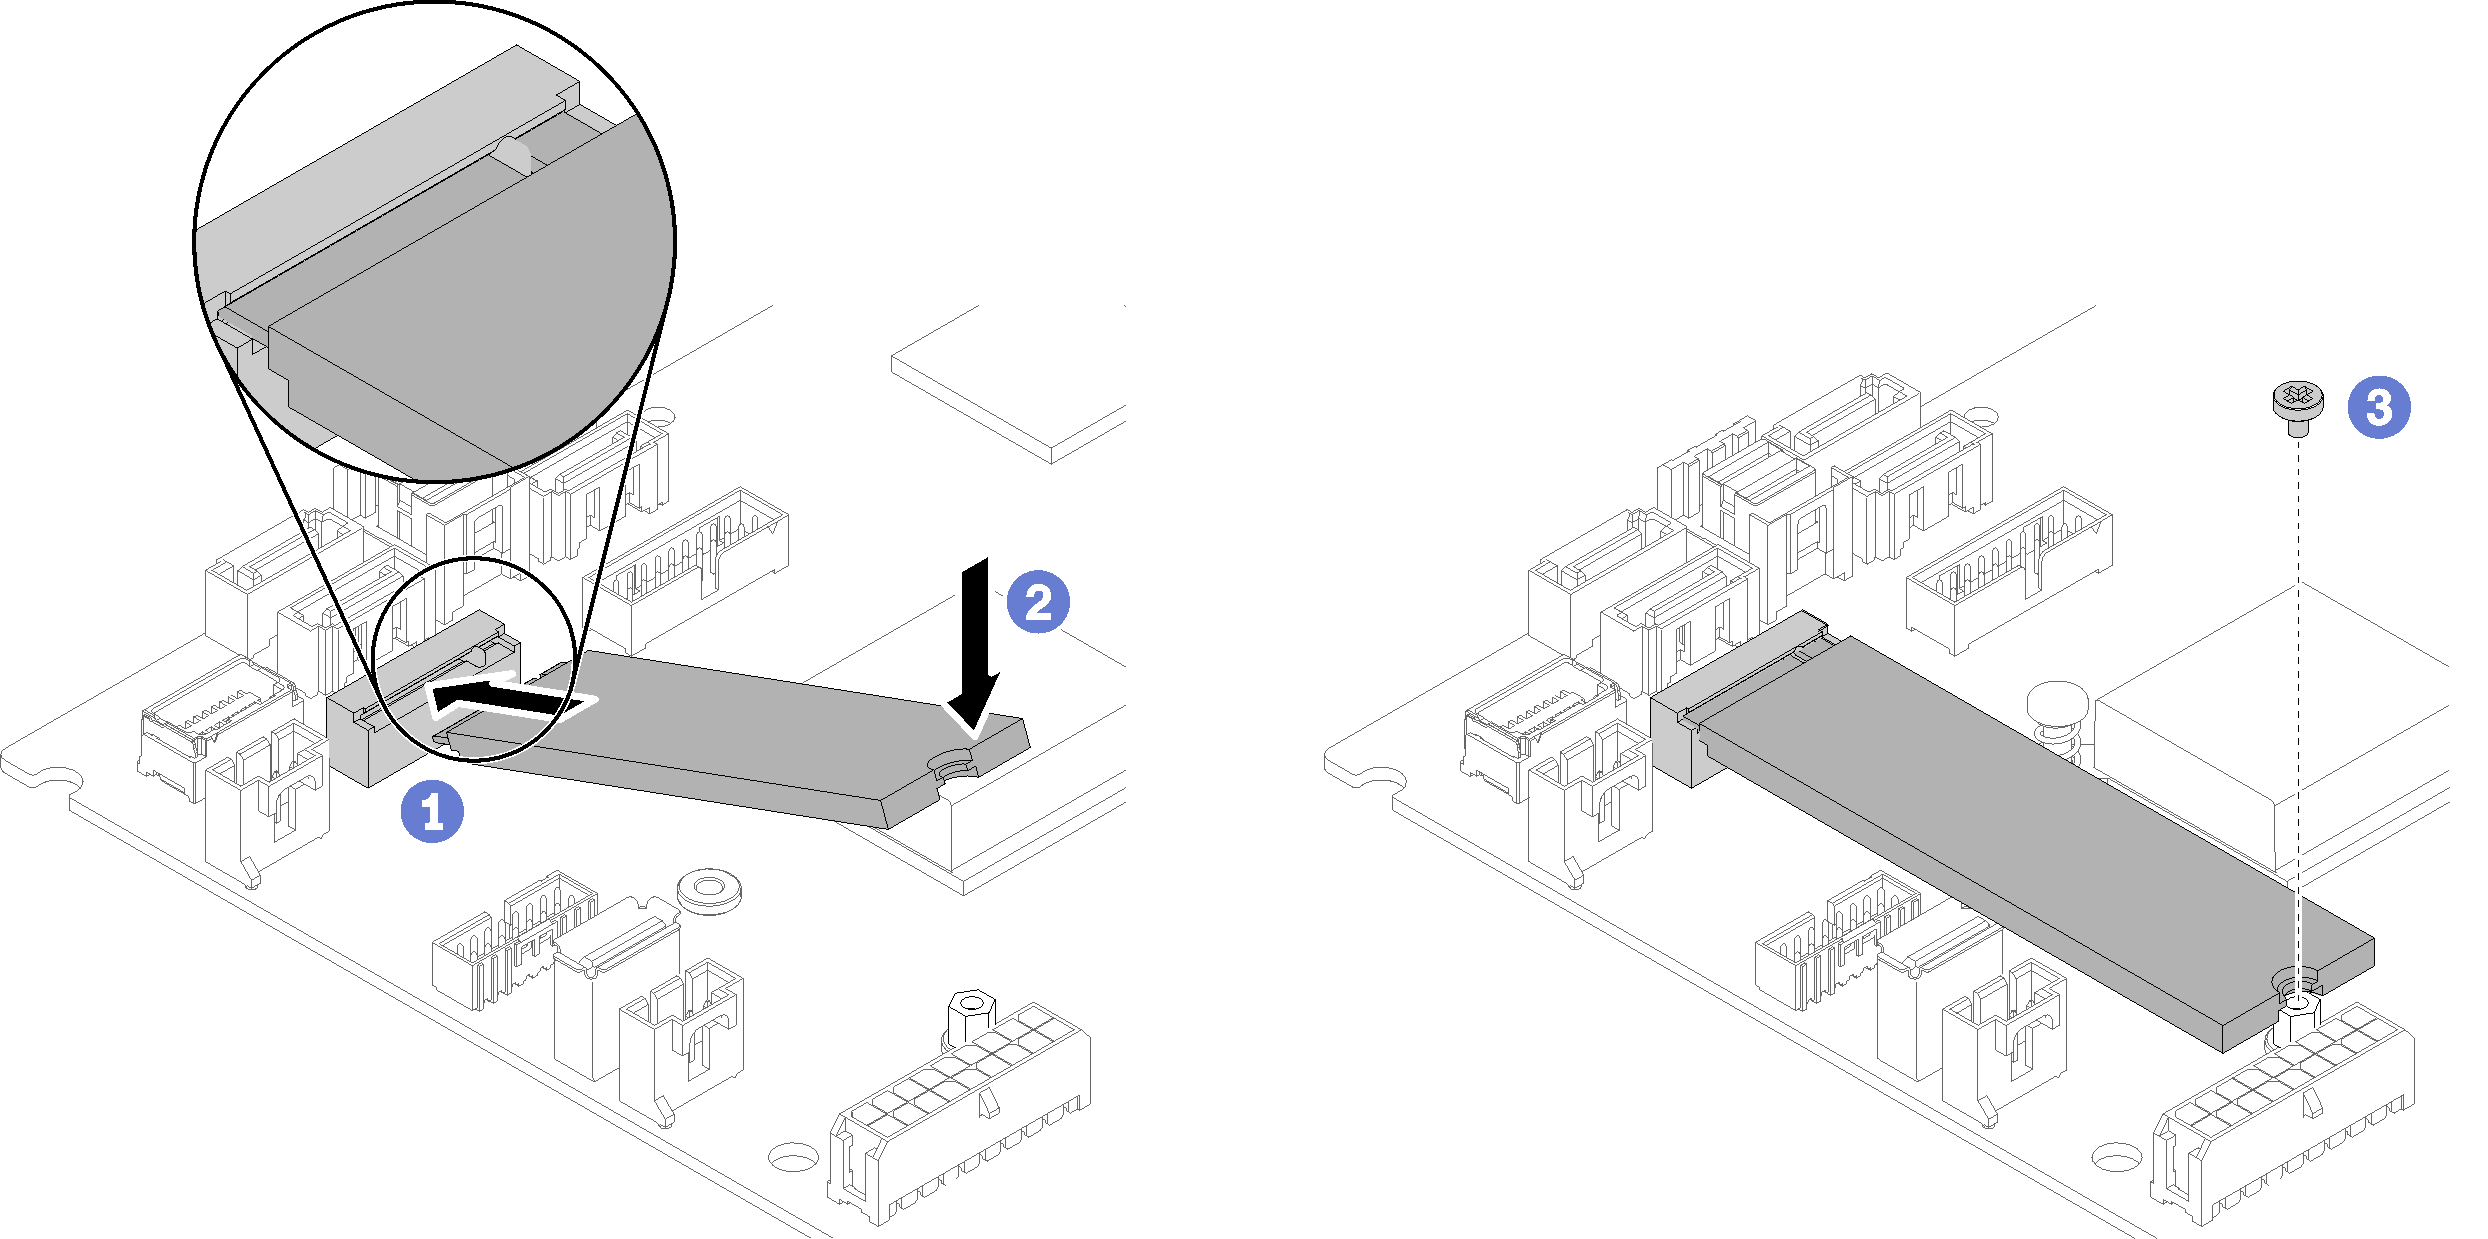
- Insert the M.2 drive at an angle to the connector.
- Lower down the other side of the M.2 drive to the system board as shown.
- Fasten the screw to secure the M.2 drive.
After you install the M.2 drive, complete the following steps:
Install the top cover onto the server (see Install the top cover).
Install the server into the rack if necessary.
Reconnect power cords and all external cables.
Demo video
Give documentation feedback