Install the PCIe riser assembly
Use this information to install the PCIe riser assembly.
Before you install the PCIe riser assembly, complete the following steps:
- Read the following section(s) to ensure that you work safely.
- Install the required adapters.
Note
PCIe slot 1 and slot 2 do not support ARI and SR-IOV.
PCIe slot 3 supports ARI and SR-IOV.
QLogic QL41262 PCIe 25Gb 2-Port SFP28 Ethernet Adapter does not support shared storage V3700 V2/XP and V5030 V2 configurations.
To install the PCIe riser cage, complete the following steps:
- Align the two screw slots on the PCIe riser card with the riser cage. Make sure two screw slots are aligned at the same time; then, fasten the screws to secure the riser card to the riser cage.Note
The following illustration might differ slightly from your hardware.
Figure 1. PCIe riser card installation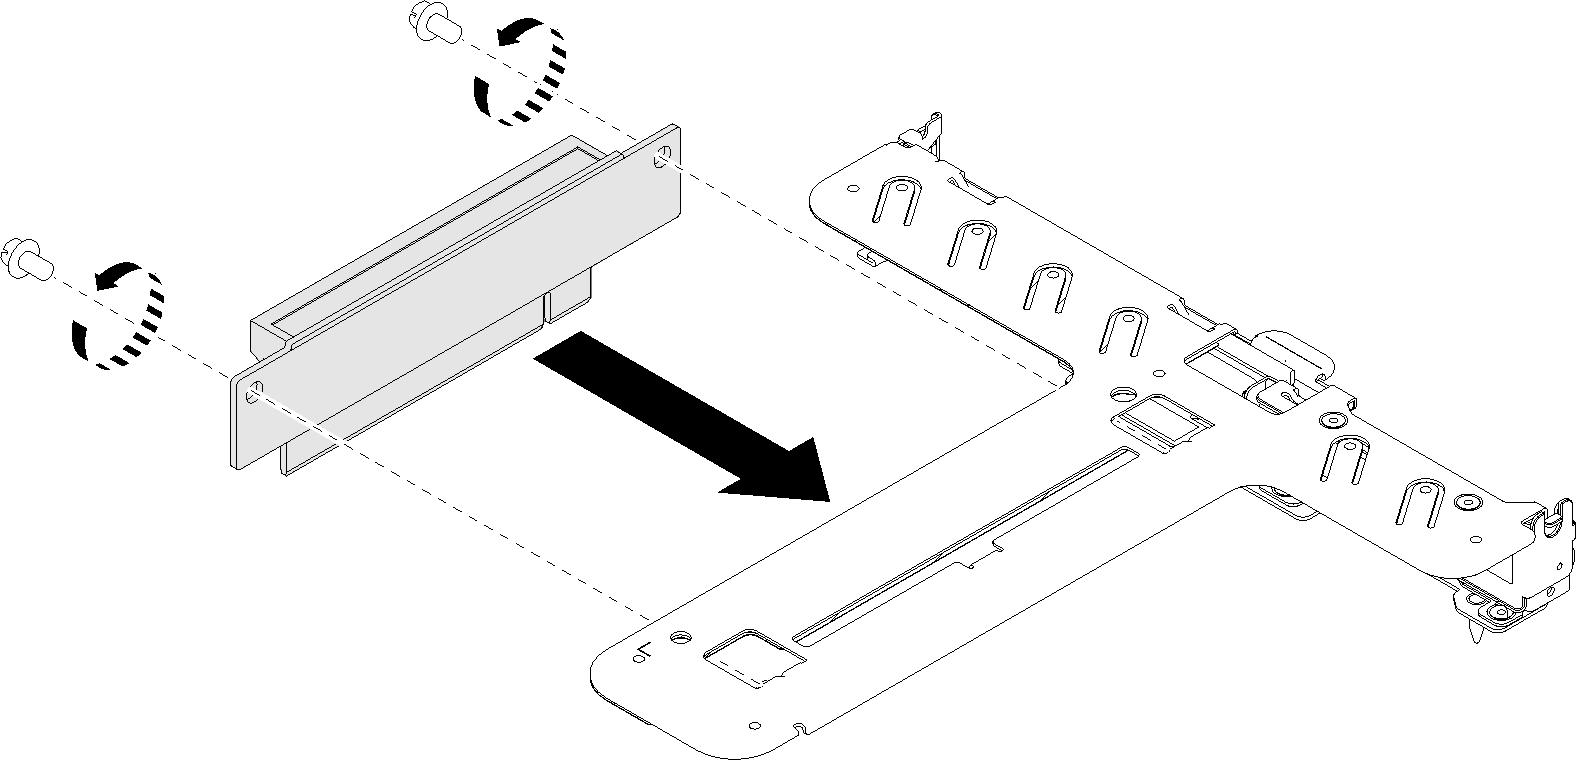
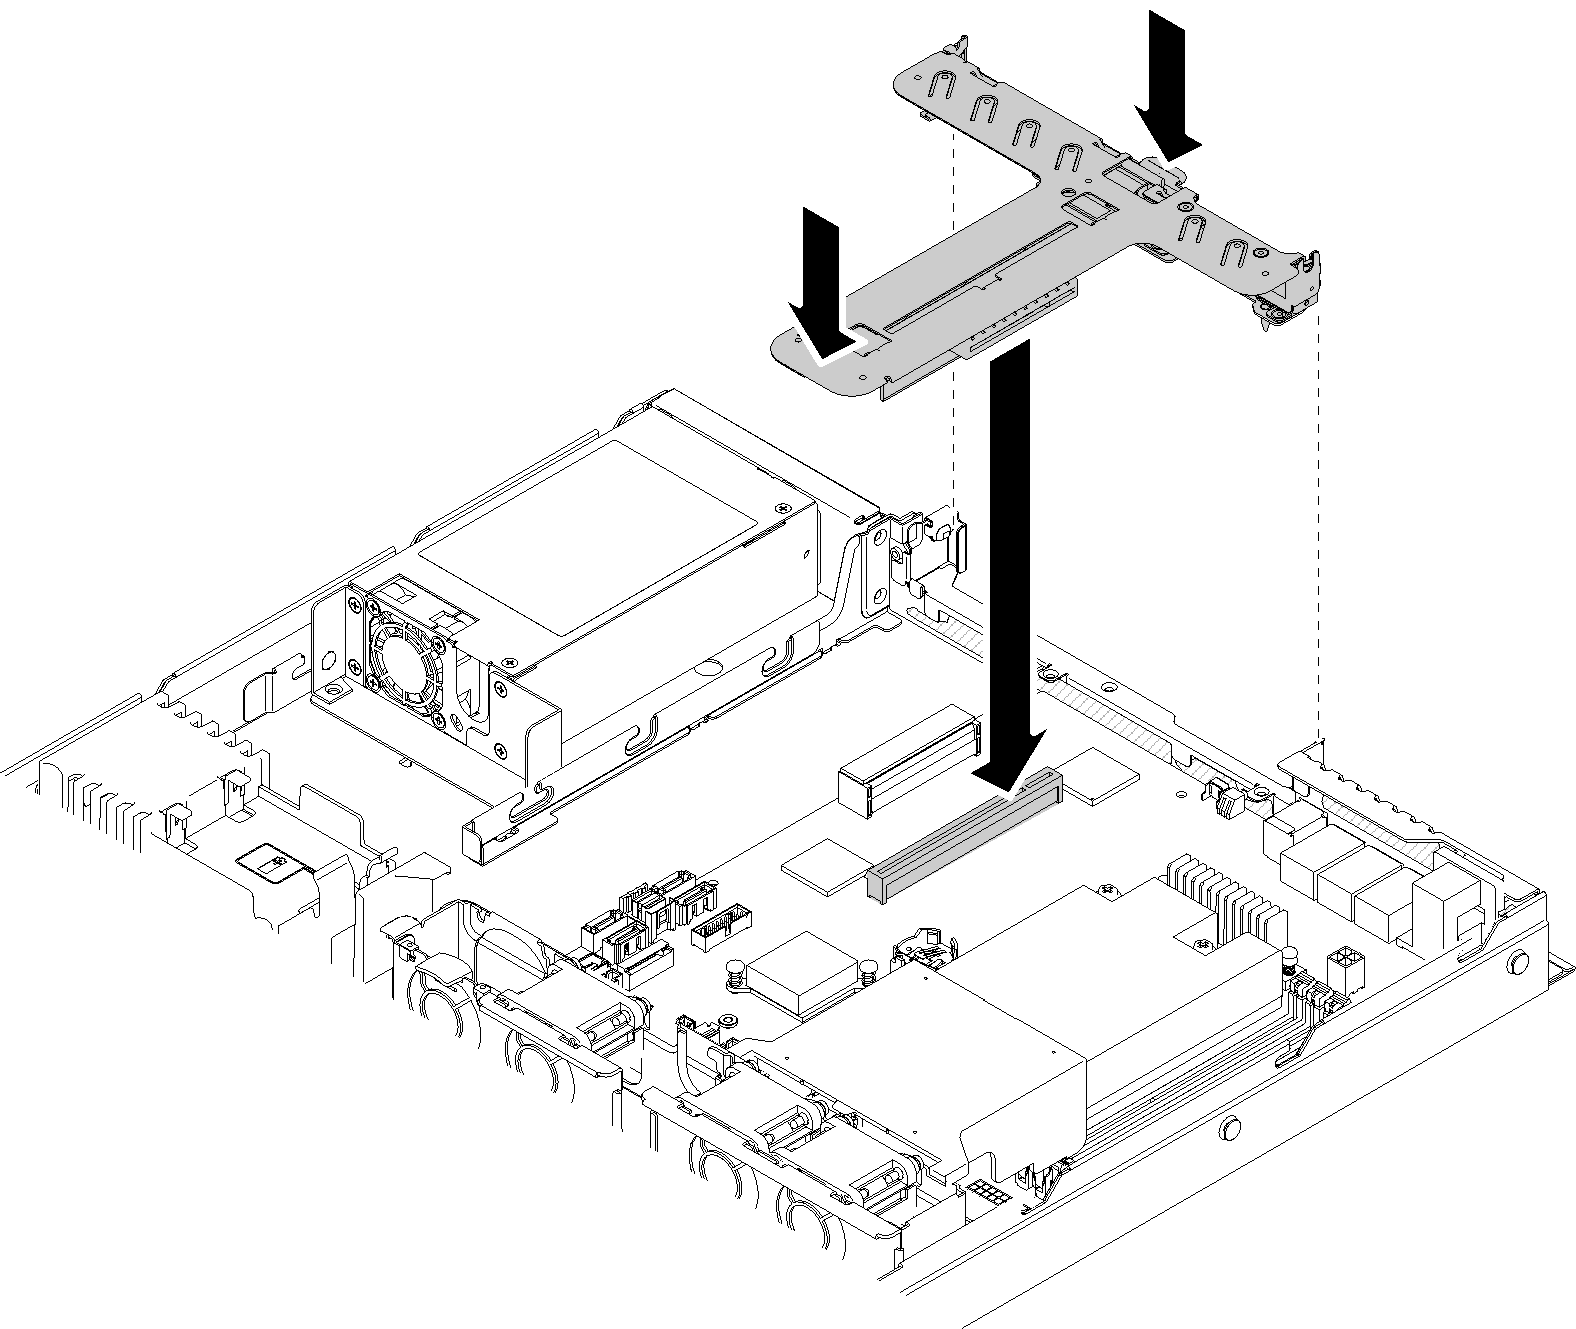
- Attach the label to the front side of the PCIe riser assembly.Figure 2. PCIe riser assembly installation

- Align the two tabs on PCIe riser assembly with the slots on the rear chassis; then, insert the PCIe riser assembly into the connector on the system board.Figure 3. PCIe riser assembly installation
After you install the PCIe riser assembly, complete the following steps:
Install the top cover onto the server (see Install the top cover).
Install the server into the rack if necessary.
Reconnect power cords and all external cables.
Demo video
Give documentation feedback