Remove a processor
Use this information to remove a processor.


Attention
The system will load factory default UEFI settings when the processor is removed. Back up the UEFI setting before processor removal.
Figure 1. Removing a processor
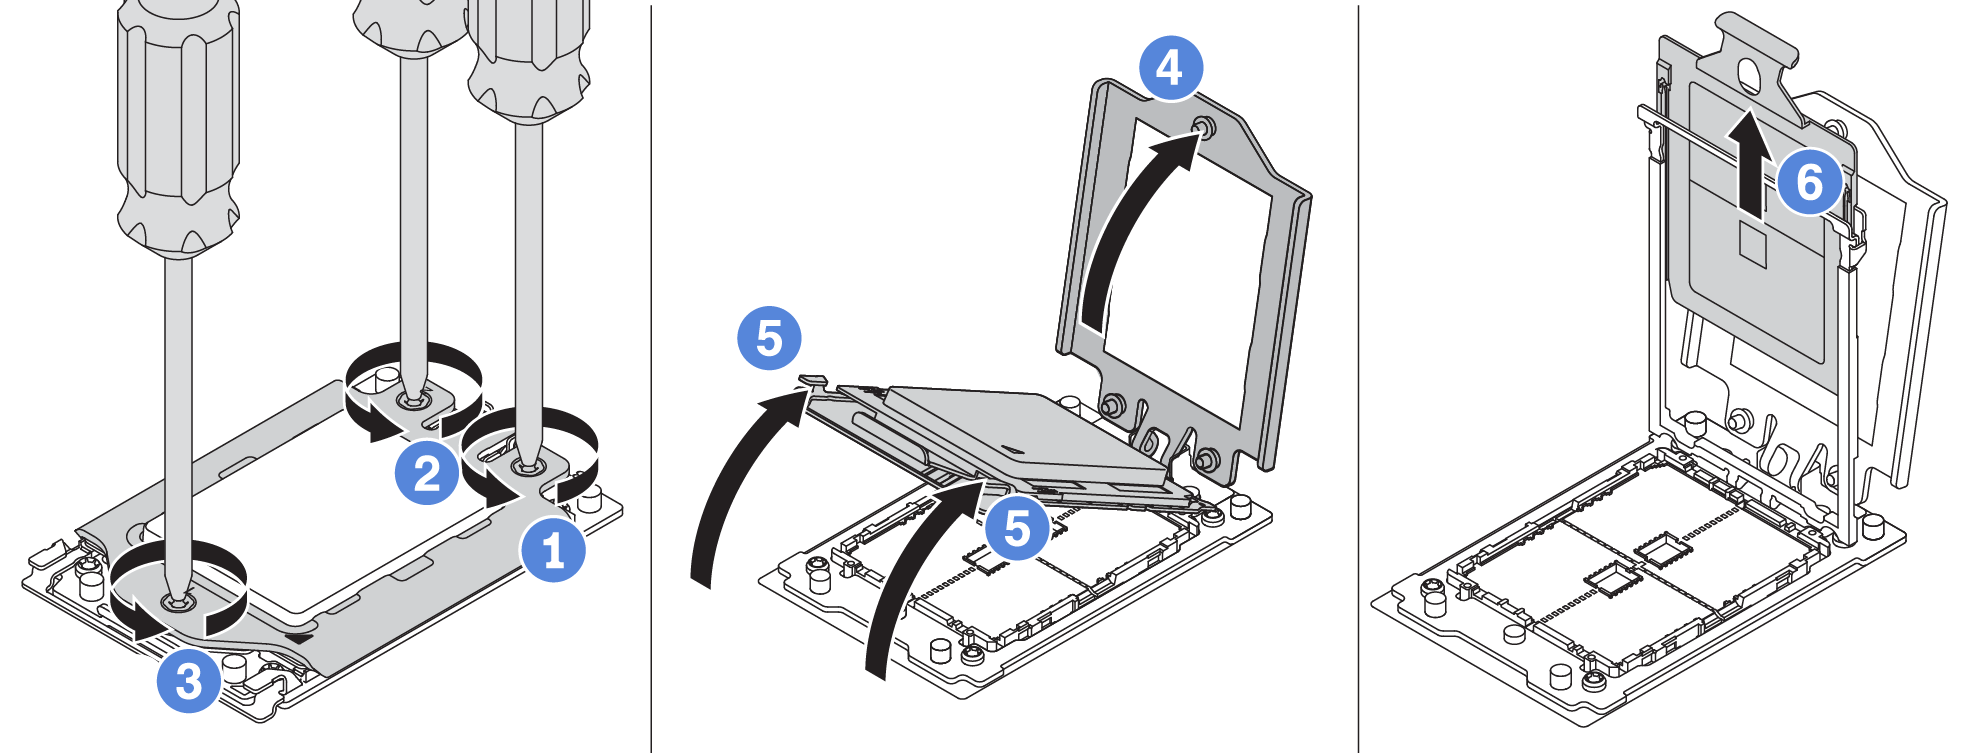
- Use a Torx #T20 screwdriver to loosen the captive screws in the removal sequence shown on the force frame.
- Slightly lift up the force frame and the rail frame in the direction shown. The processor in the rail frame is spring-loaded.
- Holding the blue tab of the processor carrier, slide the processor carrier out of the rail frame.
After you finish
After removing the processor, install a new processor by referring toInstall a processor.
Demo video
Give documentation feedback