Install the M.2 adapter and M.2 drive
Use this information to install the M.2 adapter and M.2 drive.
Read Installation Guidelines to ensure that you work safely.
Power off the server and disconnect all power cords for this task.
Prevent exposure to static electricity, which might lead to system halt and loss of data, by keeping static-sensitive components in their static-protective packages until installation, and handling these devices with an electrostatic-discharge wrist strap or other grounding system.
Procedure
- Locate the connector on the M.2 adapter.Note
Some M.2 adapters support two identical M.2 drives. Install the M.2 drive in slot 0 first.
Figure 1. M.2 drive slot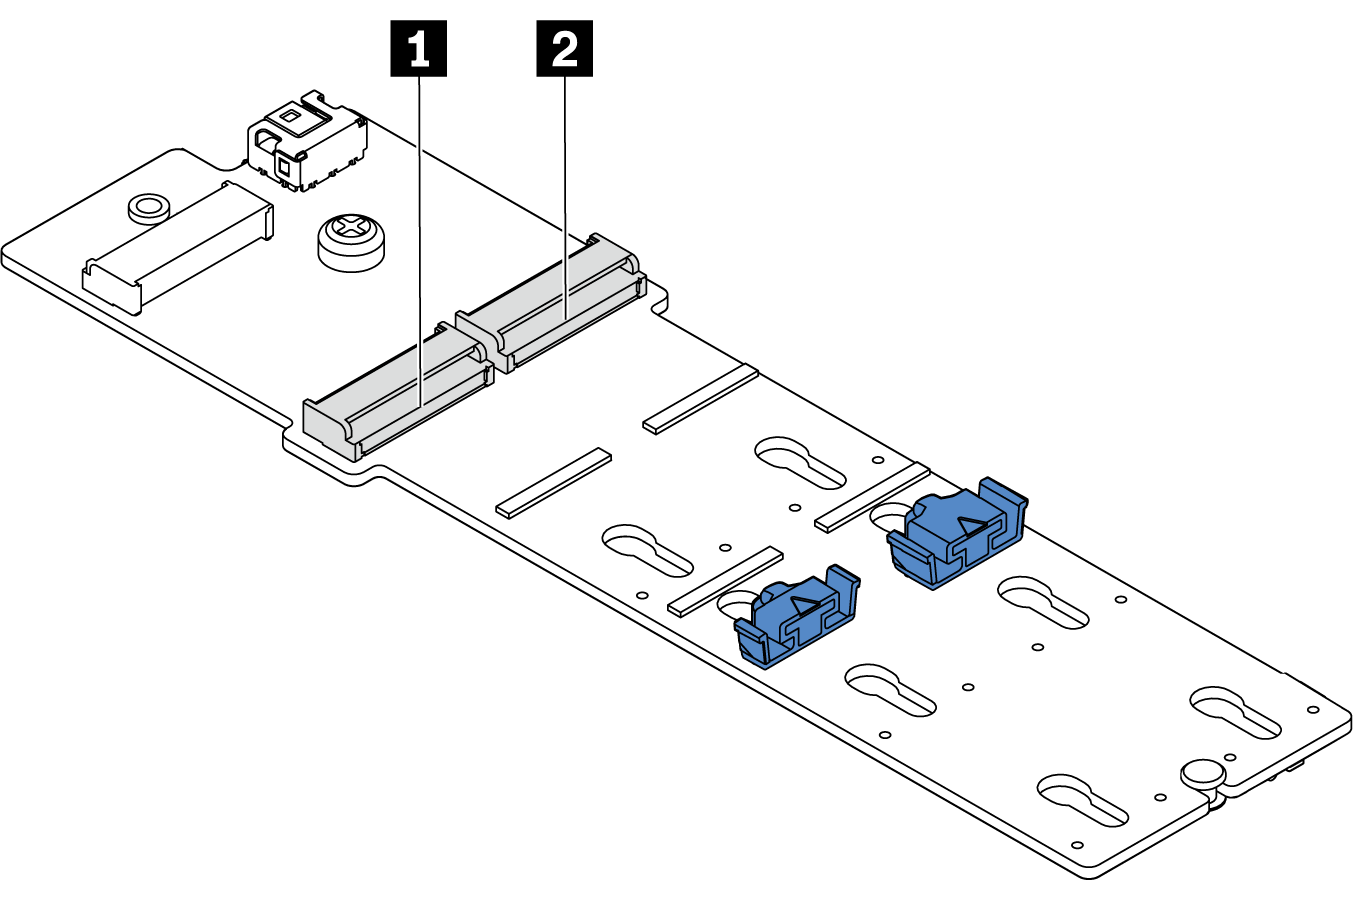
- 1 Slot 0
- 2 Slot 1
- Install the M.2 adapter into the M.2 tray.Figure 2. M.2 adapter installation
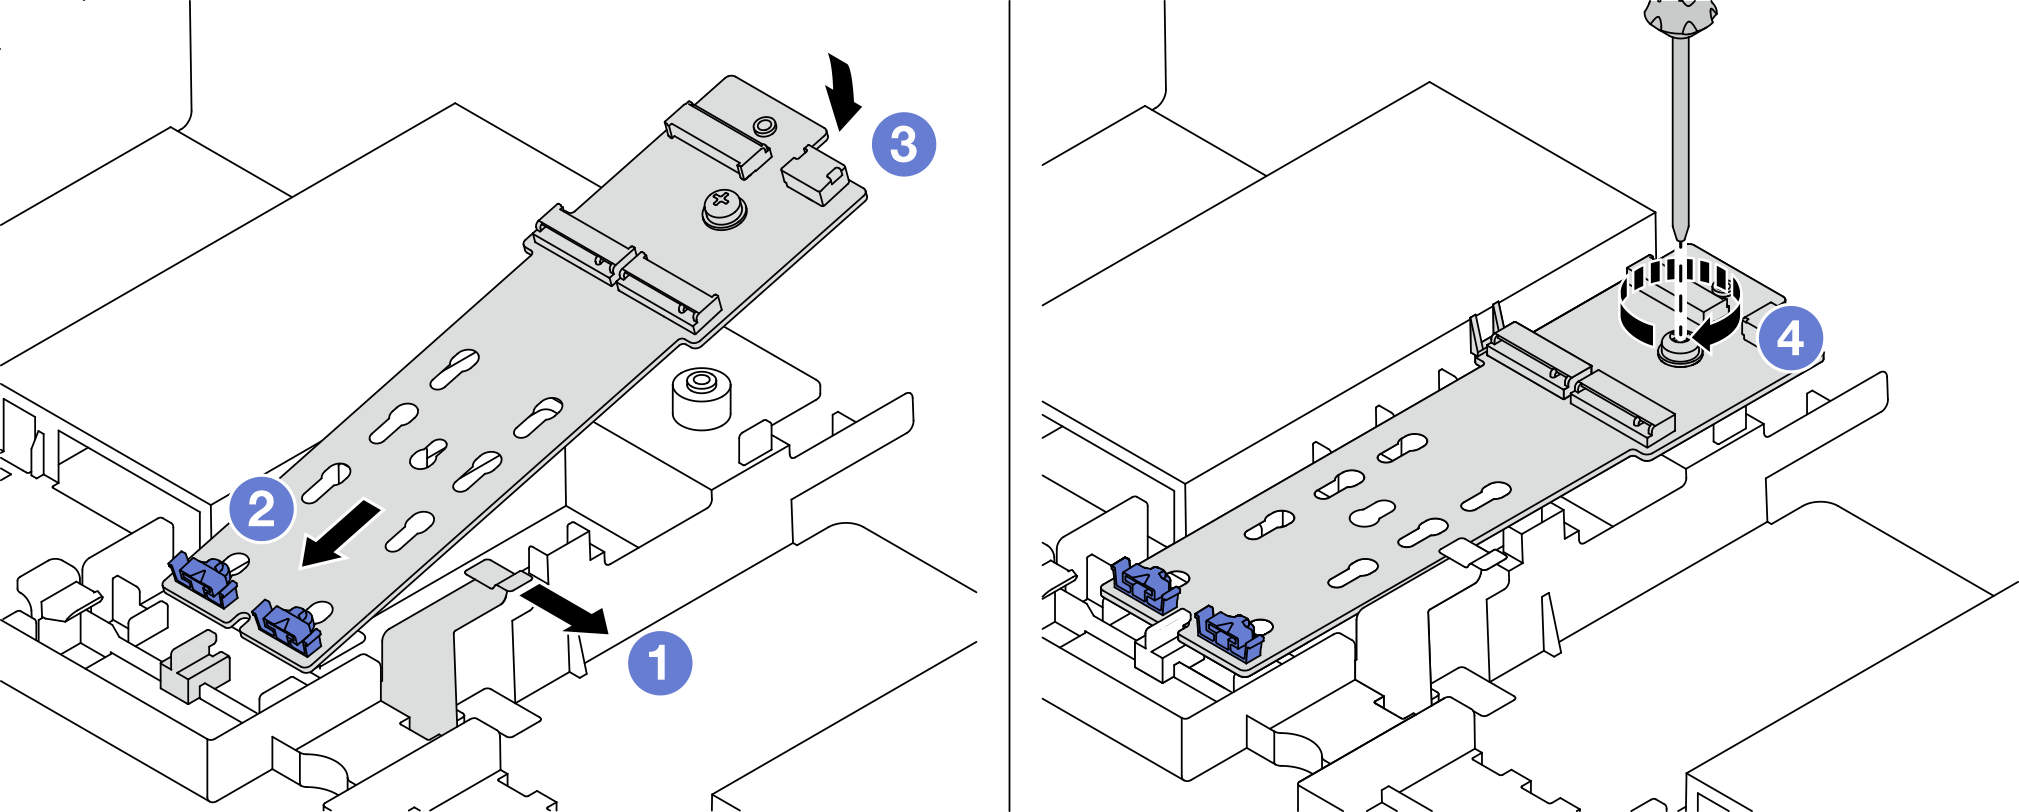
- Open the retention clip on the air baffle.
- Insert the M.2 adapter at an angle of approximately 30 degrees into the tray as shown.
- Rotate the M.2 adapter downward until it snaps into place.
- Tighten the screw to secure the M.2 adapter.
- Install the M.2 drive on the M.2 adapter.Figure 3. M.2 drive installation
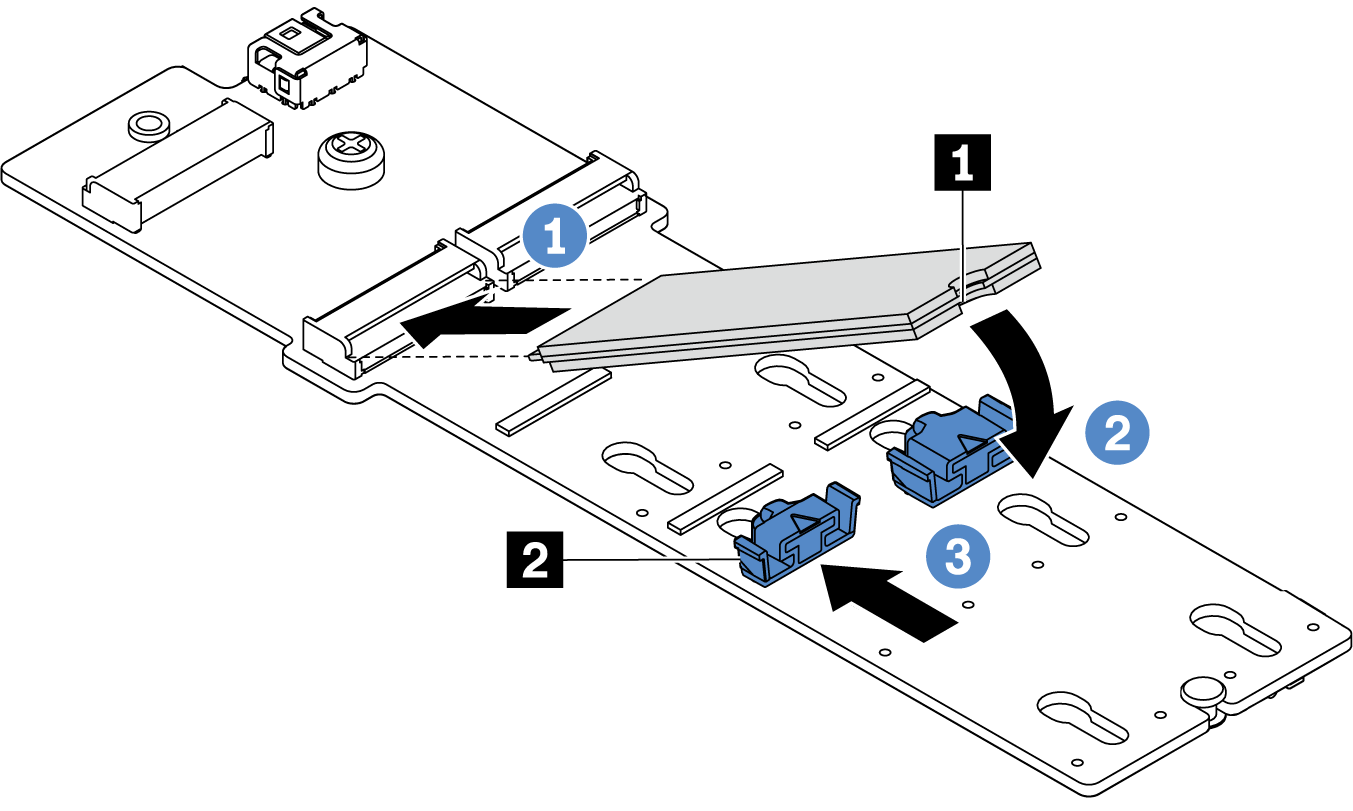
- Insert the M.2 drive at an angle of approximately 30 degrees into the connector.
- Rotate the M.2 drive down until the notch 1 catches on the lip of the retainer 2.
- Slide the retainer forward (toward the connector) to secure the M.2 drive into place.
- Connect the cables to the M.2 backplane and system board. See M.2 drives.Figure 4. Connecting M.2 cables
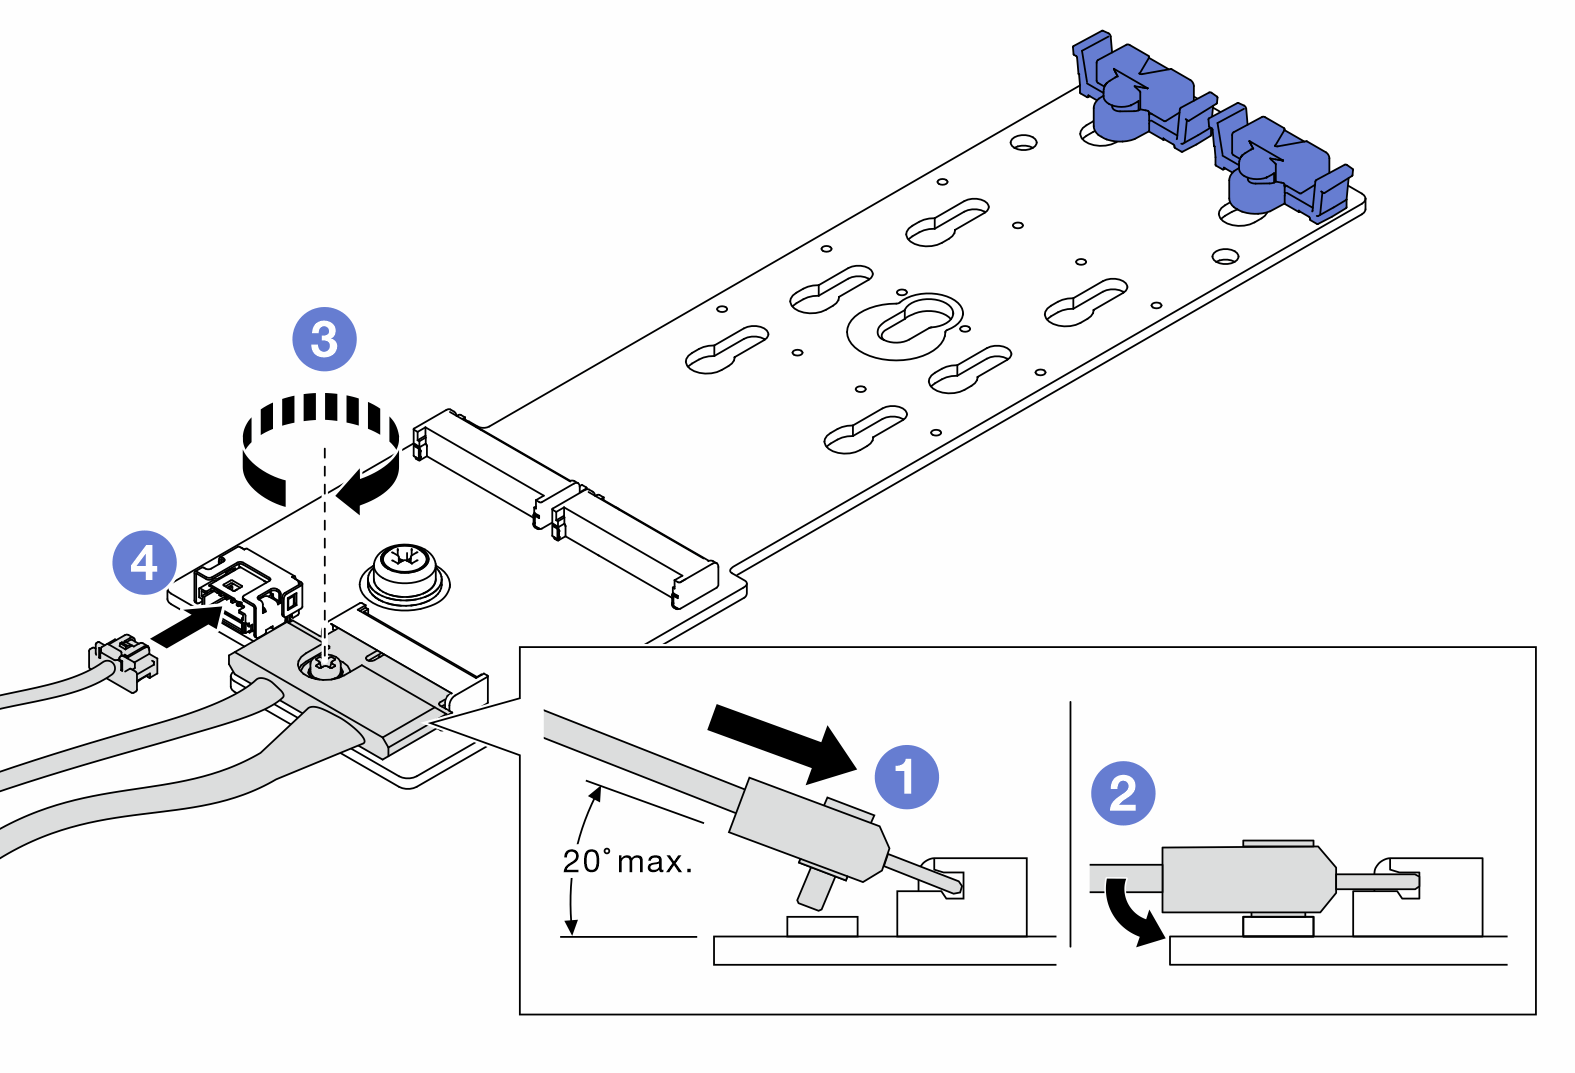
- Tilt the connector at an angle of 20 degrees or lower, and insert it until its bottom surface reaches the ramp.
- Press the connector down flat.
- Tighten the screw on the signal cable.
- Connect the power cable.
After you finish
Use the Lenovo XClarity Provisioning Manager to configure the RAID. For more information, see the RAID Setup
section in the LXPM documentation compatible with your server atLenovo XClarity Provisioning Manager portal page.
Demo video