Install the 7mm drive cage
Follow instructions in this section to install the 7mm drive cage.
About this task
Attention
- Read Installation Guidelines and Safety inspection checklist to ensure that you work safely.
- Touch the static-protective package that contains the component to any unpainted metal surface on the server; then, remove it from the package and place it on a static-protective surface.
Procedure
- If necessary, install the two 7mm drive backplanes to the drive cage.
 Slide the lower backplane into the drive cage; then, install the screw to secure the lower backplane to the drive cage.
 Tilt the upper backplane at an angle and insert it into the drive cage; then, install the two screws to secure the upper backplane to the lower backplane.Figure 1. 7mm drive backplane installation
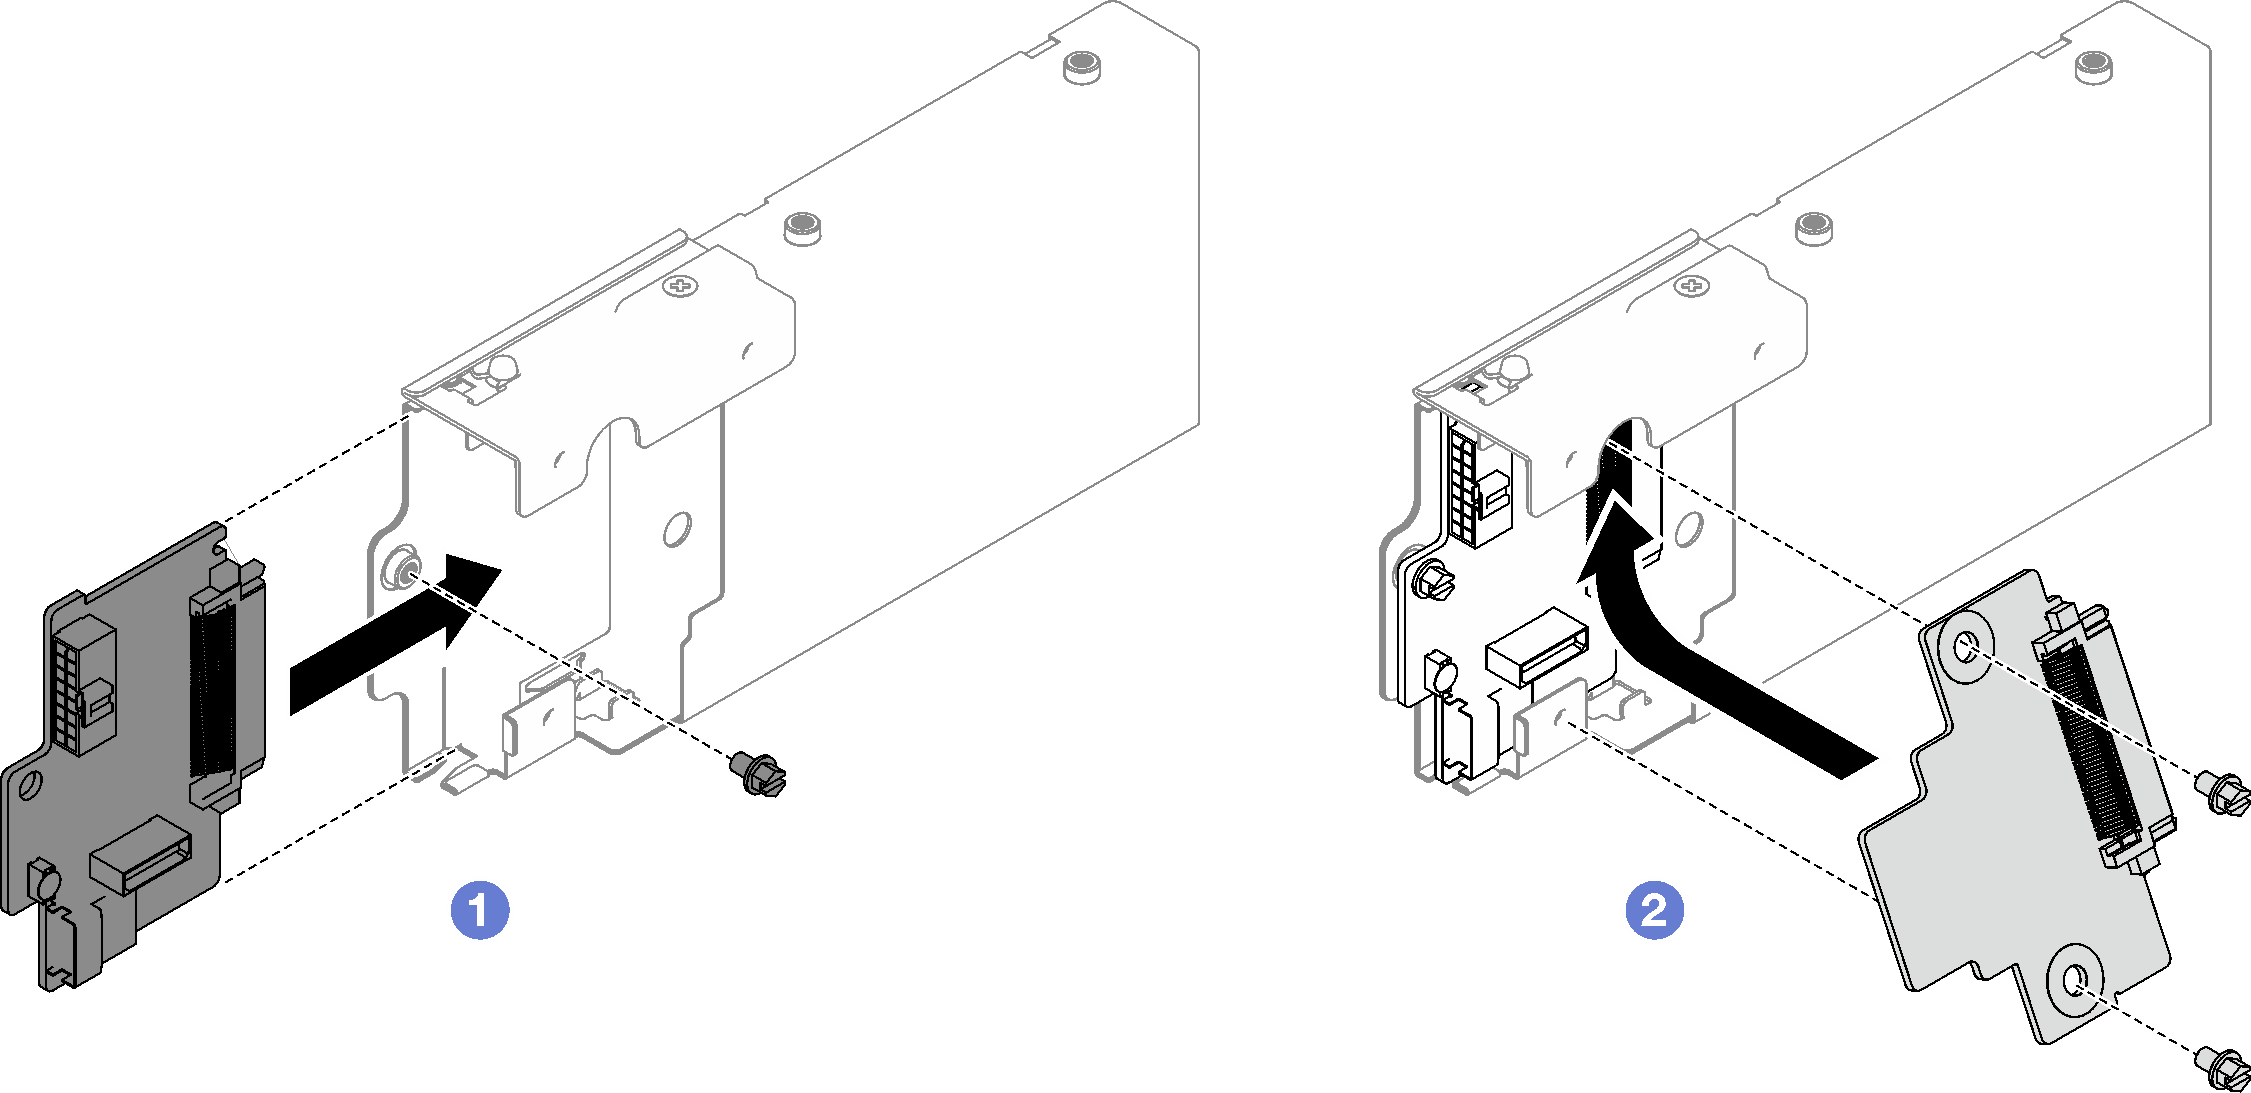
- Install the 7mm drive cage.
- Align the drive cage with the slot on the PCIe riser.
- Rotate the other end of the drive cage inwards.
 Install the screw to secure the drive cage to the PCIe riser.
 Install the two screws on the top of the PCIe riser.Figure 2. 7mm drive cage installation
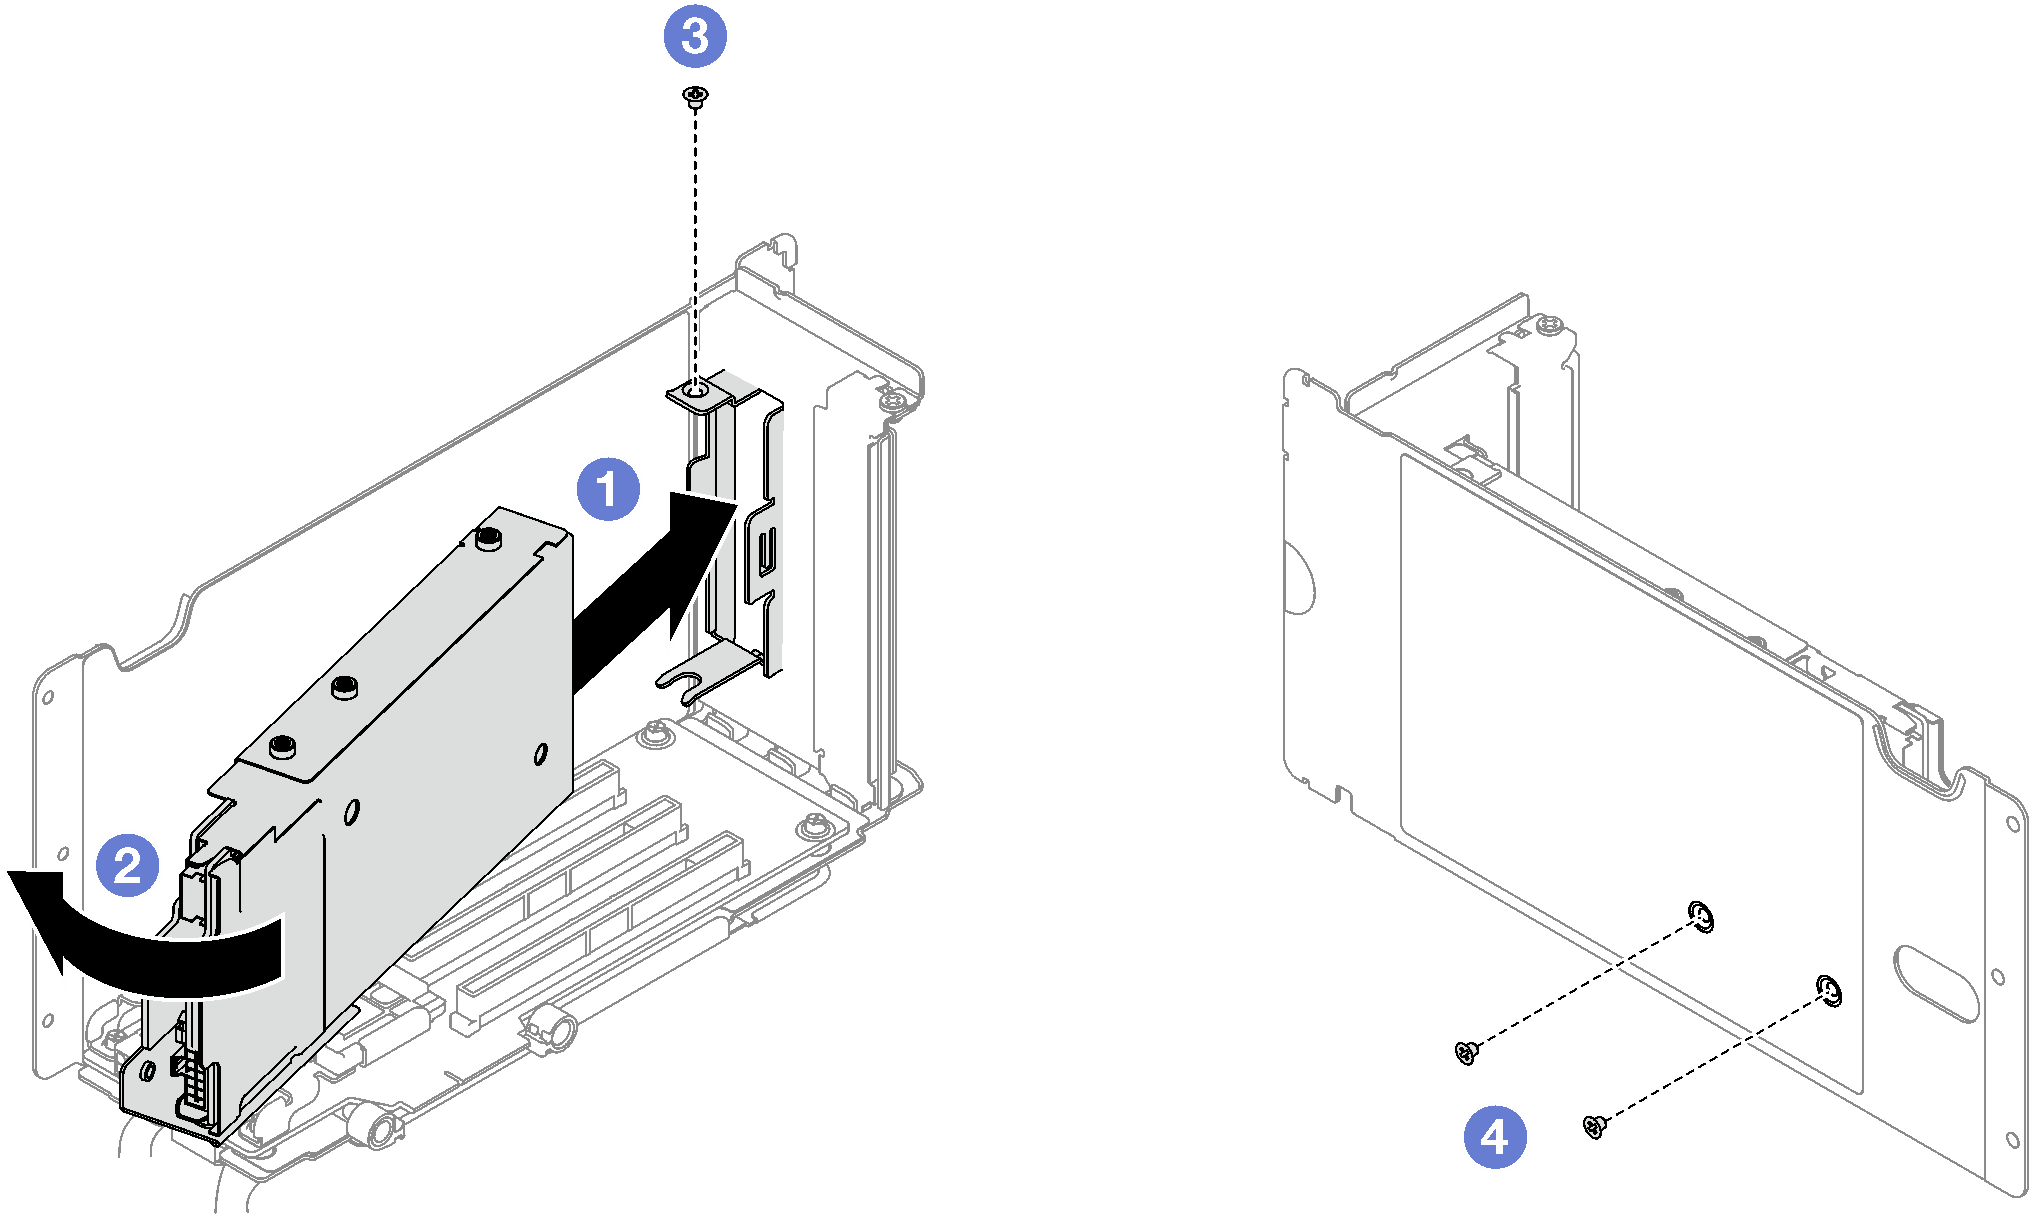
After you finish
- Reconnect the power and signal cables to the 7mm drive backplanes.
- Reinstall the PCIe riser. See Install a PCIe riser.
- Reinstall the 7mm drives or the drive bay fillers (if any) into the drive bays. See Install a 7mm drive.
- Complete the parts replacement. See Complete the parts replacement.
Demo video
Give documentation feedback