Install an M.2 drive
Follow instructions in this section to install an M.2 drive.
About this task
Attention
- Read Installation Guidelines and Safety inspection checklist to ensure that you work safely.
- Touch the static-protective package that contains the component to any unpainted metal surface on the server; then, remove it from the package and place it on a static-protective surface.
Procedure
- Locate the connector on the M.2 backplane.Note
- The M.2 backplane might look different from the illustration.
- Install the M.2 drive in slot 0 first.
Figure 1. M.2 drive slots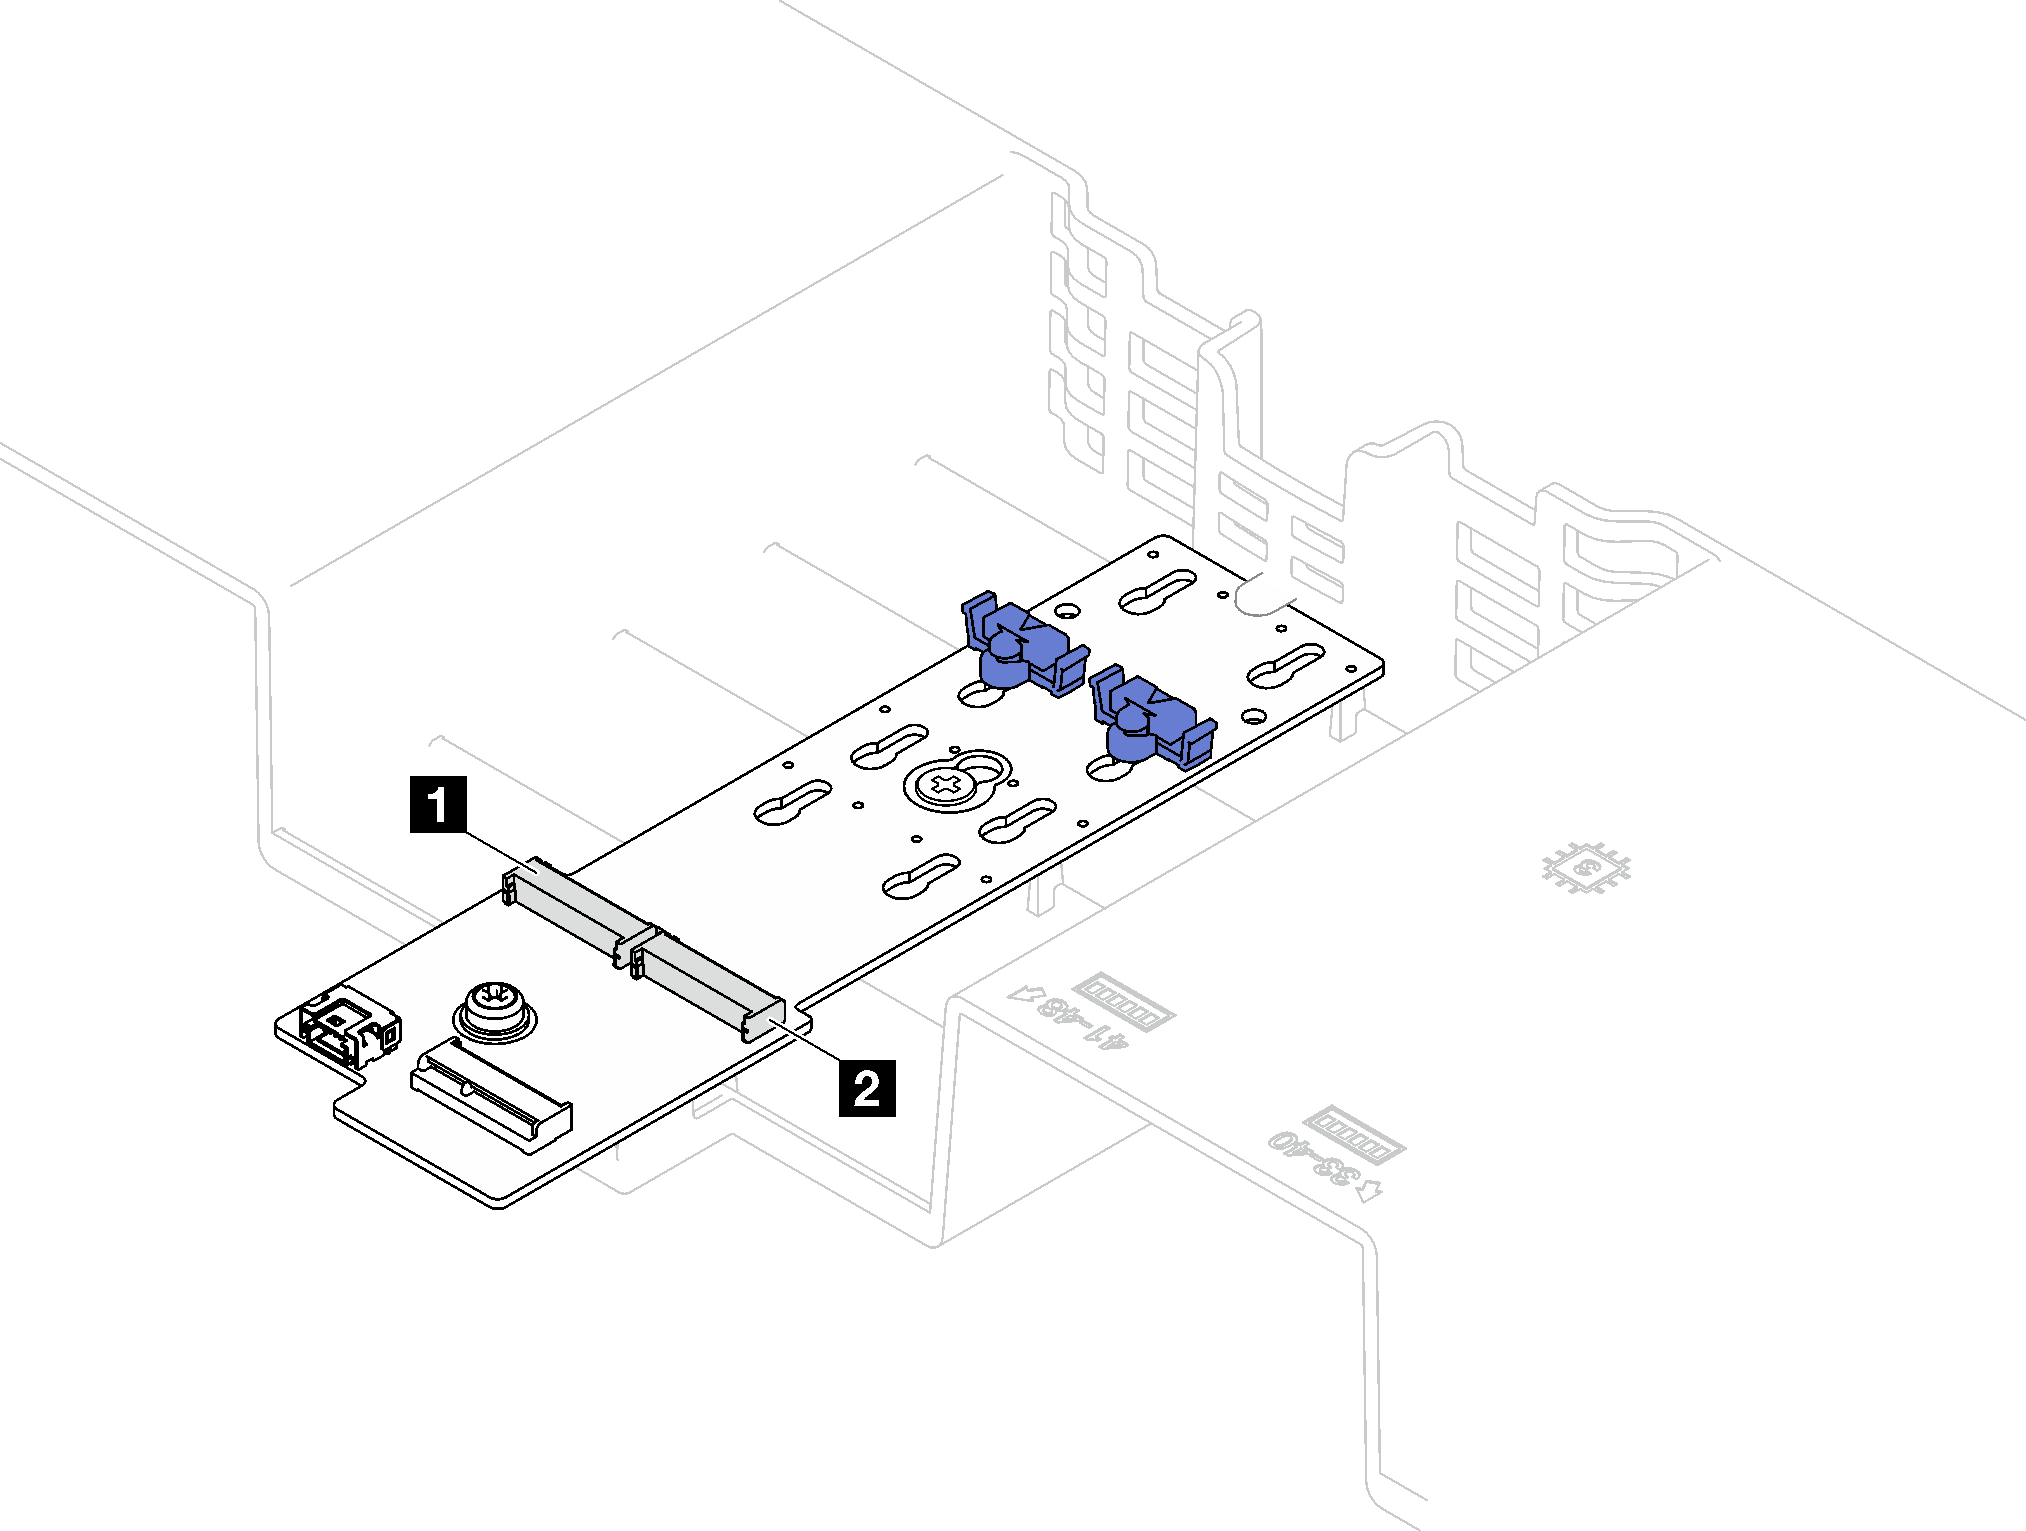
- 1 Slot 1
- 2 Slot 0
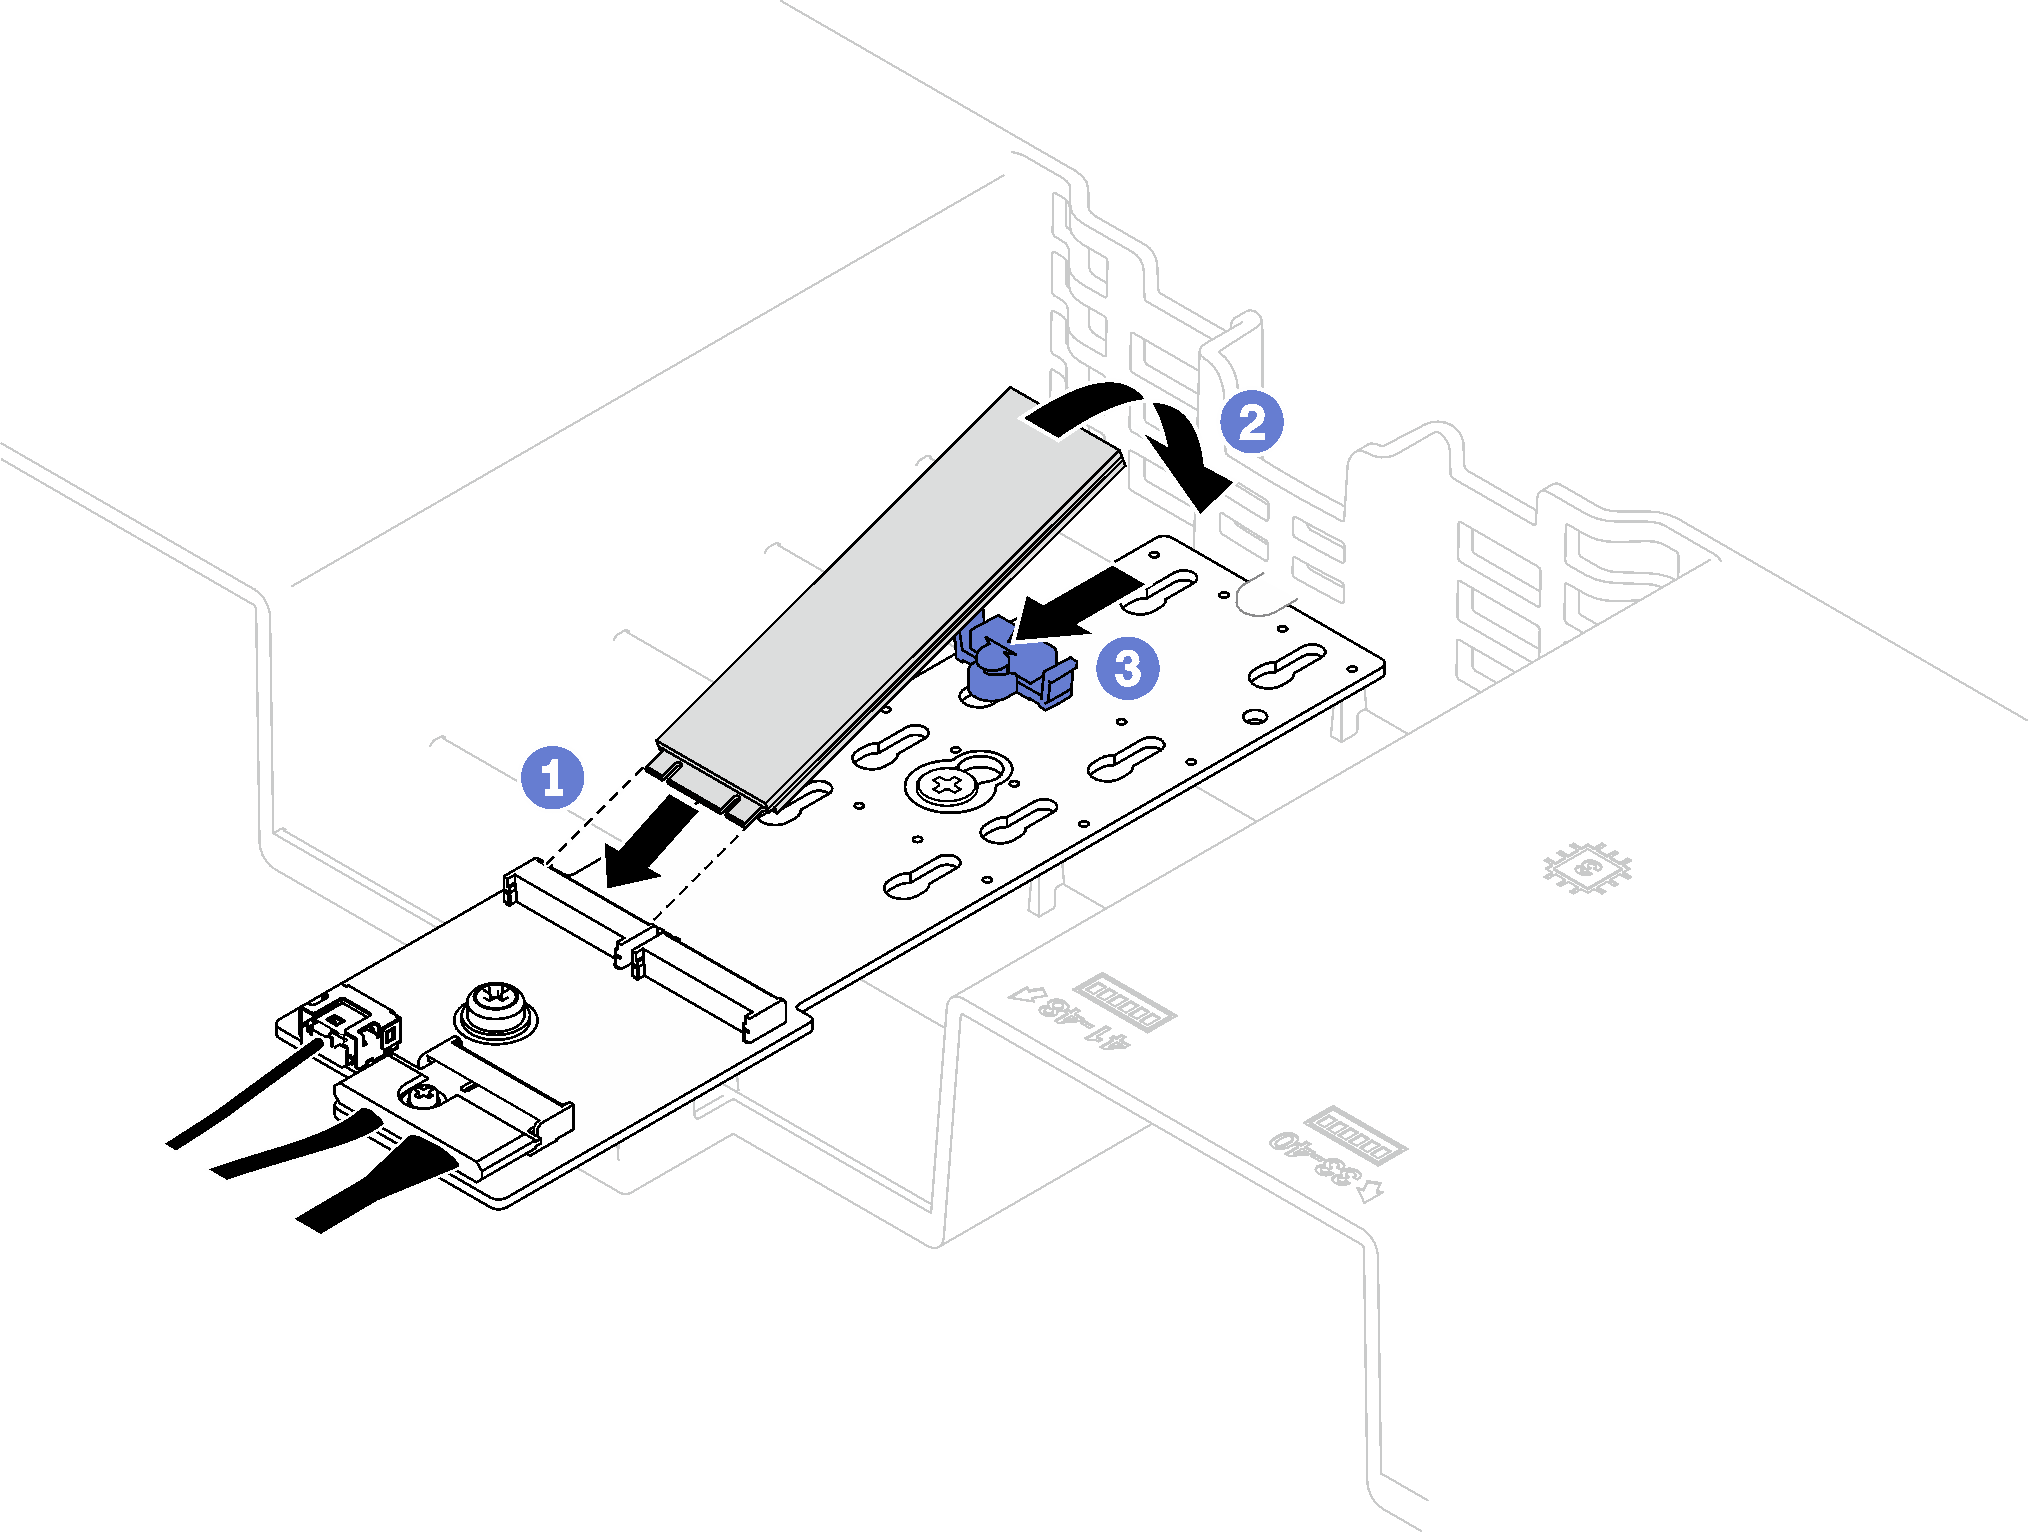
- Install the M.2 drive.
 Hold the M.2 drive at an angle, and insert it into the M.2 slot.
 Lower the M.2 drive.
- Slide the retainer toward the M.2 drive to secure it in place.Figure 2. M.2 drive installation
Give documentation feedback