Install the M.2 backplane
Follow instructions in this section to install the M.2 backplane.
About this task
Attention
- Read Installation Guidelines and Safety inspection checklist to ensure that you work safely.
- Touch the static-protective package that contains the component to any unpainted metal surface on the server; then, remove it from the package and place it on a static-protective surface.
Procedure
- If needed, connect the M.2 backplane cables to the M.2 backplane.
SATA/NVMe or NVMe M.2 backplane
 Tilt the connector at an angle of 20 degrees or lower, and insert it until its bottom surface reaches the ramp.
 Press the connector down flat.
 Tighten the screw on the signal cable.
 Connect the power cable.Figure 1. SATA/NVMe or NVMe M.2 backplane cable connection
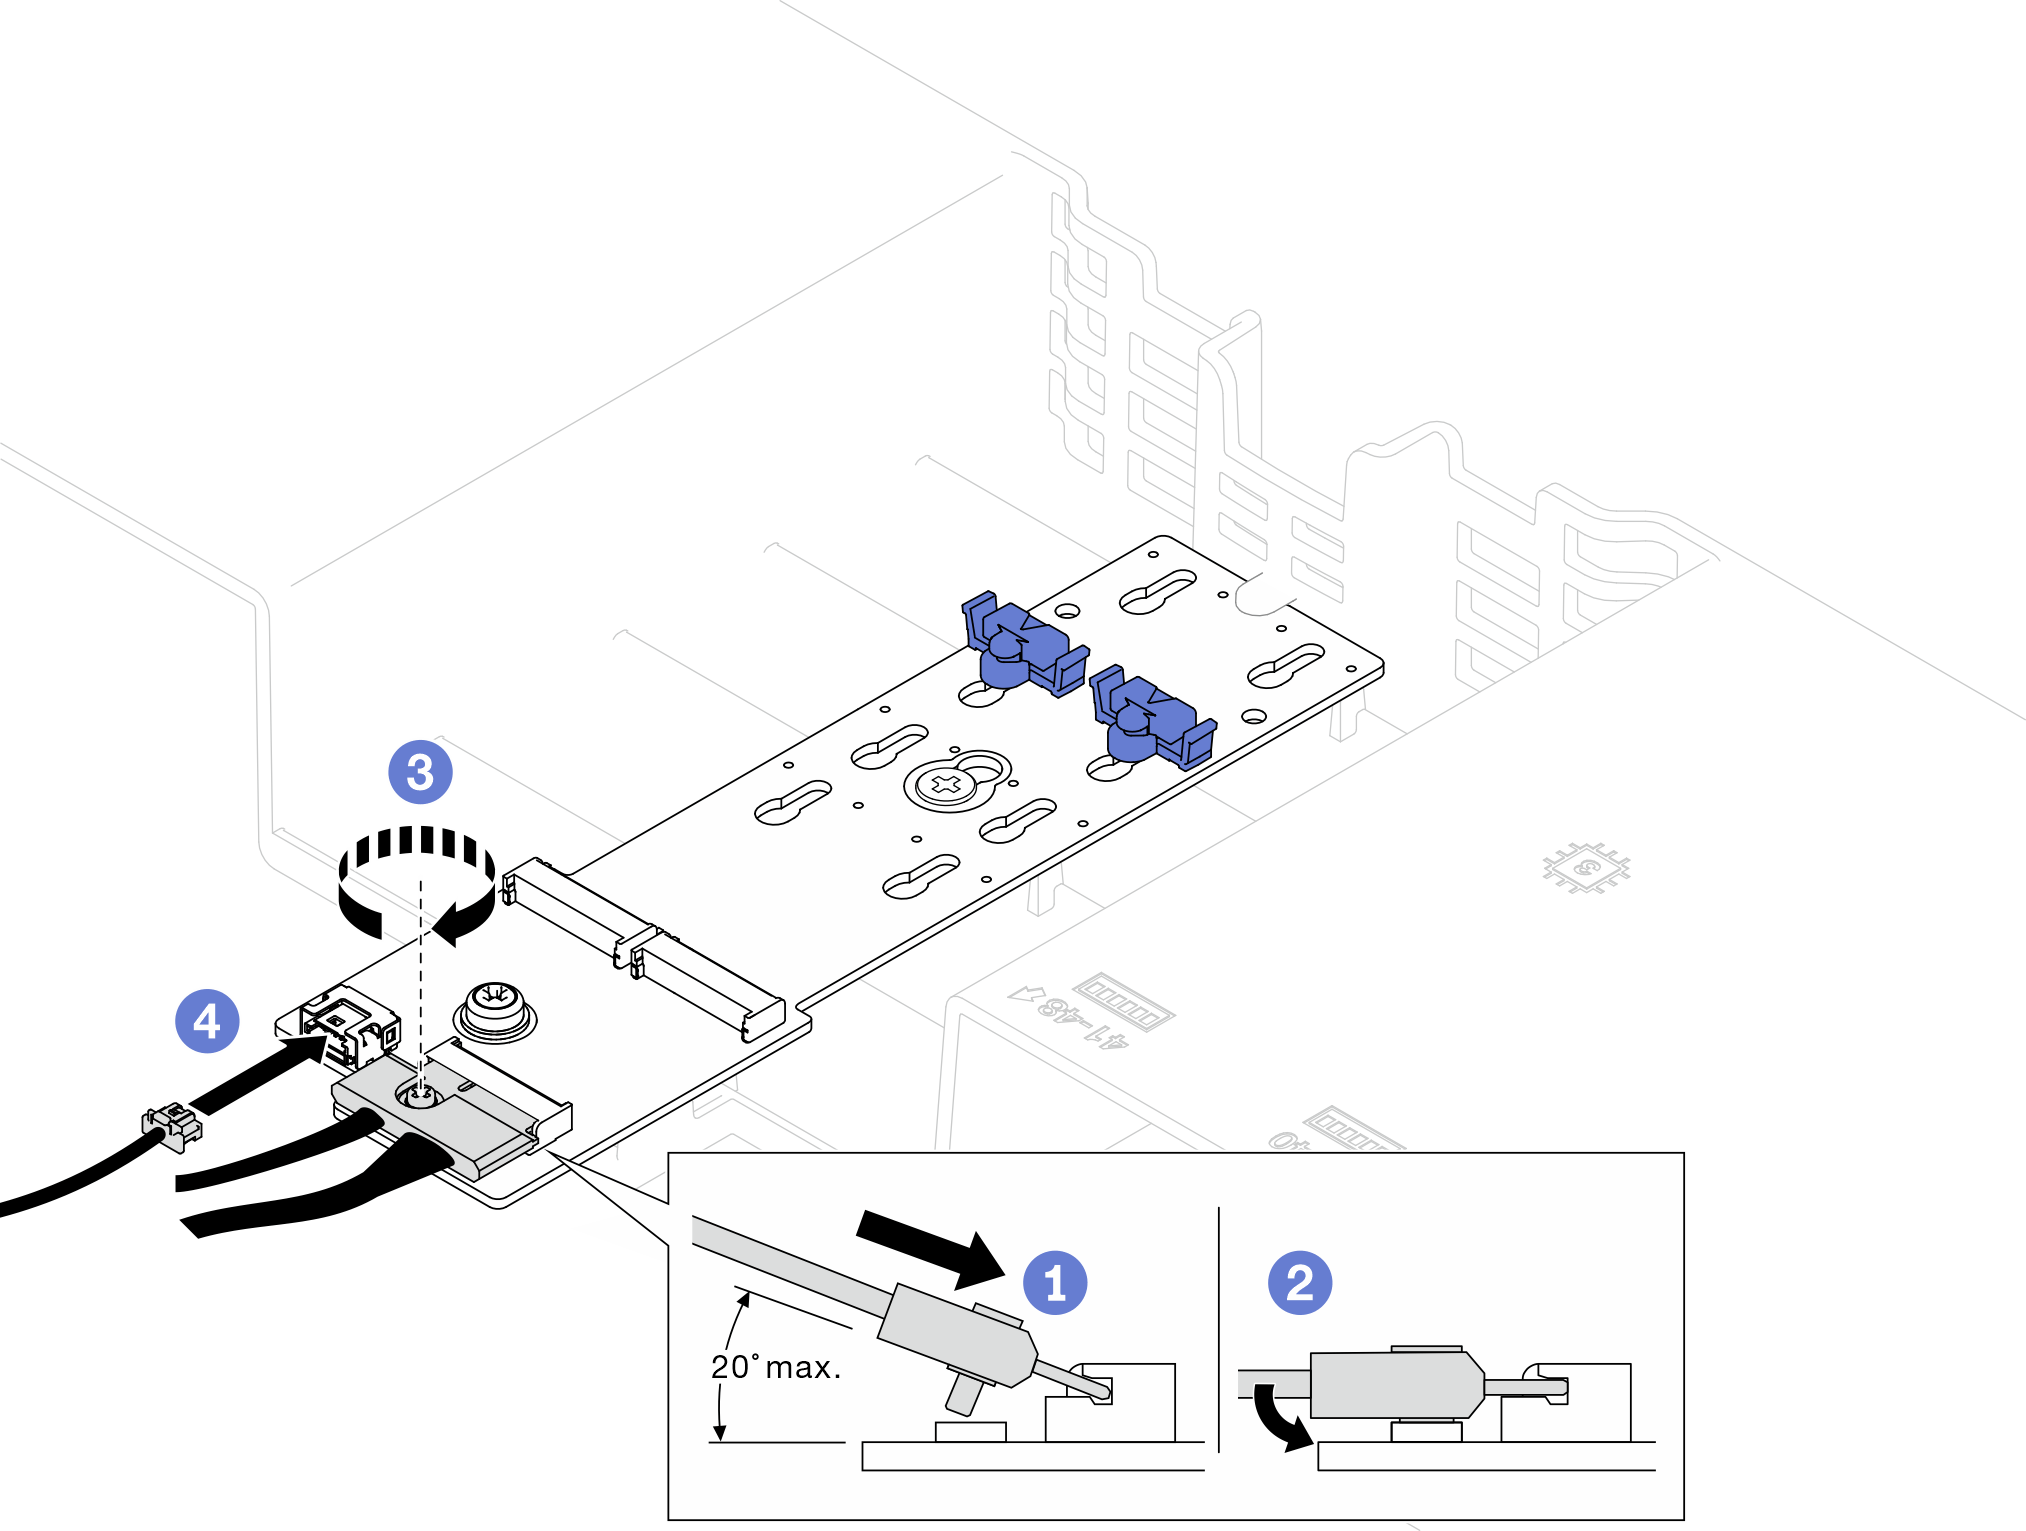
SATA/x4 NVMe M.2 backplane
Connect the M.2 backplane cables to the M.2 backplane.
Figure 2. SATA/x4 NVMe M.2 backplane cable connection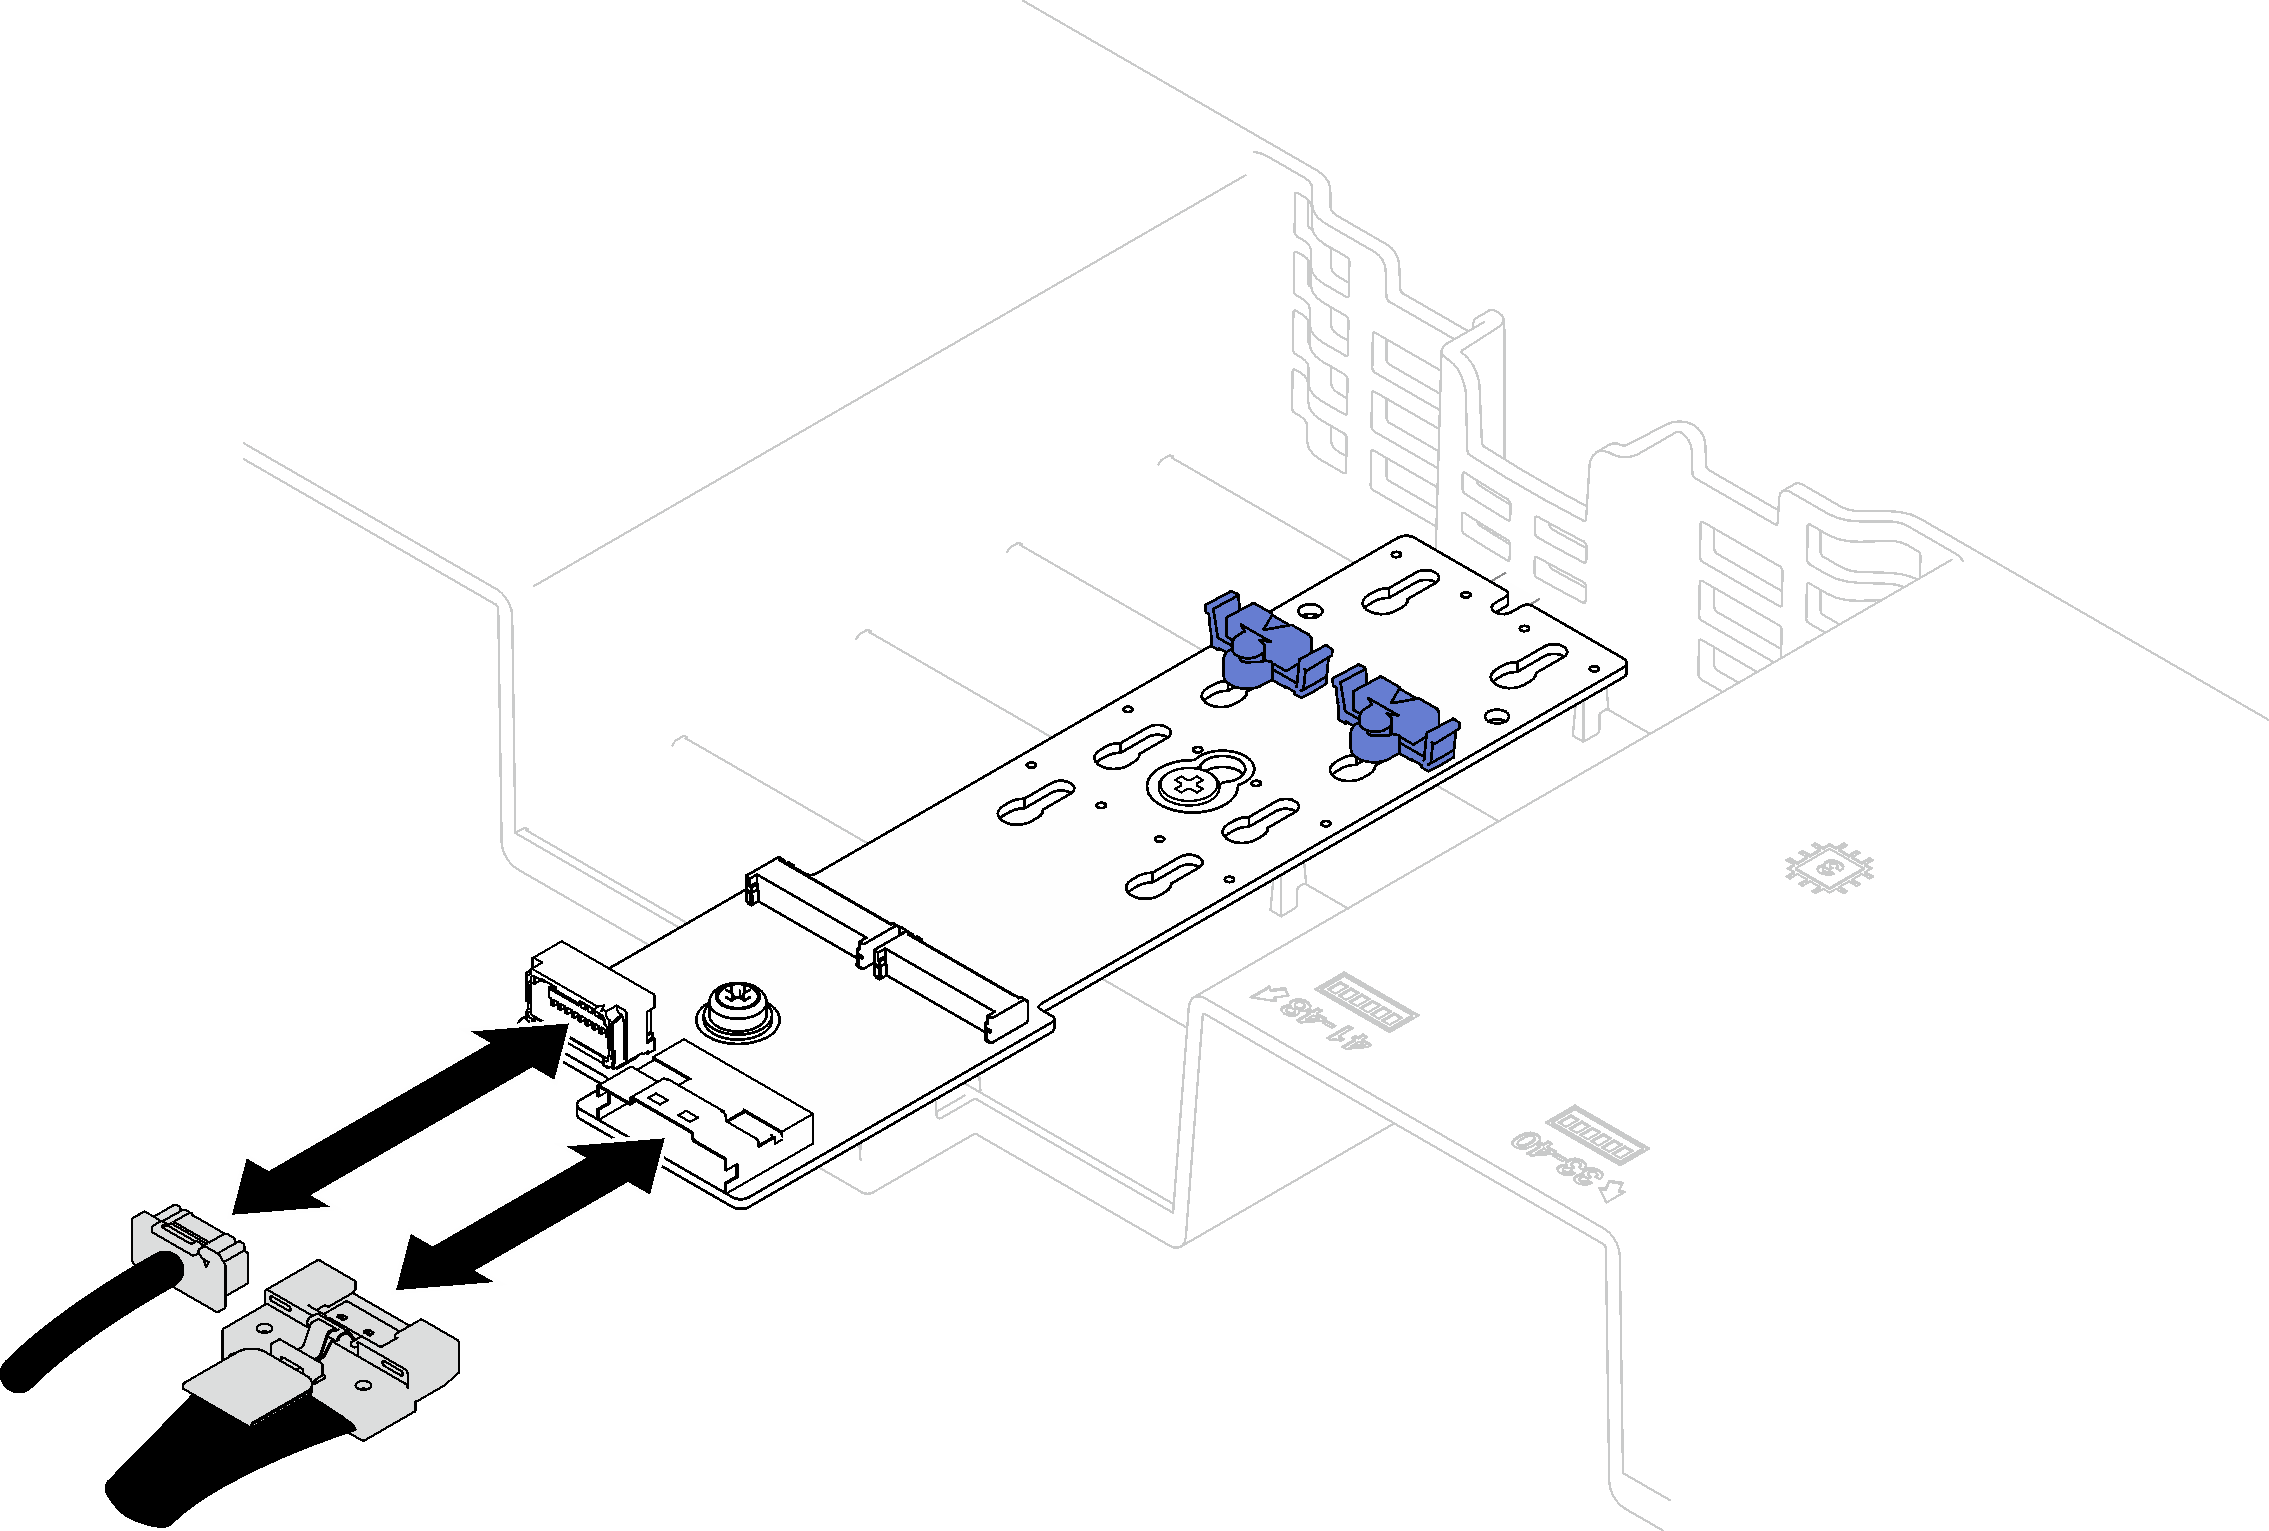
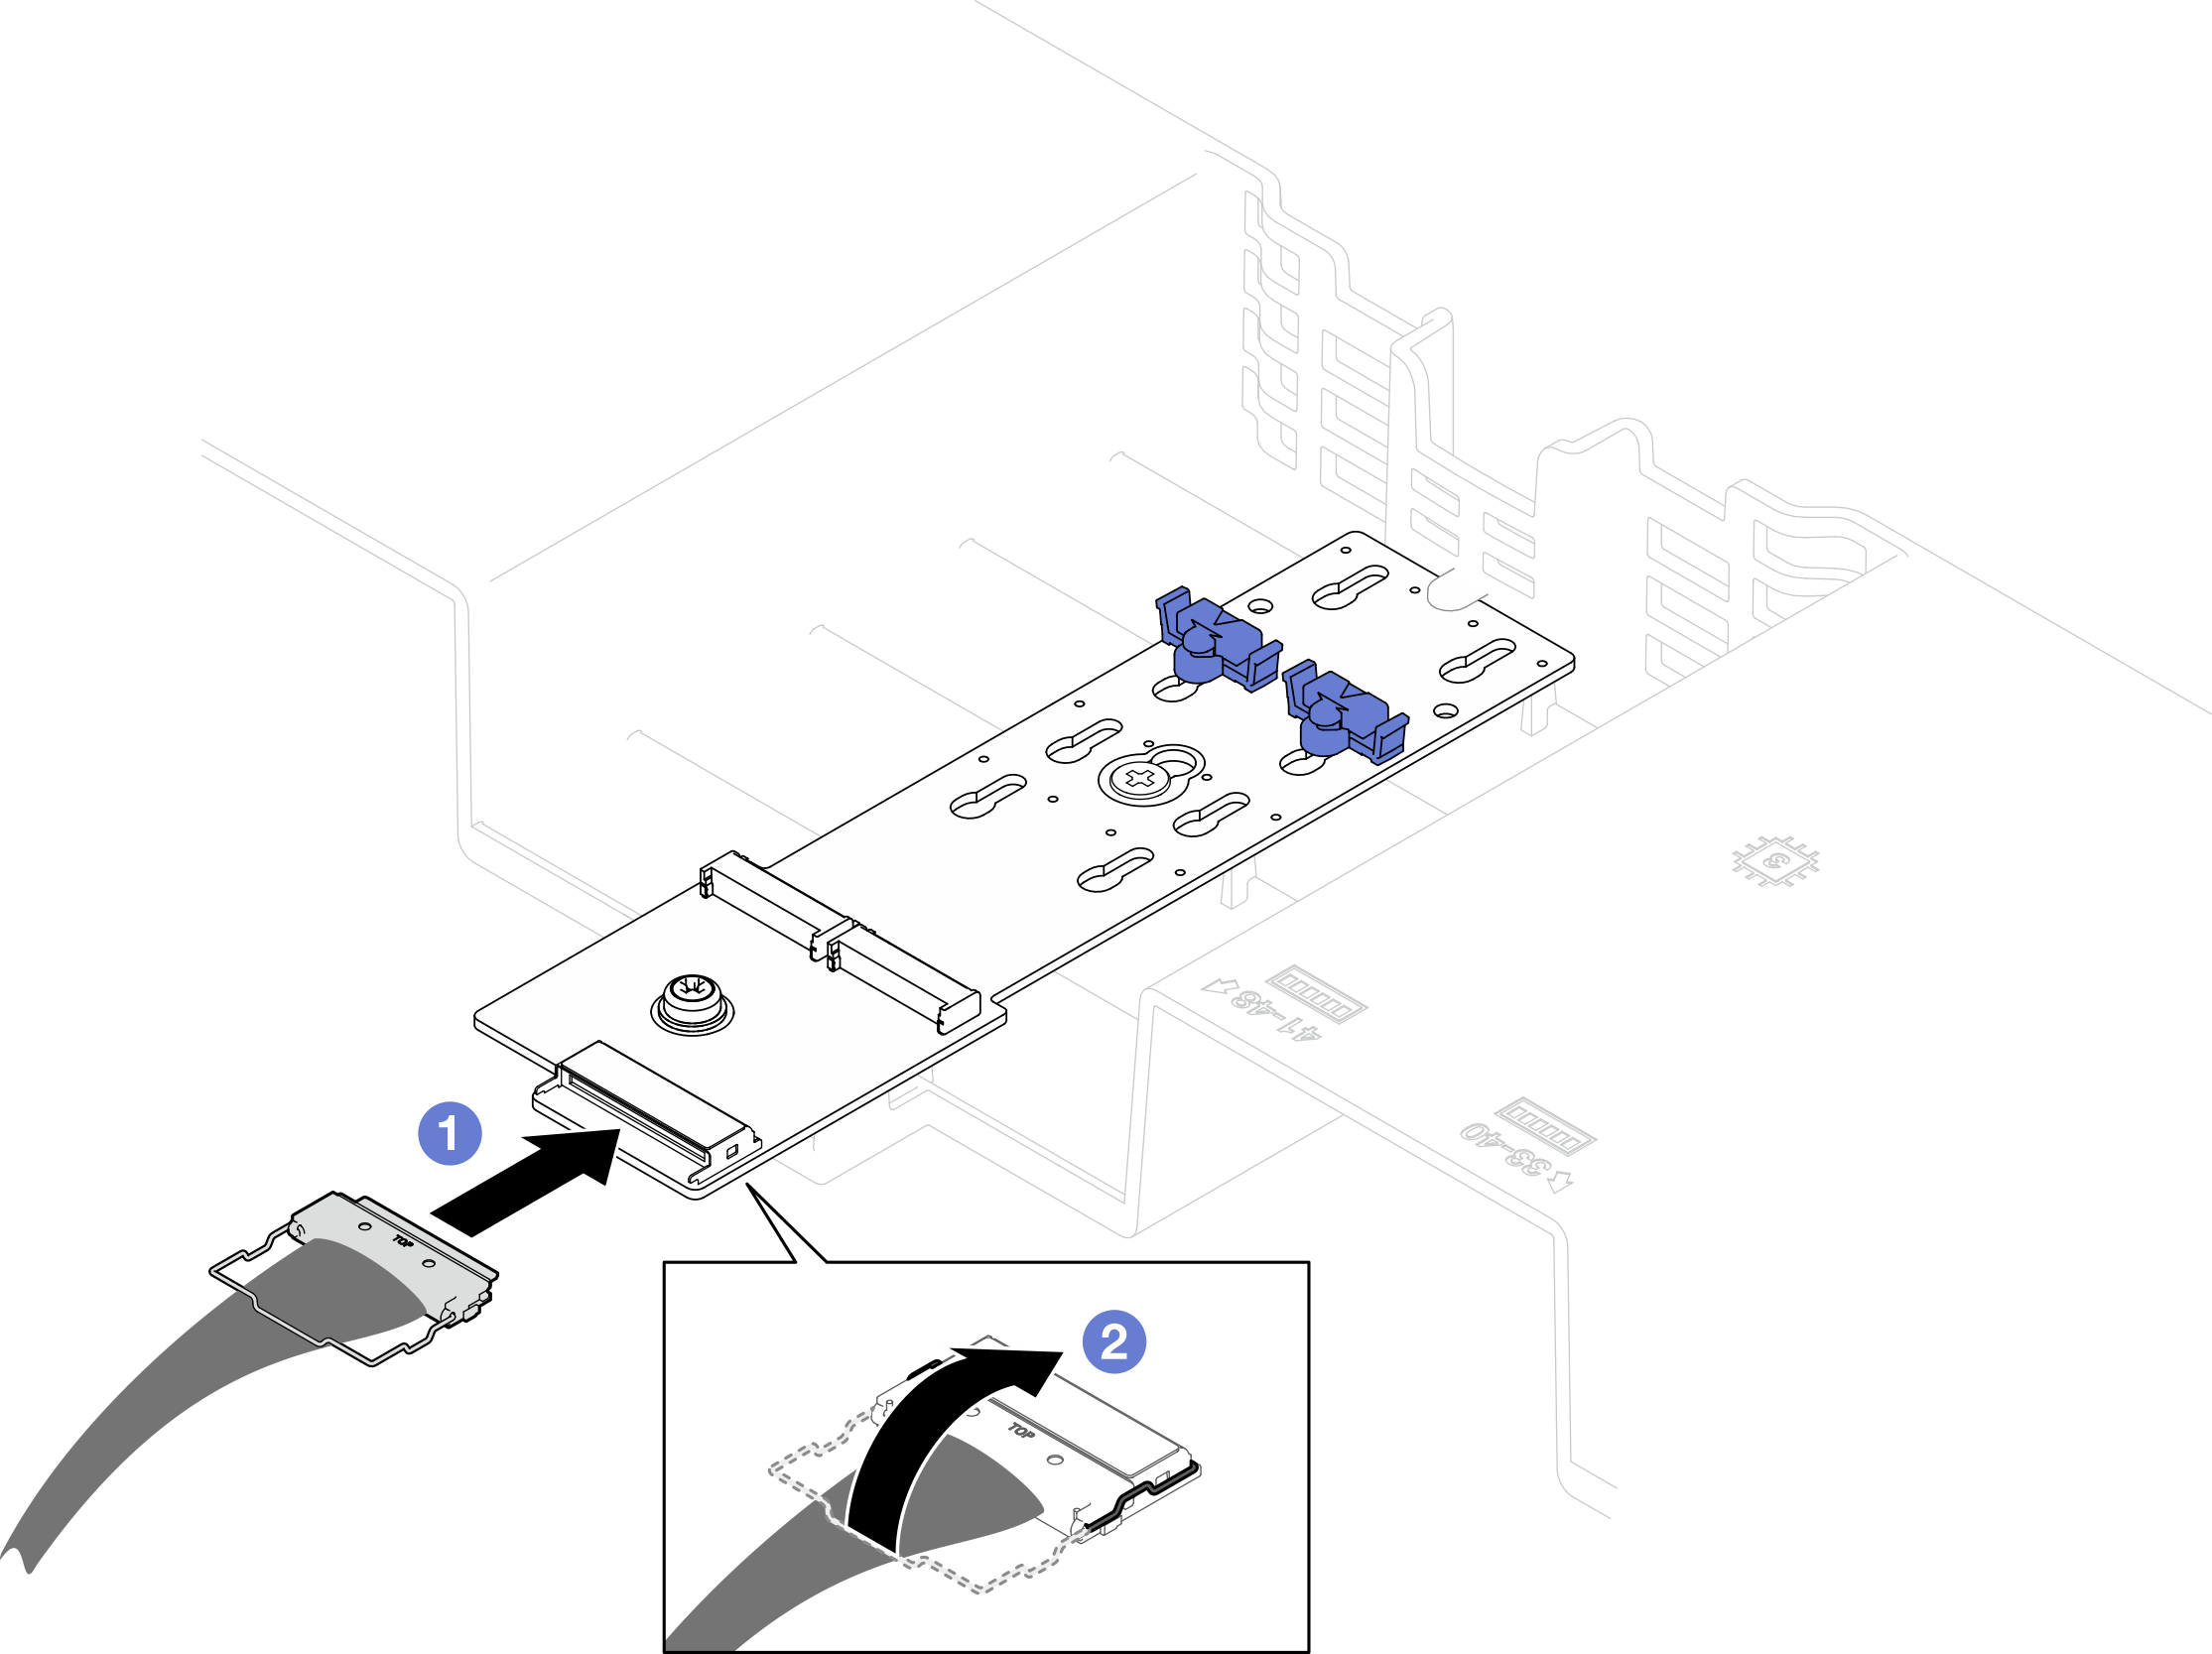
RAID SATA/NVMe M.2 backplane
- Connect the cables to the M.2 backplane.
- Hook the wire bail on the cable onto the connector.Figure 3. RAID SATA/NVMe M.2 backplane cable connection
- Install the M.2 backplane.
- Lower the M.2 backplane into the front air baffle; then, slide the M.2 backplane forward until it is seated in place.
- Install the screw that secures the end of the M.2 backplane to the front air baffle
- Install the screw that secures the middle of the M.2 backplane to the front air baffle.Figure 4. M.2 backplane installation

After you finish
- Reinstall the PCIe riser. See Install a PCIe riser.
- Reinstall the M.2 drives. See Install an M.2 drive.
- Complete the parts replacement. See Complete the parts replacement.
Demo video
Give documentation feedback