Remove the I/O tray
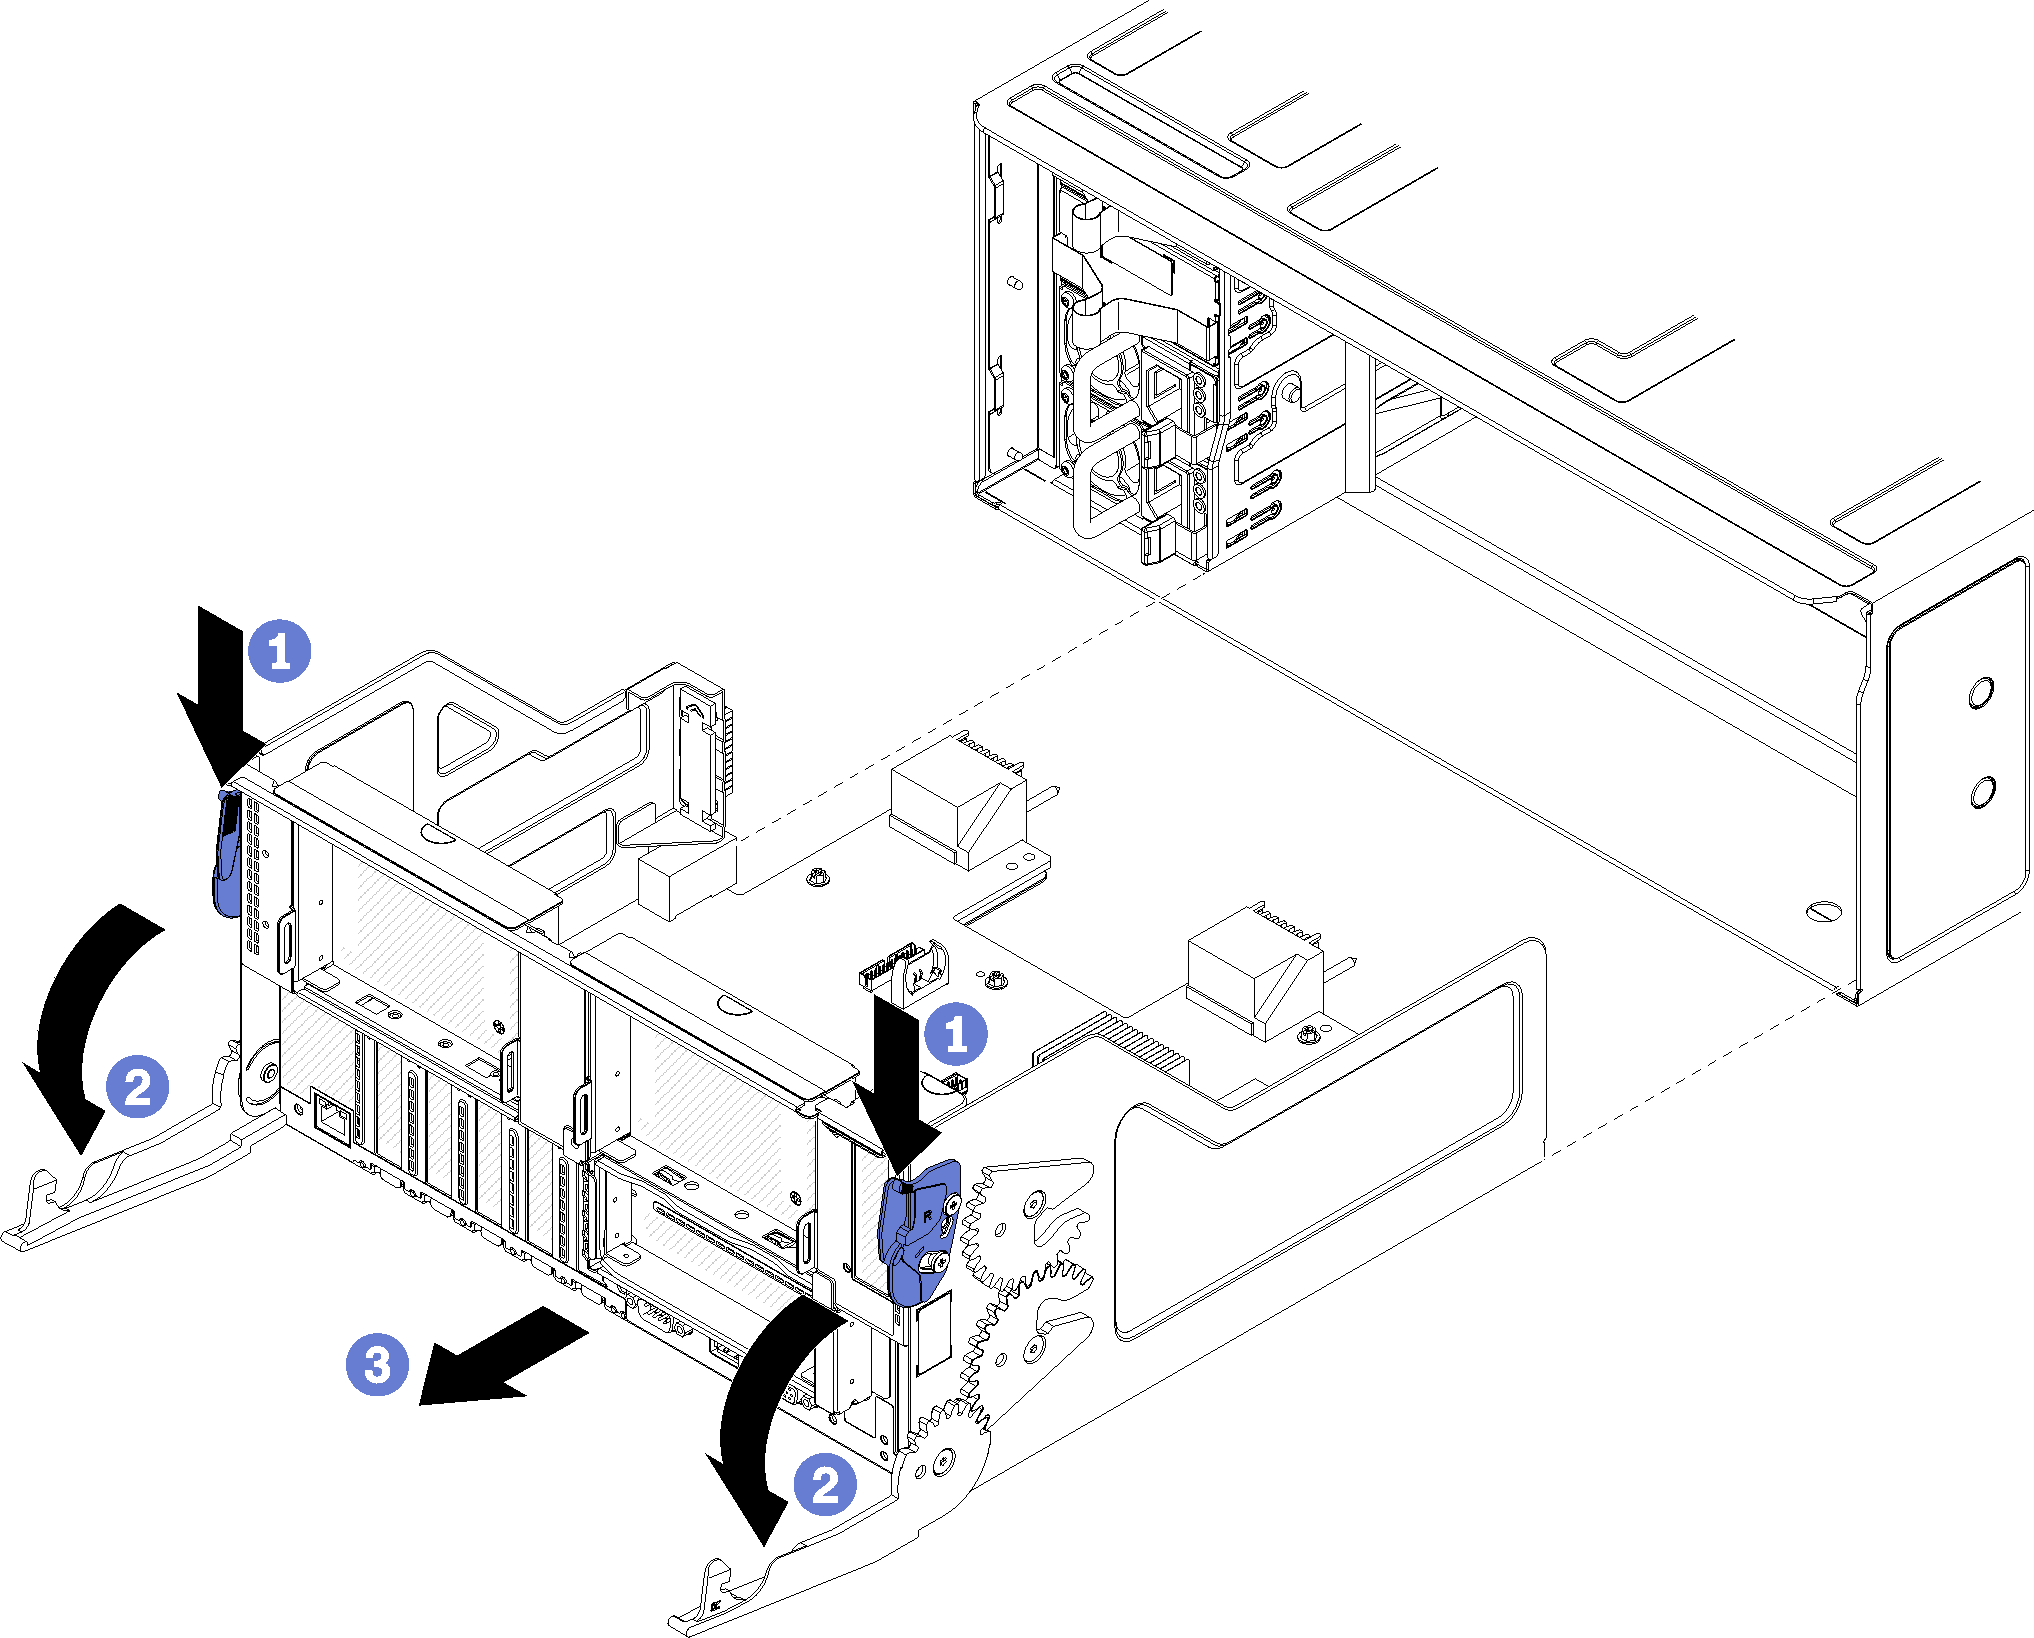
The I/O tray is accessed from the rear of the server. Open the release levers to extract the I/O tray. If you are removing the I/O tray as part of a maintenance replacement, you must transfer system identification information to the new I/O tray.


Before you remove the I/O tray:
Disconnect and label all cables connected to adapters in the I/O tray.
NoteSystem identification information for theThinkSystem SR950 server is stored in the I/O tray. If you are removing the I/O tray to replace it as part of a maintenance operation, you will need to transfer system identification information to the new I/O tray, after it is installed in the server. If you are managing the server from Lenovo XClarity Administrator, make sure that you unmanage the server before removing the I/O tray. Then, you can manage the server again after the new I/O tray has been replaced.
Complete the following steps to remove the I/O tray.

- Press the button on each release lever; then, simultaneously rotate the release levers until they are perpendicular to the chassis.
- Pull I/O tray out of the chassis.
After you remove the I/O tray:
If you are replacing the I/O tray as part of a maintenance operation, remove all of the following components from the tray; then, place them on a static-protective surface or install them in the new I/O tray:
Adapters (see Adapter replacement)
Risers (see Riser replacement)
Cables (see Internal cable routing)
If you are instructed to return the I/O tray, follow all packaging instructions, and use any packaging materials for shipping that are supplied to you.
Demo video