Install the I/O tray
Install the I/O tray by inserting it in the rear of the chassis, pushing it in until it stops, and closing the release levers. If you are installing a new I/O tray as a maintenance replacement, you must transfer system identification information as part of the new I/O tray installation.


Before you install the I/O tray:
Make sure that all cables, adapters, and other components in the I/O tray are installed and seated correctly and that you have not left loose tools or parts inside the server.
Make sure that all internal cables are correctly routed. See Internal cable routing.
Complete the following steps to install the I/O tray:
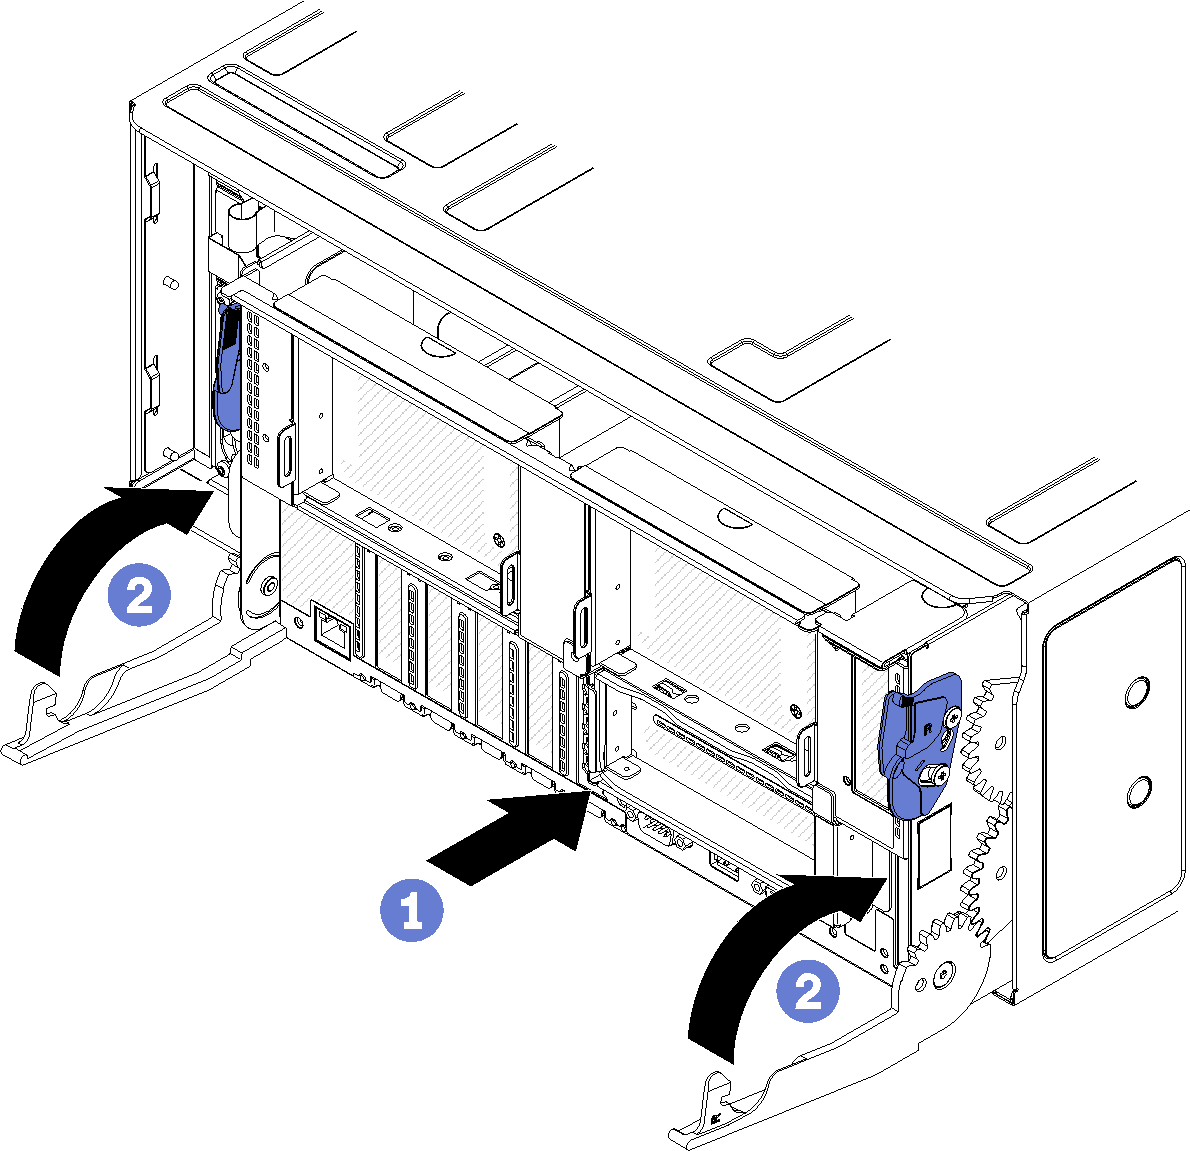
- Align the I/O tray with its opening in the rear of the chassis and insert. Position the tray toward the right side of the opening during insertion.
- Fully open the I/O tray release levers and push the tray into the chassis until it stops.
- Rotate the I/O tray release levers until they lock, fully closed.
If you are done performing installation or maintenance procedures at the rear of the chassis, reconnect the cables. See Cable the server.
Update the machine type and serial number with new vital product data (VPD). Use the Lenovo XClarity Provisioning Manager to update the machine type and serial number. See Update the machine type and serial number.
Enable TPM/TCM. See Enable TPM/TCM
Optionally, enable Secure Boot. See Enable UEFI Secure Boot.
Demo video