Install a power supply
Insert the power supply in its bay and press it in until the release tab locks. Power supplies are hot-swap devices that can be installed while the server is powered on.

To avoid a shock hazard:
- Connect all power cords to a properly wired and grounded electrical outlet/source.
- Connect any equipment that will be attached to this product to properly wired outlets/sources.
- When possible, use one hand only to connect or disconnect signal cables.
- Never turn on any equipment when there is evidence of fire, water, or structural damage.
- The device might have more than one power cord, to remove all electrical current from the device, ensure that all power cords are disconnected from the power source.

Never remove the cover on a power supply or any part that has this label attached. Hazardous voltage, current, and energy levels are present inside any component that has this label attached. There are no serviceable parts inside these components. If you suspect a problem with one of these parts, contact a service technician.

Observe the following criteria when installing power supplies:
All power supplies installed in the server must be of the same capacity.
1100-watt power supplies accept either 100-127 vac or 200-240 vac input.
1600-watt power supplies accept only 200-240 vac input.
The server supports the following power supply configurations:
For two processor server configurations, one or more 1600-watt or 1100-watt power supplies.
For four processor server configurations, two or more 1600-watt or 1100-watt power supplies.
For eight processor server configurations, two or more 1600-watt or four 1100-watt power supplies
Attempting to operate the server with an unsupported power configuration results in an “unsupported configuration” message in the system event log and on the system front panel
- Power supplies can be installed in any power supply bay and populated in any order. Redundancy differs depending on how many processors are installed, the number of power supplies that are required to keep the system operating, which power supply bays are populated, and the number of input power sources.Note
For power source redundancy, the power supplies in bays 1 and 3 must be fed from a different power source than the power supplies in bays 2 and 4.
Use the Lenovo Capacity Planner to calculate the required power capacity for what is configured for your server. More information about the Lenovo Capacity Planner is available at: Lenovo Capacity Planner website
Before you install a power supply:
If the power supply bay contains a filler, pull the filler from the bay.
Complete the following steps to install a power supply:
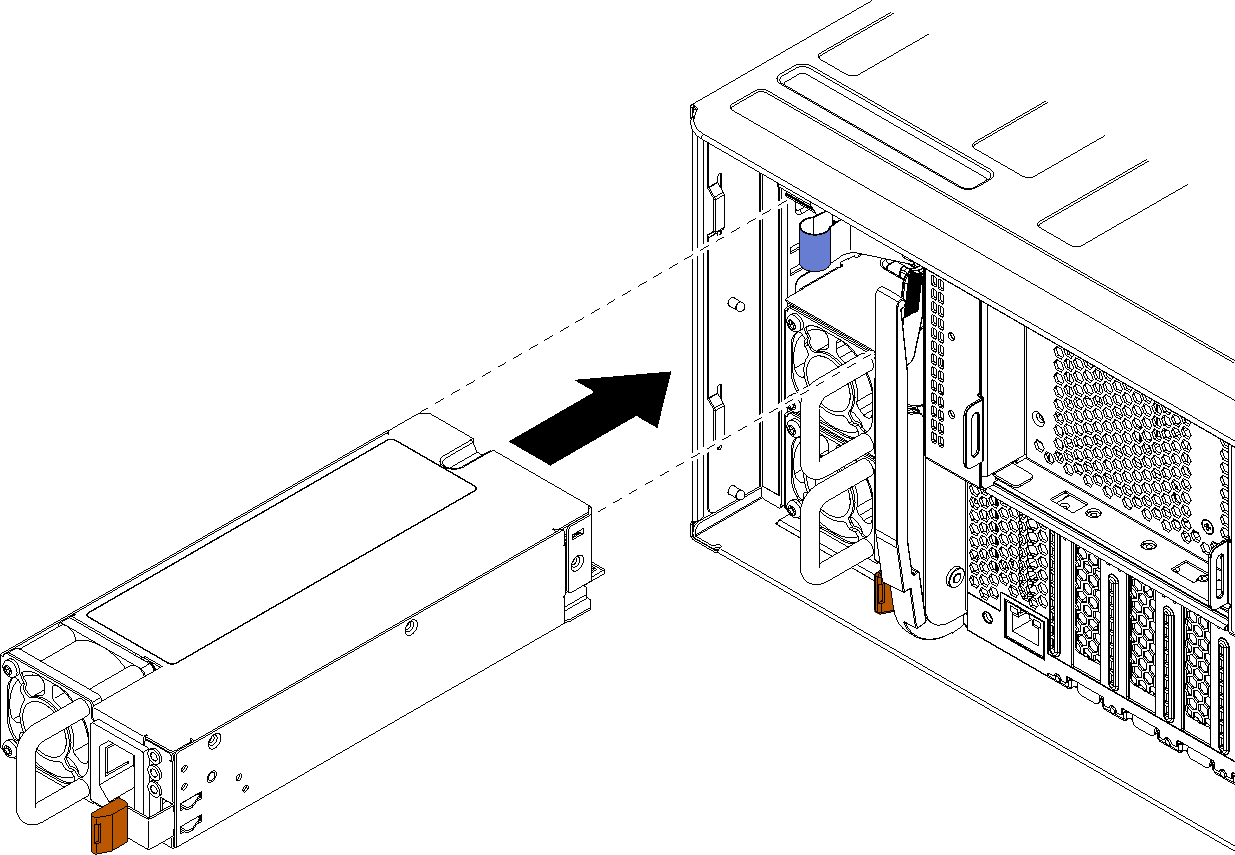
Insert the power supply in its bay and press it in until the release tab locks.
After you have installed a power supply:
If the power supplies being installed are of a different wattage than the power supplies previously installed in the chassis, cover the existing chassis power rating label with a new label of the same style from the system power rating labels sheet that comes with the power supply option.
Route the power cable from the power supply to the power source and secure it.
The cable should pass through the cable hook-and-loop on the rear of the server so that it does not accidentally become unplugged.
Connect the power cable to the power supply; then, connect it to the power source.
Demo video