Install the M.2 backplane
The M.2 backplane is in the I/O tray that is accessed from the rear of the server. After installing M.2 drives in the backplane, insert the backplane in the I/O tray and press it in place.


Install the M.2 drives before you install the M.2 backplane. See Install an M.2 drive.
If the I/O tray is installed in the server, remove it. See Remove the I/O tray.
If the riser for slot 10 to 15 (riser 2) and the riser for slot 16 to 17 are installed, remove one of them to access the M.2 backplane connector. See Remove the riser for slot 10 to 15 (riser 2) or Remove the riser for slot 16 to 17 (riser 3).
Complete the following steps to install the M.2 backplane.
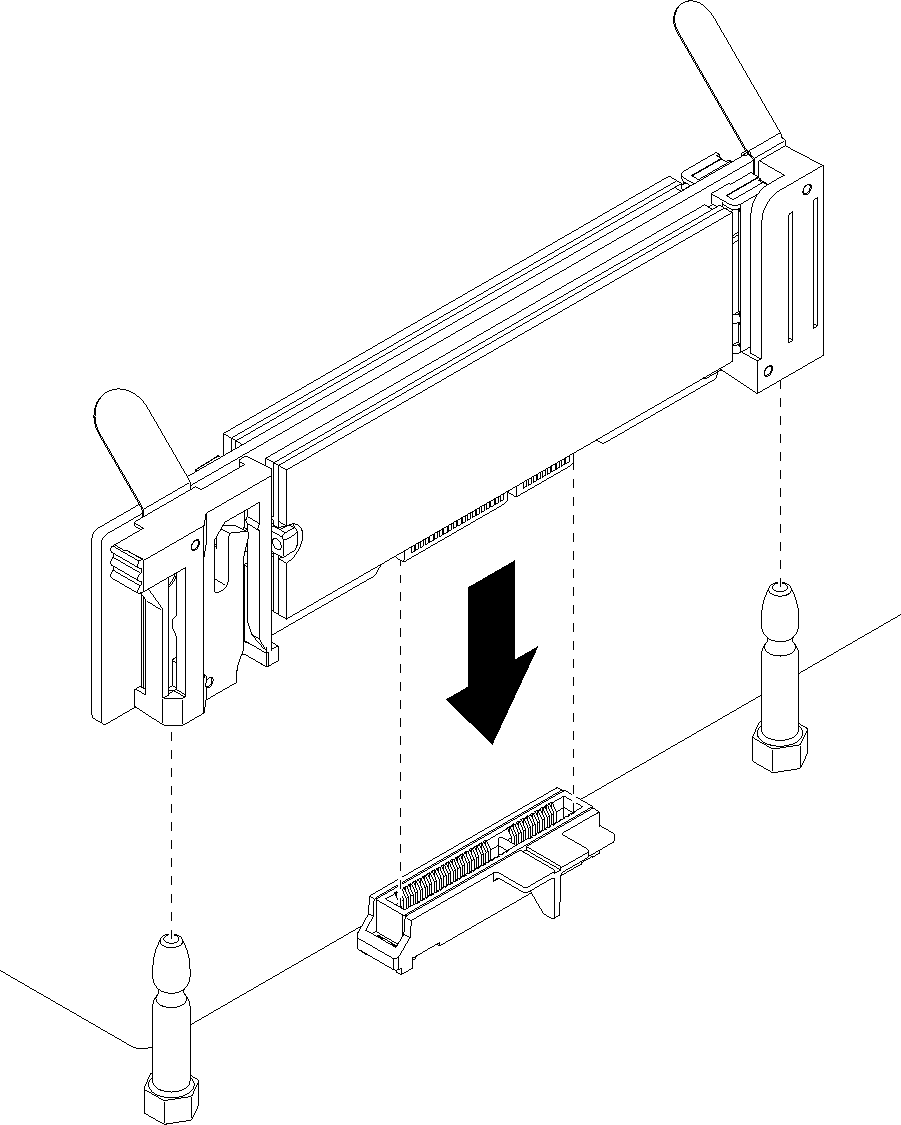
- Align the openings in the plastic supports at each end of the M.2 backplane with the guide pins on the system board; then, insert the backplane in the system-board connector.
- Press down on the M.2 backplane to fully seat it.
If you removed a riser and have no adapters to install in it, install the riser. See Install the riser for slot 10 to 15 (riser 2) or Install the riser for slot 16 to 17 (riser 3).
If you have no additional options to install in the I/O tray, install it. See Install the I/O tray.
Demo video