更新ストレージ・コンテナーの作成
更新パッケージをインポートするために Azure Stack ハブ 内でストレージ・コンテナーを作成するには、この手順に従ってください。
Azure Stack ハブ に適用する OEM Extension Package は、Azure Stack ハブ 内の特定のストレージ・コンテナーにインポートする必要があります。このコンテナーは次の方法で作成する必要があります。
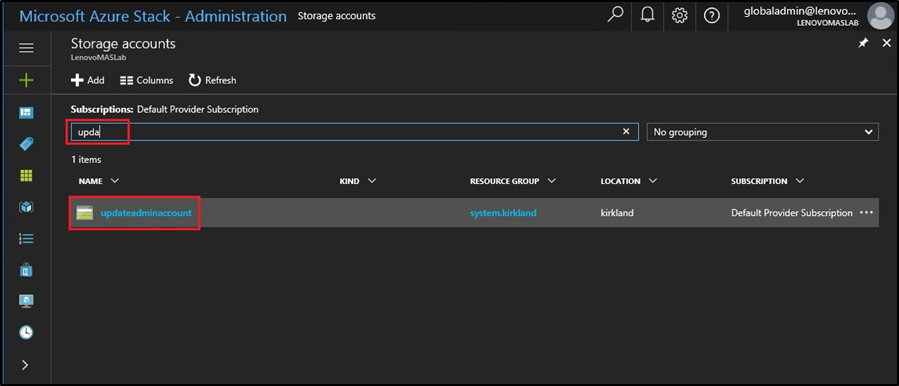
- フィルター・ボックスで「update」と入力し、「updateadminaccount」を選択します。図 1. 「updateadminaccount」ストレージ・コンテナーに移動
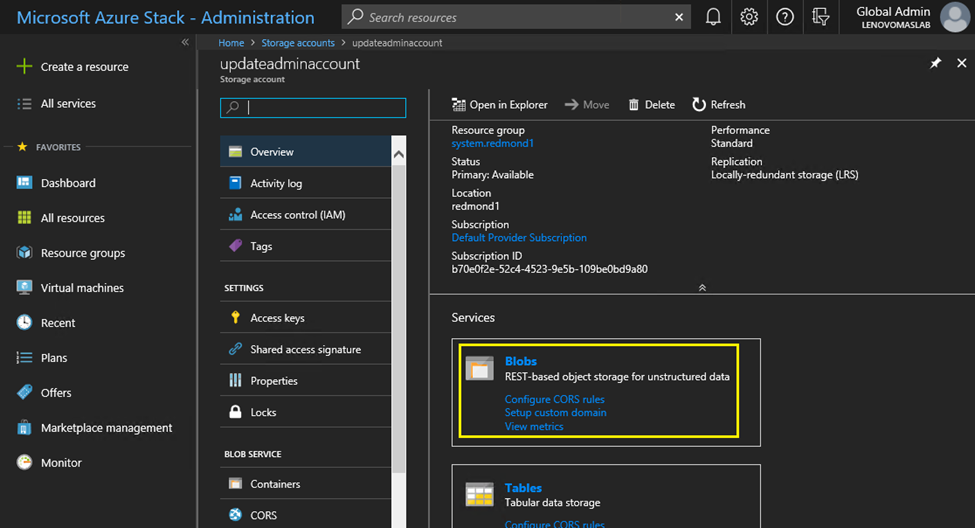
- updateadminaccount ストレージ・アカウントの詳細で、「サービス」の下にある「Blobs」 (バイナリ・ラージ・オブジェクト) を選択します。図 2. 「Blobs」ストレージ・コンテナーに移動
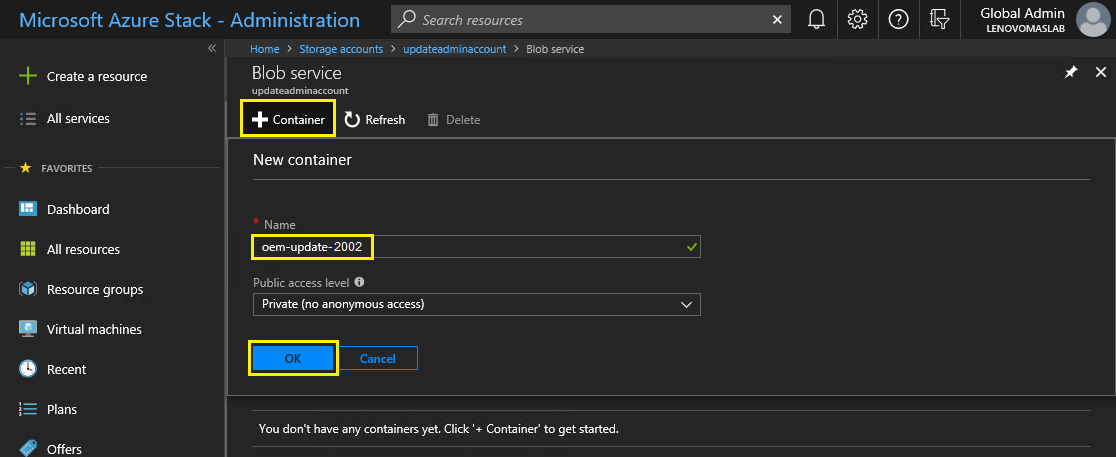
- 「Blob サービス」タイルで、「+ コンテナーの追加」をクリックしてコンテナーを作成し、そのコンテナーの名前を入力して (たとえば、oem-update-2002)、「OK」をクリックします。図 3. 新しいコンテナーの作成
フィードバックを送る