Installing the 2.5-inch simple-swap hard-disk-drive backplate assembly
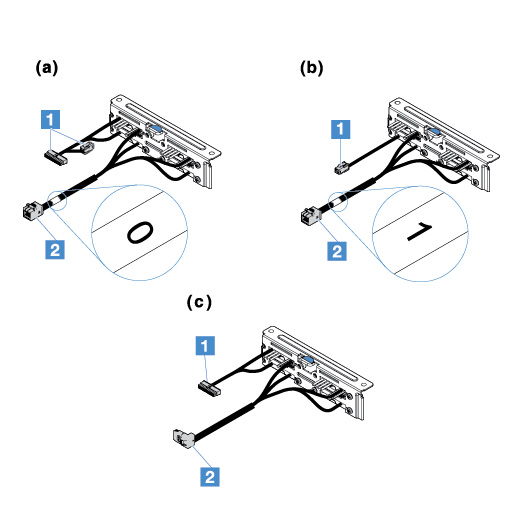
There are three types of 2.5-inch simple-swap hard-disk-drive backplate assemblies. In the following illustrations, type a and b are for server models with RAID adapters and type c is for server models with onboard software RAID configuration.
Figure 1. 2.5-inch simple-swap hard-disk-drive backplate assemblies


1 Power connector
2 Mini-SAS signal connector
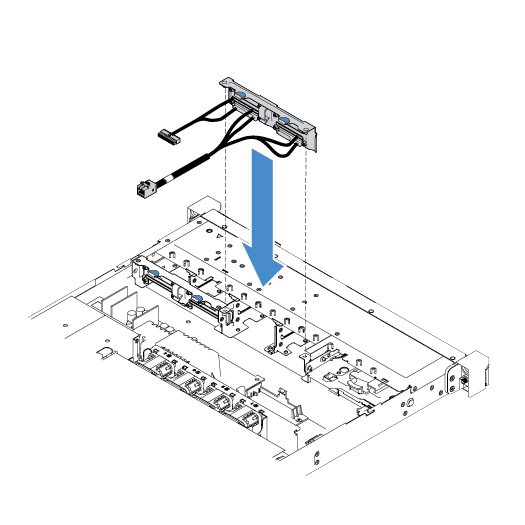
To install the 2.5-inch simple-swap hard-disk-drive backplate assembly, do the following:
Give documentation feedback
