Installing a ServeRAID SAS/SATA controller memory module

Note
For brevity, in this documentation the Lenovo ServeRAID SAS/SATA controller is often referred to as the SAS/SATA adapter or the ServeRAID adapter.

To install a ServeRAID adapter memory module, do the following:

  1. Turn off the server. Then, disconnect all external cables and remove all peripheral devices.
  2. Remove the server cover. See Removing the server cover.
  3. Remove the PCI riser-card assembly. See Removing the PCI riser-card assembly.
  4. Remove the ServeRAID adapter. See Removing an adapter.
  5. Touch the static-protective package that contains the memory module to any unpainted metal surface on the server; then, remove the memory module from the package.
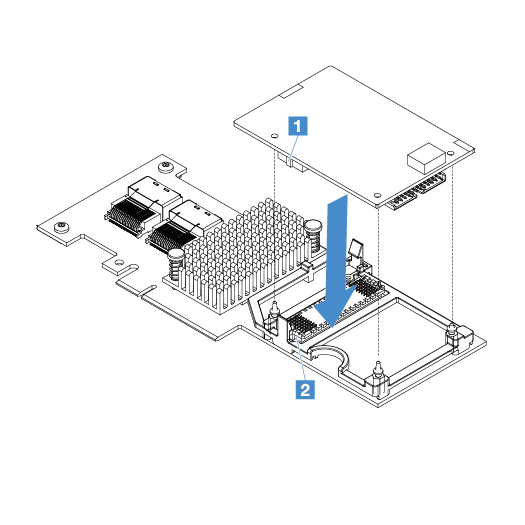
  6. Align the board-to-board connector 1 on the bottom of the memory module with the connector 2 on the ServeRAID adapter. Ensure that the three mounting studs on the ServeRAID adapter are aligned with the corresponding holes in the memory module. Carefully press the memory module onto the ServeRAID adapter until the two connectors (1 and 2) are firmly joined.
    Figure 1. ServeRAID adapter memory module installation
    ServeRAID adapter memory module installation

  7. Reinstall the ServeRAID adapter. See Installing an adapter.
  8. Complete the parts replacement. See Completing the parts replacement.