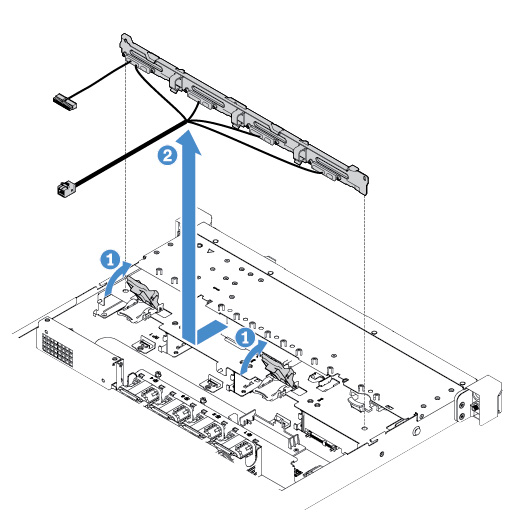
To remove the 3.5-inch simple-swap hard-disk-drive backplate assembly, do the following:
- Turn off the server. Then, disconnect all external cables and remove all peripheral devices.
- Remove the server cover. See Removing the server cover.
- Remove the PCI riser-card assembly if installed. See Removing the PCI riser-card assembly.
- Disconnect the cables from the RAID adapter or system board. See Internal cable routing. Then, remove the corresponding cables from the cable clips.
- Remove the installed hard disk drives or fillers from the drive bays. See Removing a simple-swap hard disk drive.
- Pivot the retention latches on the chassis upward. Then, carefully pull the backplate assembly outwards and lift it up to remove it out of the chassis.
Figure 1. 3.5-inch simple-swap hard-disk-drive backplate assembly removal
