Replacing a hot-swap fan
Use this information to replace a hot-swap fan.
For proper cooling, the server requires that all four dual-motor hot-swap fans be installed at all times.
Attention
To ensure proper operation, replace a failed hot-swap fan within 30 seconds.
To replace a hot-swap fan, complete the following steps:
- Insert the fan into the fan slot in the fan assembly bracket and press it down until it is seated correctly in the slot and the fan connector is seated correctly in the connector on the system board. Figure 1. Fan installation
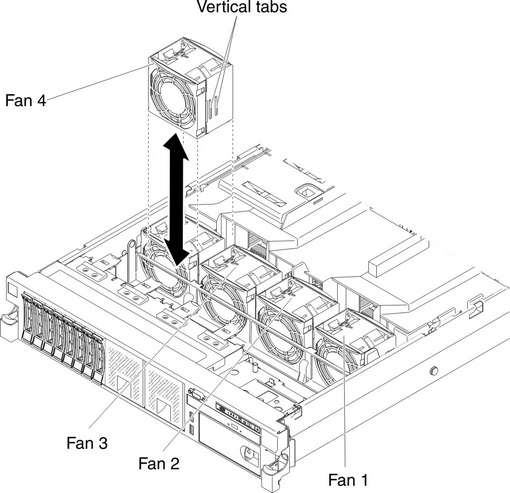 NoteMake sure that the newly-installed fan aligns horizontally with other correctly-seated fans for proper installation.
Give documentation feedback