Replacing an optional ServeRAID upgrade adapter memory module
Use this information to replace an optional ServeRAID upgrade adapter memory module.
To install an optional ServeRAID upgrade adapter memory module, complete the following steps:
- Connect the battery/flash power module cable to the ServeRAID upgrade adapter memory module.Figure 1. ServeRAID upgrade adapter memory module and battery cable
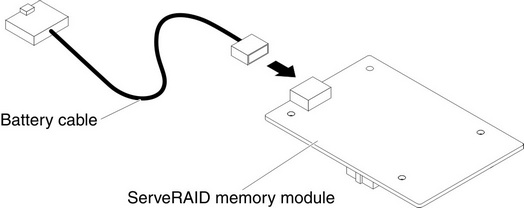 Figure 2. ServeRAID upgrade adapter memory module and flash power module cable
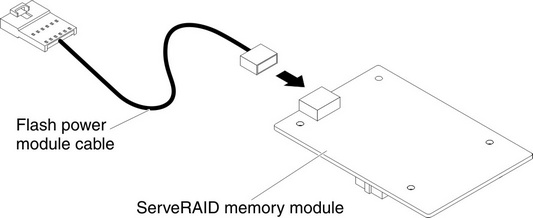
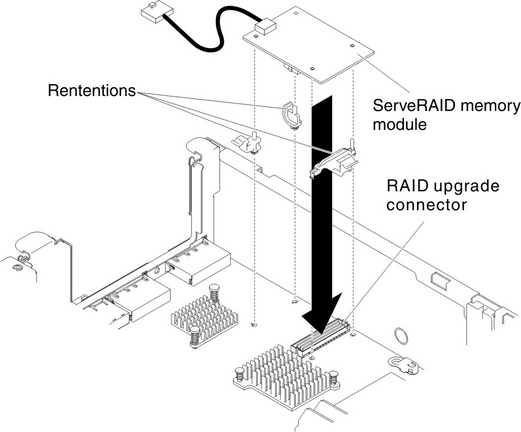
- Attach the three pegs to the ServeRAID upgrade adapter memory module and install the ServeRAID upgrade adapter memory module into the system board.Figure 3. Installing ServeRAID upgrade adapter memory module and battery/flash power module cable
- Connect the other end of the battery/flash power module cable to the battery/flash power module.Figure 4. Connecting the battery cable
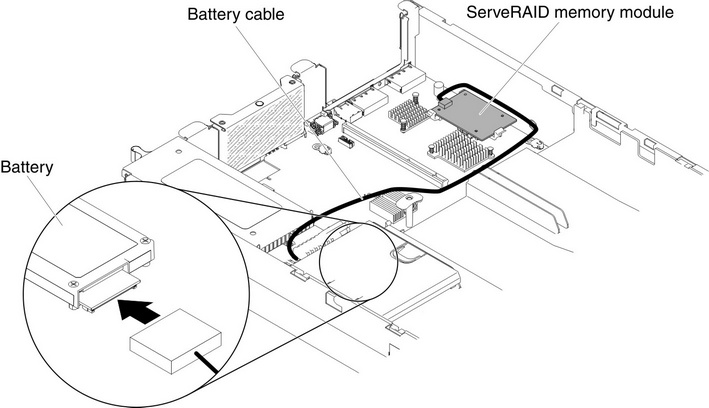 Figure 5. Connecting the flash power module cable
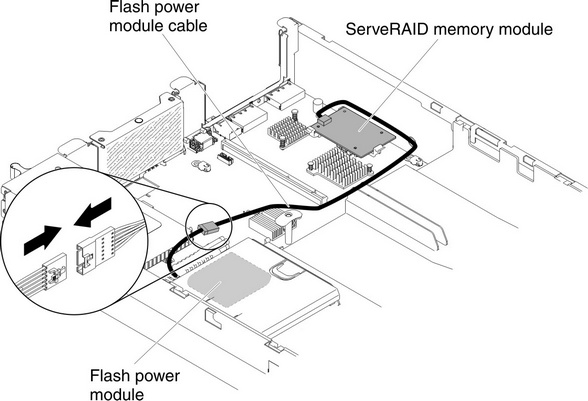 NoteMake sure the battery/flash power module is seated properly (see
Installing a ServeRAID SAS controller battery on the remote battery tray).
Give documentation feedback