
Installing a hot-swap fan

Use this information to install a hot-swap fan.

The server comes standard with three replaceable double fans. For proper cooling, the server requires that all four fans be installed at all times.

Attention
To ensure proper operation, replace a failed hot-swap fan within 30 seconds.

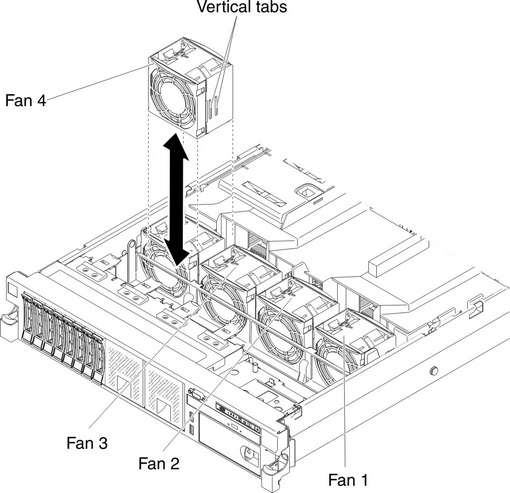
To install an additional hot-swap fan, complete the following steps:

Figure 1. Fan installation
Fan installation
  1. Read the safety information that begins on Safety and Installation guidelines.
  2. Remove the cover (see Removing the cover).
    Attention
    To ensure proper system cooling, do not remove the top cover for more than 30 minutes during this procedure.
  3. Rotate the air baffle up.
  4. Orient the new fan over its position in the fan bracket so that the connector on the bottom aligns with the fan connector on the system board.
  5. Align the vertical tabs on the fan with the slots on the fan cage bracket.
  6. Push the new fan into the fan connector on the system board. Press down on the top surface of the fan to seat the fan fully. Make sure that the yellow LED next to the fan connector on the system board is off.

If you have other devices to install or remove, do so now. Otherwise, go to Completing the installation.